Chemical Inventory Add or Edit
Chemical Inventory Add or Edit
Edit or Add an Inventory Item
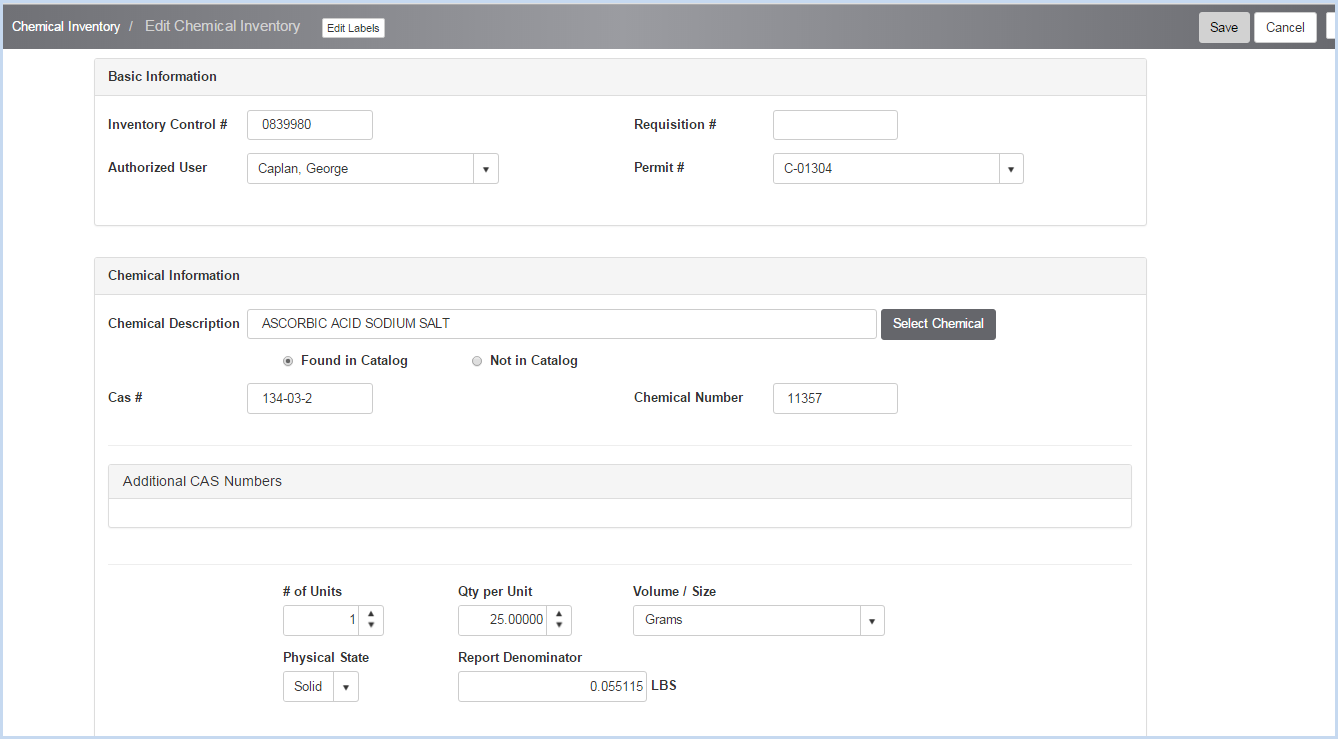
- Highlight and click [Edit] to modify an item on the Chemical Inventory List. This opens the Chemical Inventory Edit screen shown below.
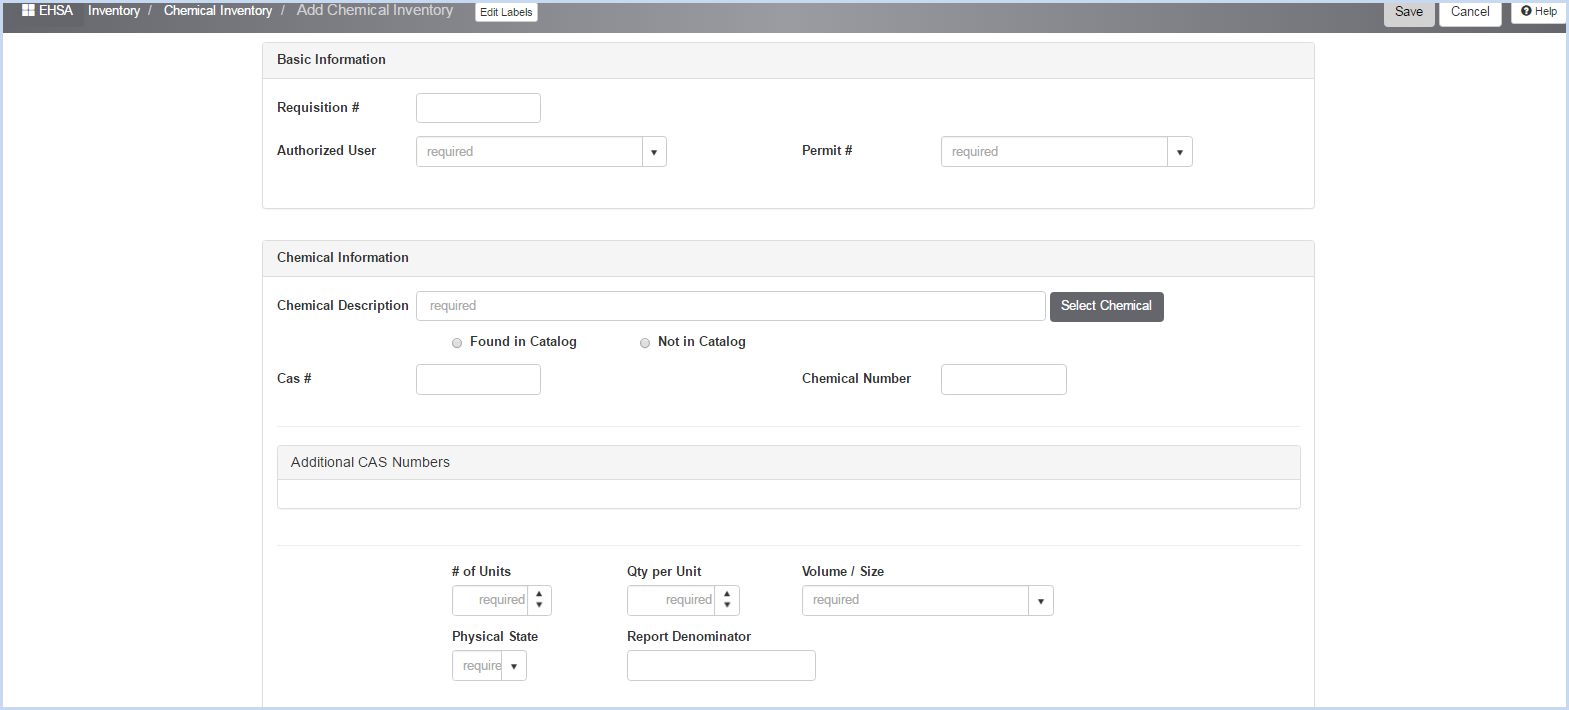
- Click [Add] for a new inventory item. This also opens the Chemical Inventory Edit screen.
- Enter a Requisition # if placing an order.
- Then select the Authorized User and Permit # from the dropdown lists.
- The Inventory Control # is a unique identifier created when the item was originally entered and cannot be edited.
- If editing a record, modify the Authorized User (PI) by selecting a different PI from the dropdown list.
- The Permit # will also change to the permit for the new PI, or a selection if the PI has multiple CHEM permits.
- If adding a new record or changing the chemical, click [Select Chemical] to open the [Select Chemical] search box.
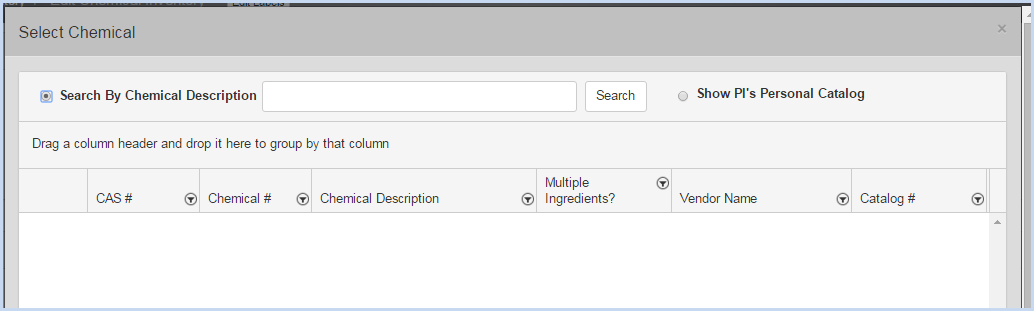
- Select Search by Chemical Description and enter a Description, or Show PI's Personal Catalog.
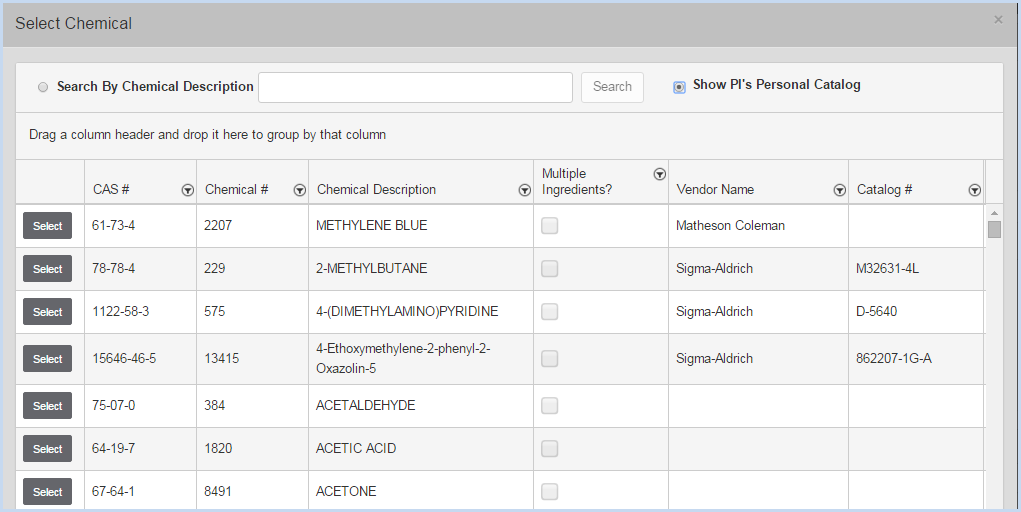
- Use the Search and Filter Options to find the chemical to add to the PI's inventory.
- Click the [Select] button beside the Chemical you want to add.
- This will populate the chemical information - Chemical Description and CAS# (if available) will fill in.

- Enter the # of Units, Qty per Unit, Volume/Size, and Physical State.
- The Report Denominator will calculate based on the Unit, Volume, and Size entry details.
- Enter the Concentration.
Scroll down to view Vendor, Location and Dates section:
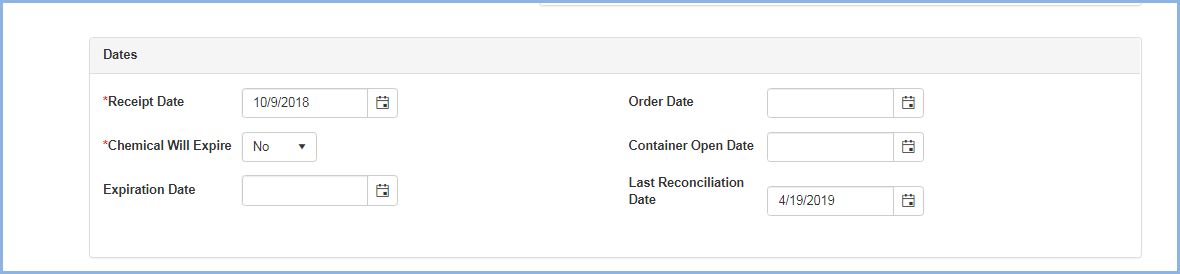
- The Receipt Date will default to the current date. Edit if necessary.
- Select Yes/No if Chemical Will Expire.
- Enter the Expiration Date if the Chemical will expire.
- Select the Vendor and Catalog # (for Vendor) if applicable.
- Select the Lab/Location from the dropdown of labs for the PI on the Permit that was selected.
- Select/enter In-Lab Storage Location as applicable/needed.
- Select/enter Sub-Storage Location as applicable/needed.
- Select/enter Storage Device as applicable/needed.
- Select the Segregation Code as applicable.
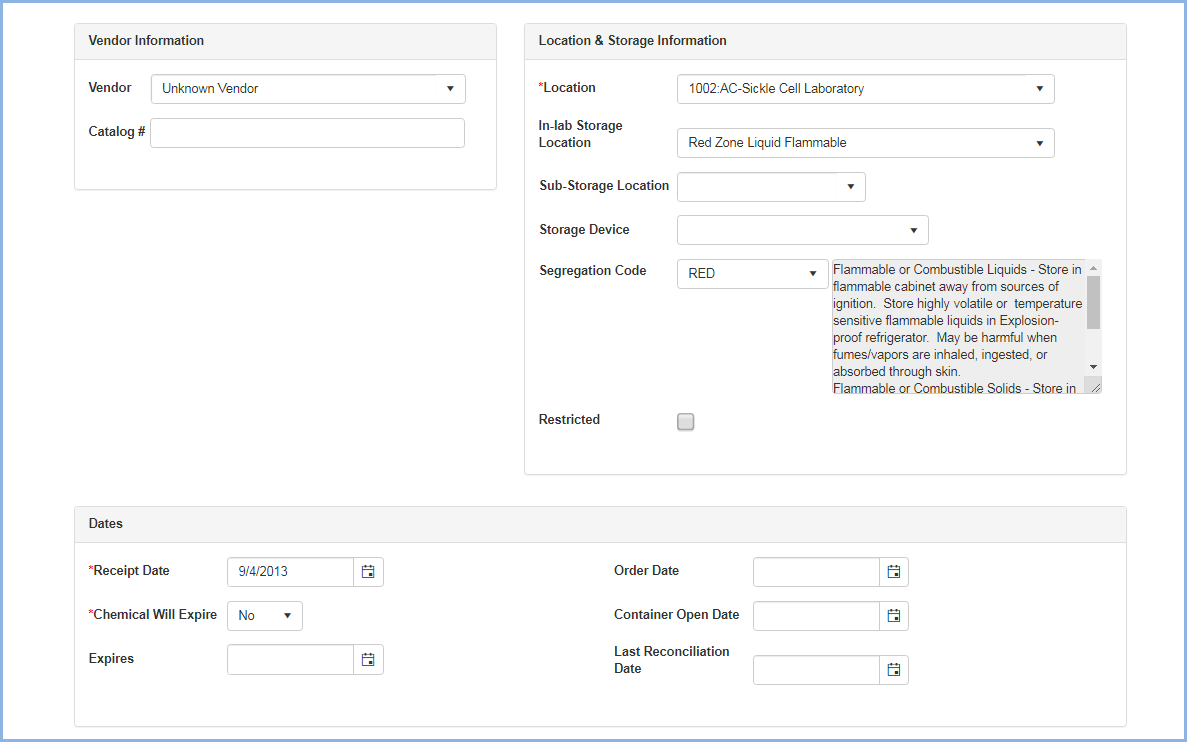
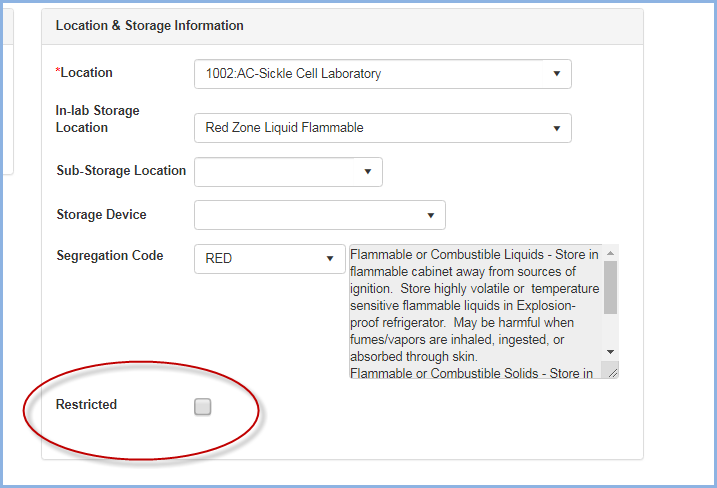
- .Check if the chemical item is Restricted. If Restricted is checked, this indicates it is a highly hazardous chemical and viewing this inventory item will be limited to users in a security group with authorization to view Restricted items
- Enter the Order Date as needed.
- Enter the Container Open Date as needed.
- The Last Reconciliation Date will auto-fill the last date the inventory item was verified.
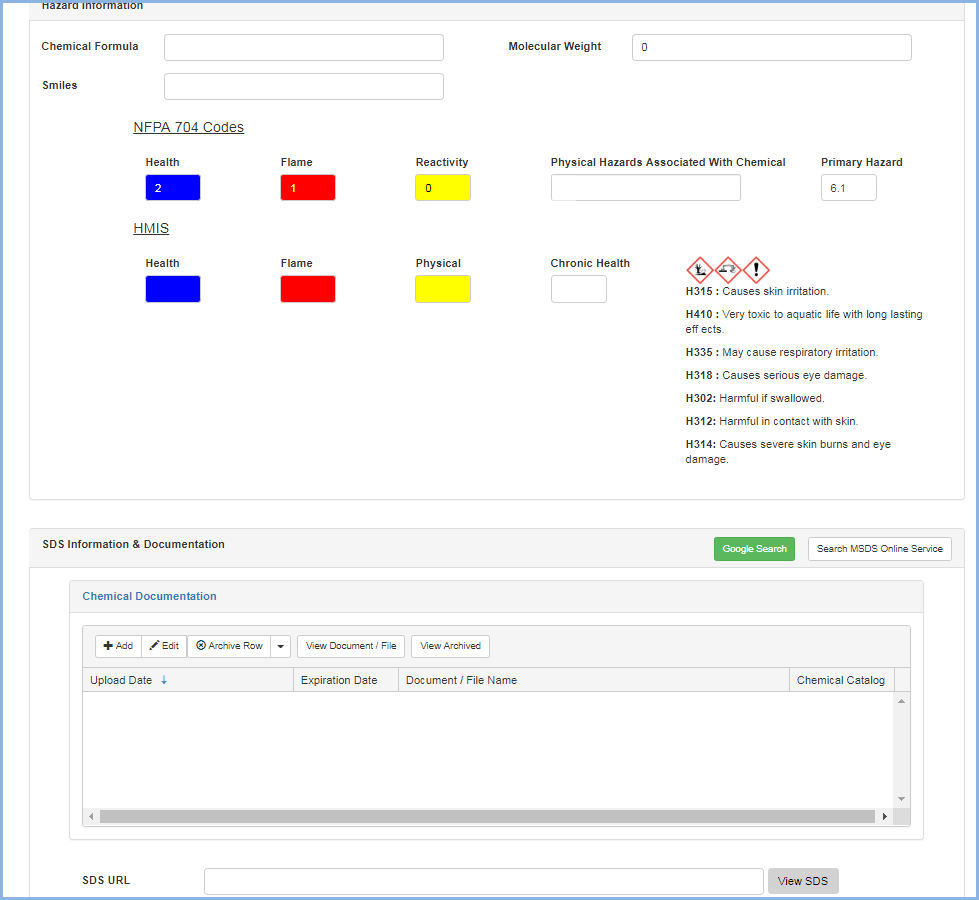
Scroll down to view The Hazard Information and SDS Information & Documents sections:
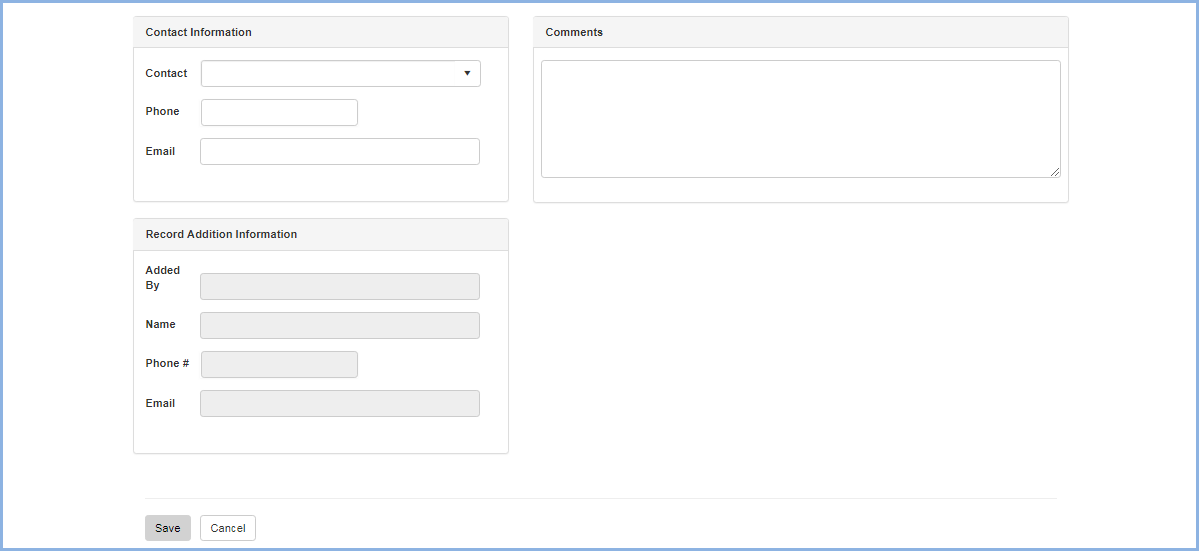
Scroll down to view the Contact Information, Comments, and Record Addition Information
- Select the Contact from the dropdown - these will be the contacts from the Permit selected for this entry.
- The Contact's Phone and Email will auto-fill.
- Enter any Comments as needed.
- The Record Addition Information will auto-fill wit the information of the user entering the inventory item.
- Click [Save] to save changes/edits, or [Cancel] to discard changes.
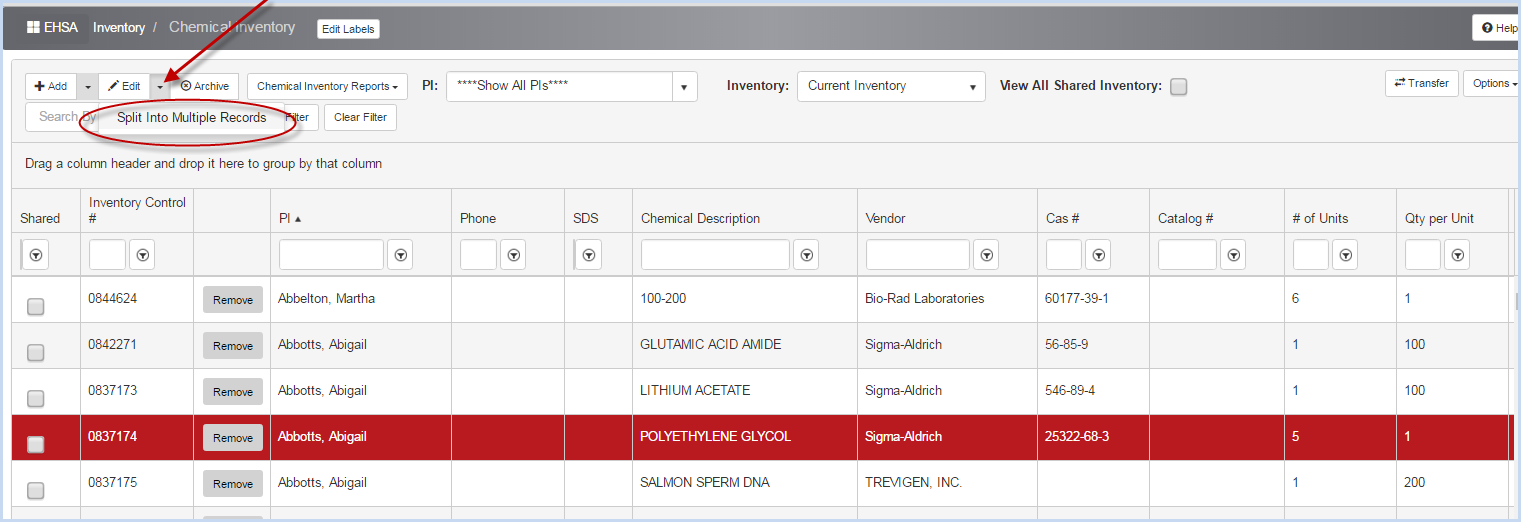
Split Inventory Item
Users can split an inventory item into multiple records if the # of Units is greater than one.
- Highlight an inventory item with more than one unit and click the [Split Into Multiple Records] button from the Edit dropdown.
- This will open a Split Record confirmation pop-up.
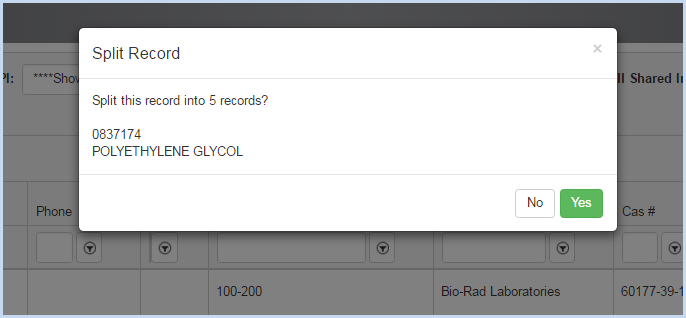
- Click [Yes] to confirm and split the record, or [No] to cancel the split.
- There are now five inventory records for this item. The list below shows the original Inventory Control # and four additional records.
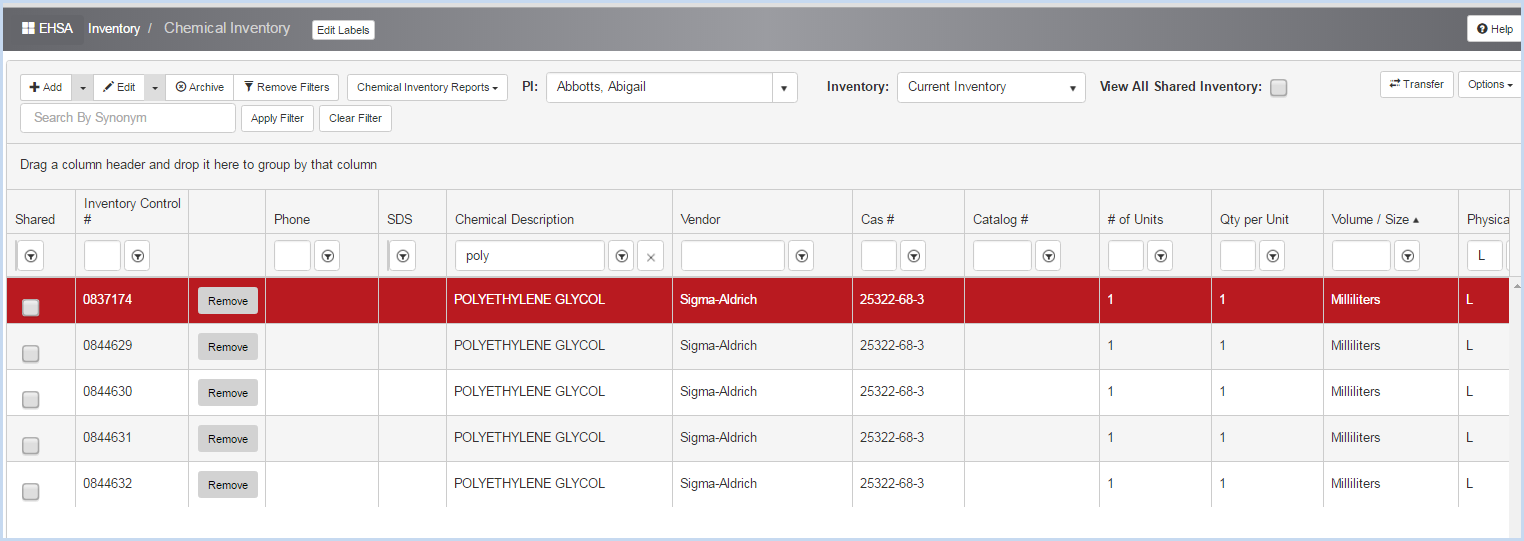
- Make any other edits as needed.