Quick Chemical Inventory
Inventory - Chemical Inventory - Chemical Entry
Users can view, add, edit or delete Chemicals from a PI in this screen. Inventory Transfers from one PI to another can also be made on this screen.
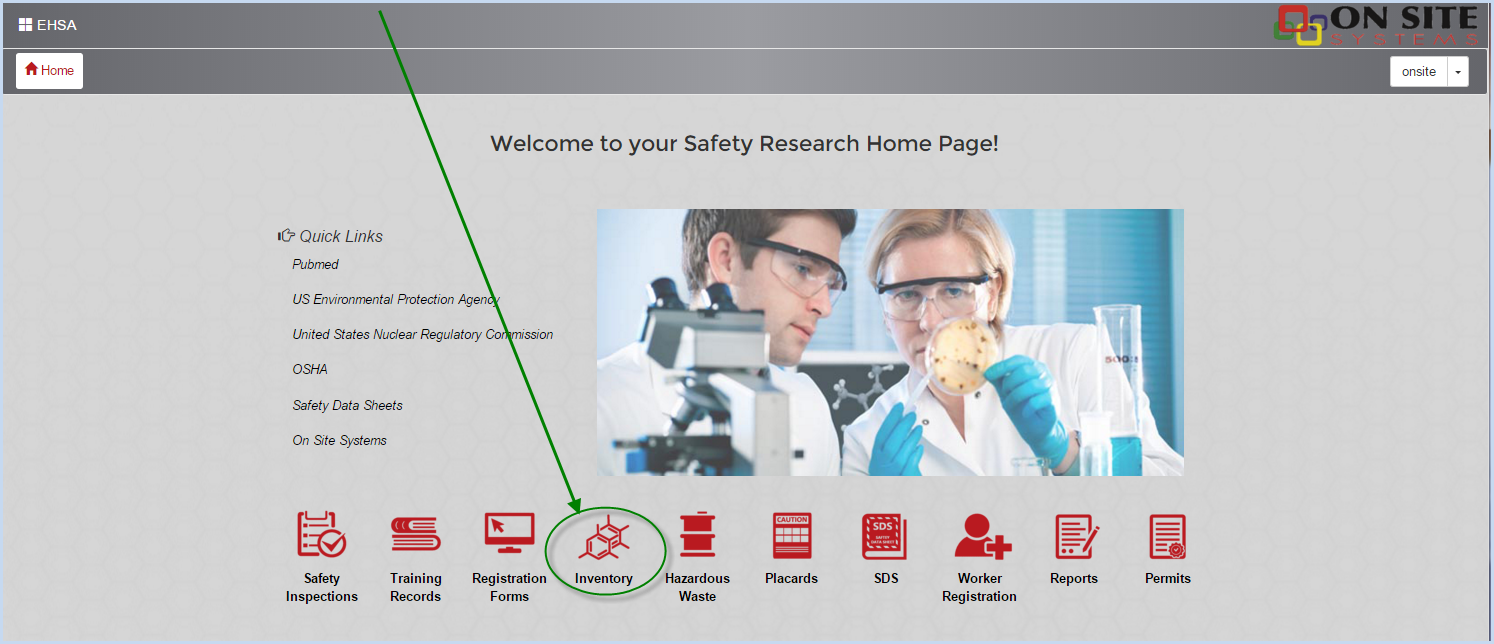
- Select the Inventory icon from the Main Menu bar.

- PI users will select Inventory from the icons shown on the Home Page.
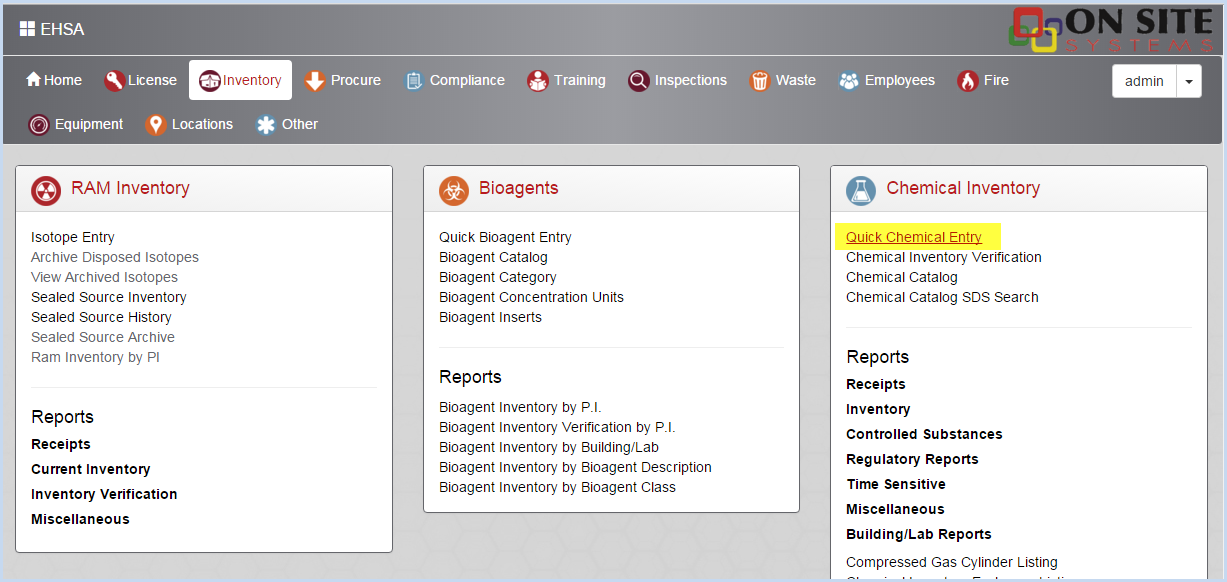
- Select Quick Chemical Entry from under [Chemical Inventory].
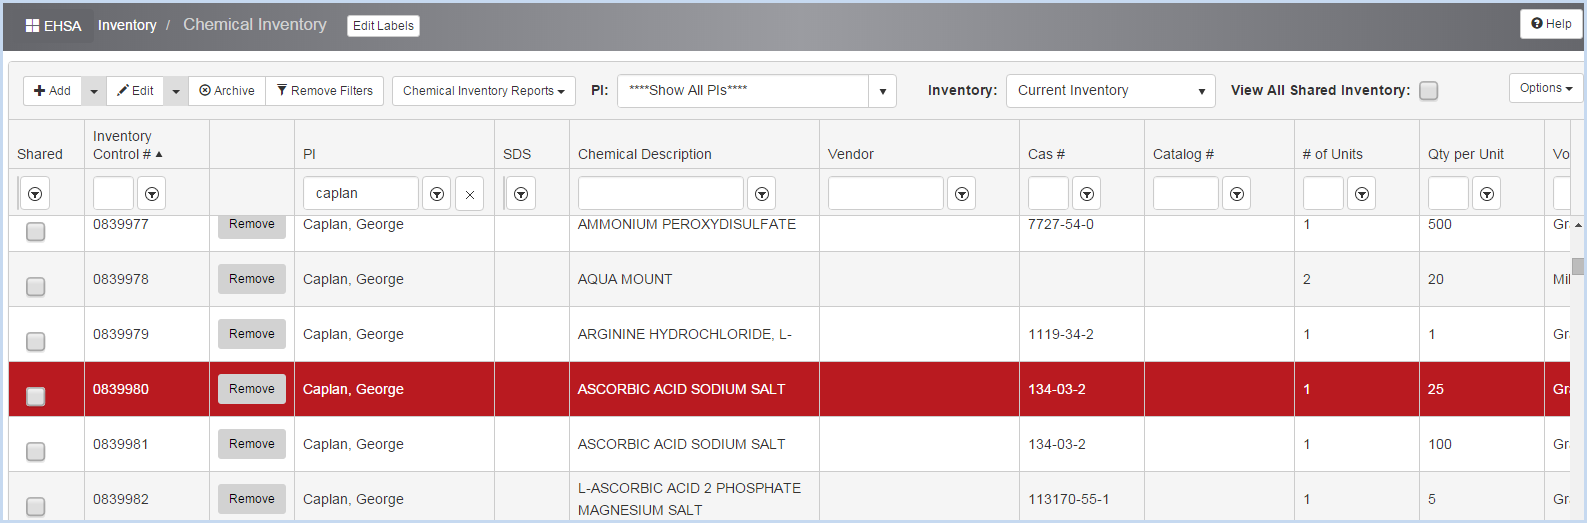
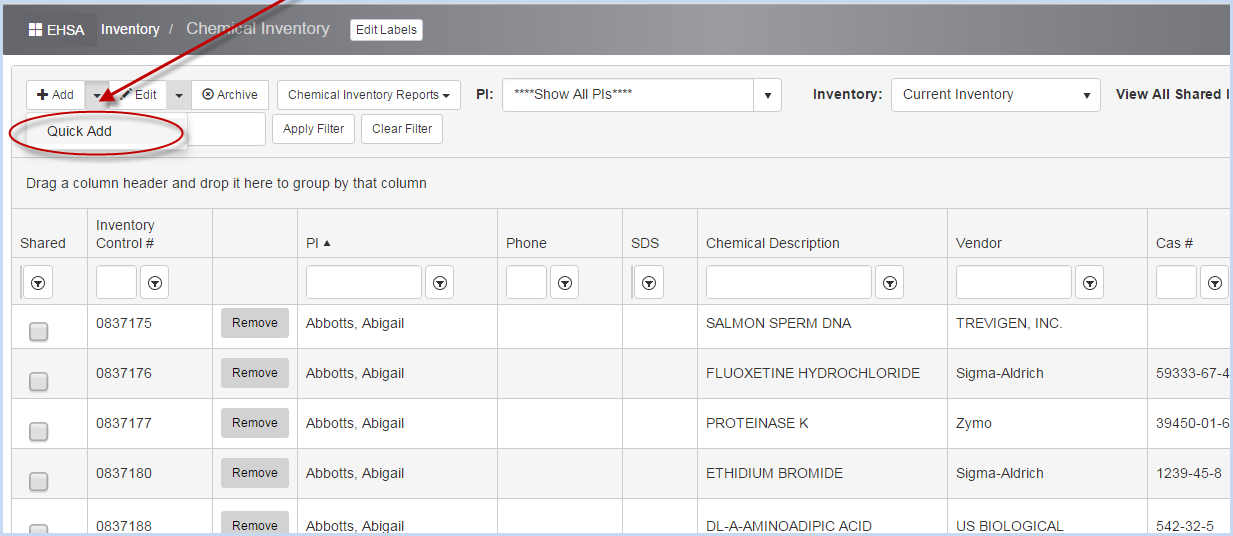
- The Chemical Inventory screen shows a list of all Chemical Inventory items. Use sorts (click on header row column), grouping, and filters to sort or view the list by any column (PI, Chemical Description, etc.). The default view is "Show All PIs". Select an individual PI from the dropdown list to view a single PI's inventory. The Inventory dropdown allows the user to view "Current Inventory" or "Disposed Inventory". The default view is Current Inventory.
- Click the "View all Shared Inventory" to show just the shared inventory items. The default view is all items, showing a check in the Shared column if the items is shared.
Chemical Inventory Quick Add
The Quick Add feature allows the user to add a chemical inventory item without a Requisition.
- From the Chemical Inventory screen, click the Arrow beside the [+Add] button and then click [Quick Add].
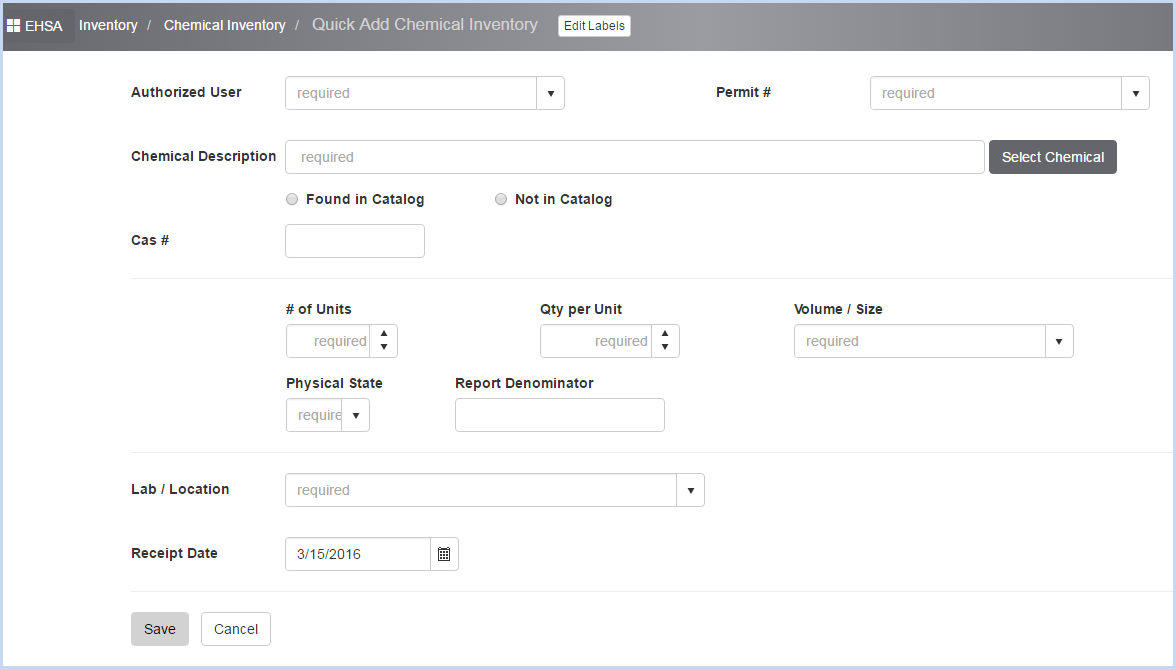
- This opens the Quick Add Chemical Inventory screen.
- Select the Authorized User or P.I. from the dropdown list. PI's and Lab Managers will be limited to the list of PI's they are authorized to access.
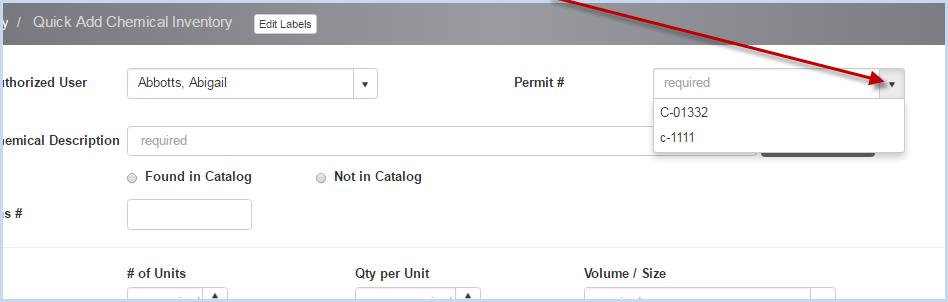
- Then select a Permit # for the Authorized User chosen.
- Required fields are noted or marked with an *.
- On the Chemical Inventory screen if an individual PI's inventory was selected for viewing as shown below and the user clicks [Quick Add],
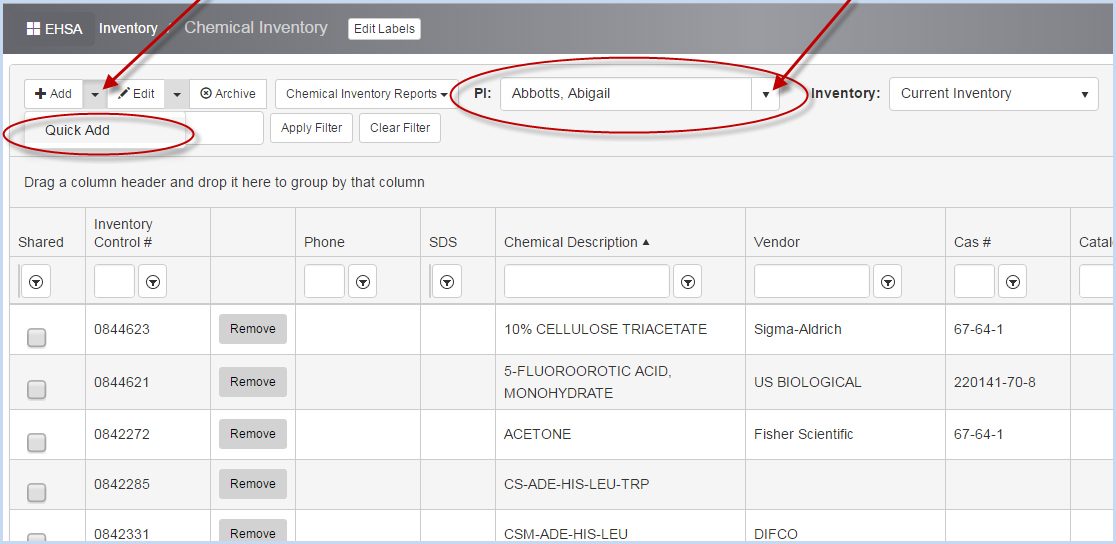
then the Quick Add Chemical Inventory screen will open with the Authorized User filled in as shown below.
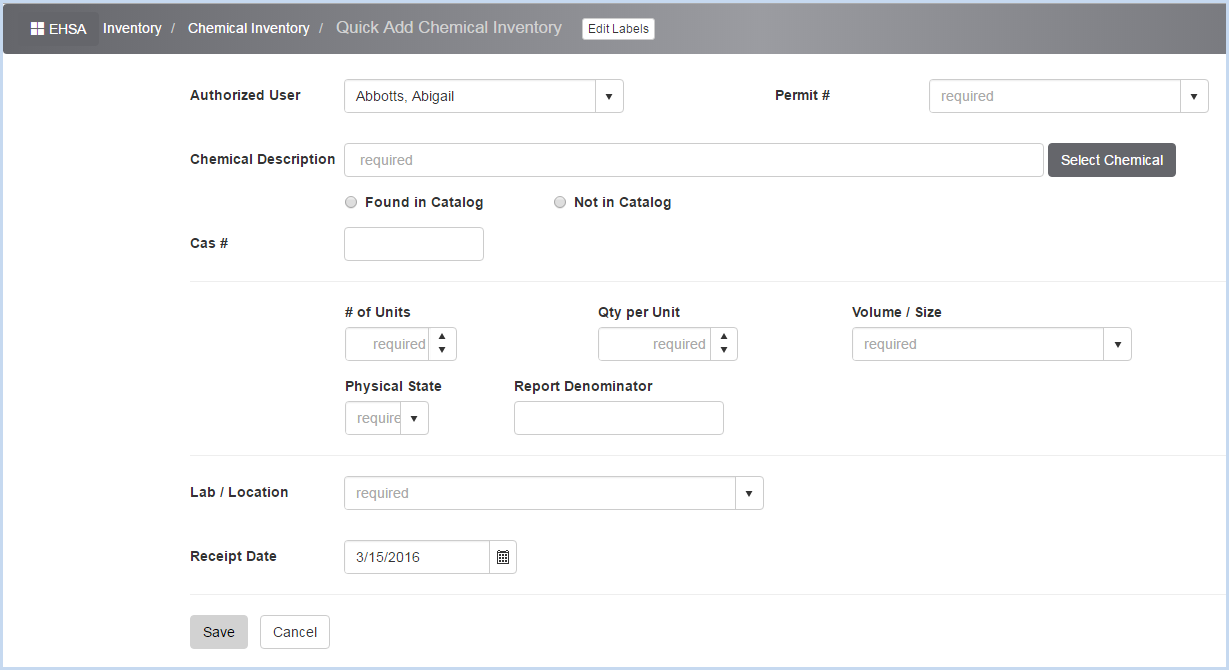
- Select the Permit # to attach the chemical to from the list of the selected PI's permits. This is a required field.
- Continue entering data in the Chemical Inventory fields.
- Click [Select Chemical] to open the [Select Chemical] search box.
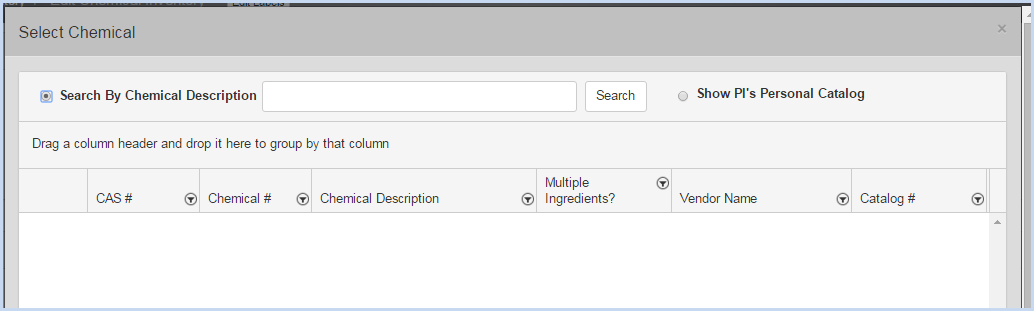
- Select Search by Chemical Description and enter a Description, or Show PI's Personal Catalog.
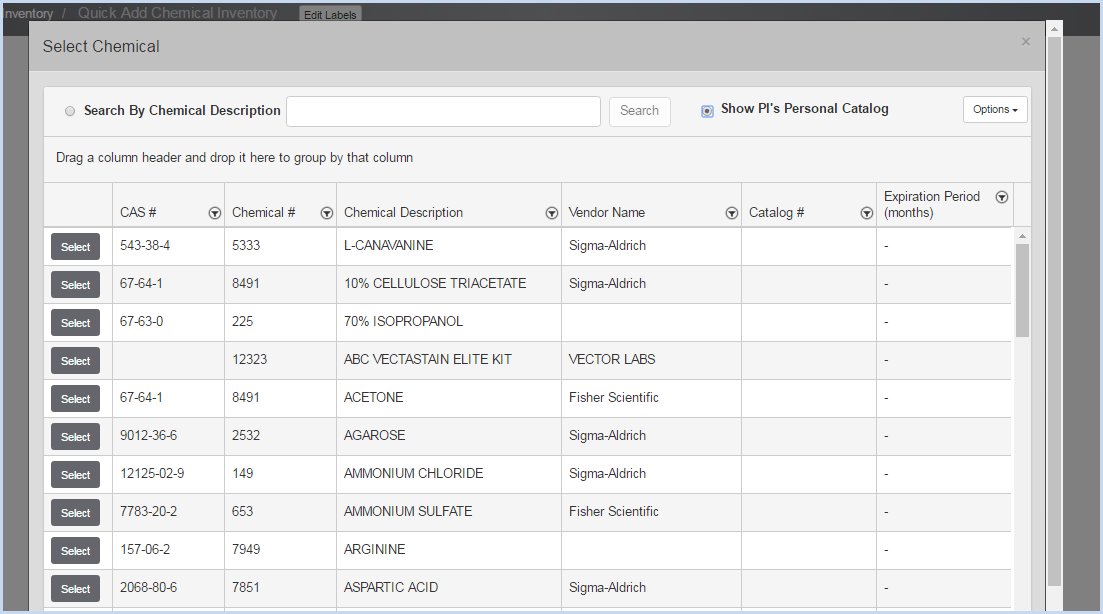
- Click [Select] for the chemical you wish to add. This will populate the chemical information - Chemical Description and CAS# (if available) will fill in.

- Enter the # of Units, Qty per Unit, Volume/Size, and Physical State.
- The Report Denominator will calculate based on the Unit, Volume, and Size entry details.
- Enter the Concentration.
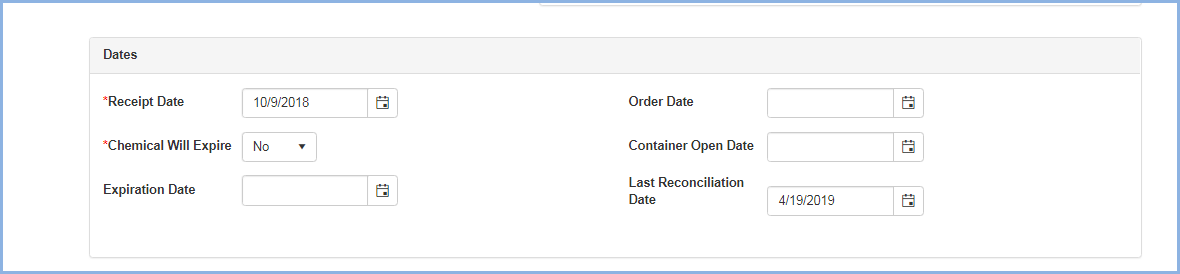
- The Receipt Date will default to the current date. Edit if necessary.
- Select Yes/No if Chemical Will Expire.
- Enter the Expiration Date if the Chemical will expire.
Scroll down to view Vendor, Location and Dates section:
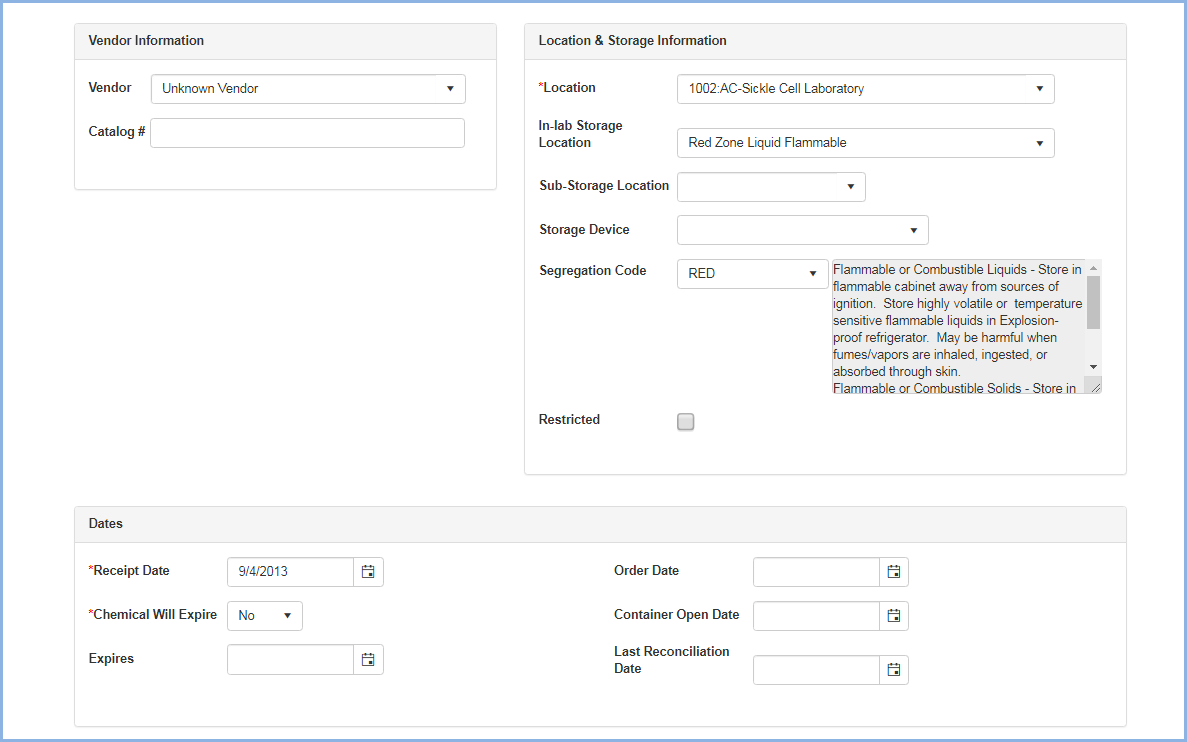
- Select the Vendor and Catalog # (for Vendor) if applicable.
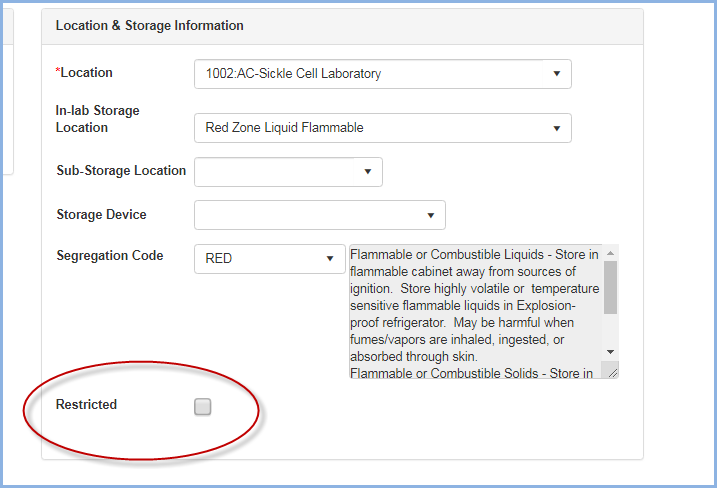
- Select the Lab/Location from the dropdown of labs for the PI on the Permit that was selected.
- Select/enter In-Lab Storage Location as applicable/needed.
- Select/enter Sub-Storage Location as applicable/needed.
- Select/enter Storage Device as applicable/needed.
- Select the Segregation Code as applicable.
- Check if the chemical item is Restricted. If Restricted is checked, this indicates it is a highly hazardous chemical and viewing this inventory item will be limited to users in a security group with authorization to view Restricted items.
- Enter the Order Date as needed.
- Enter the Container Open Date as needed.
- The Last Reconciliation Date will auto-fill the last date the inventory item was verified.
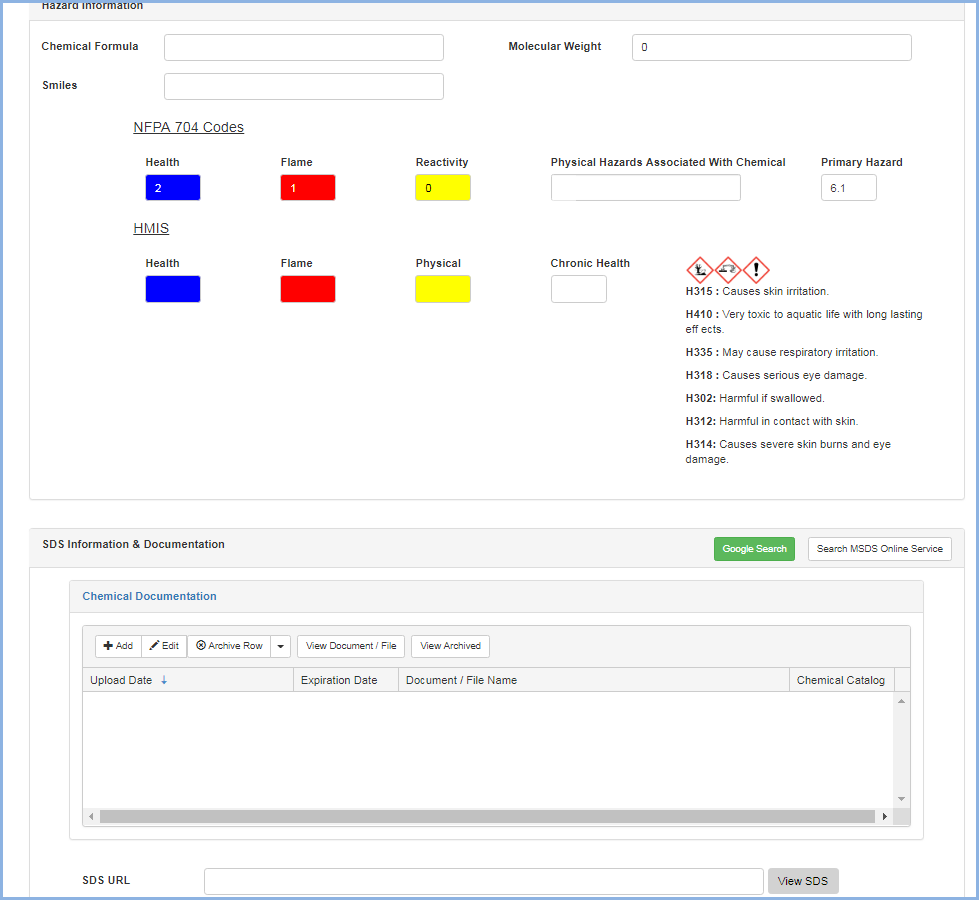
Scroll down to view The Hazard Information and SDS Information & Documents sections:
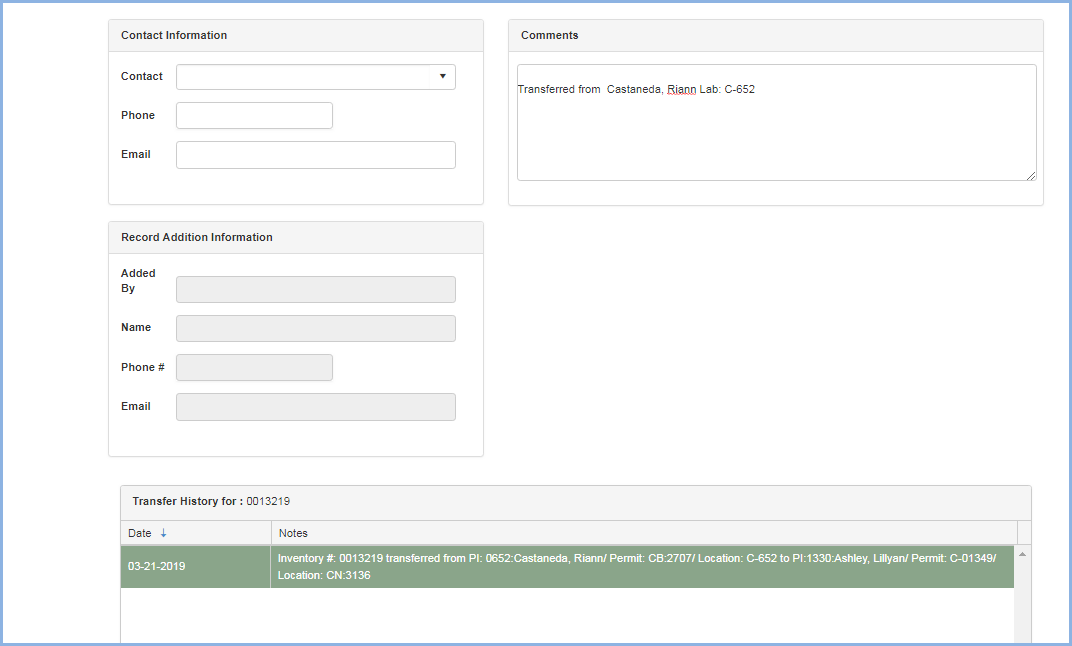
Scroll down to view the Contact Information, Comments, and Record Addition Information
- Select the Contact from the dropdown - these will be the contacts from the Permit selected for this entry.
- The Contact's Phone and Email will auto-fill.
- Enter any Comments as needed.
- The Record Addition Information will auto-fill wit the information of the user entering the inventory item.
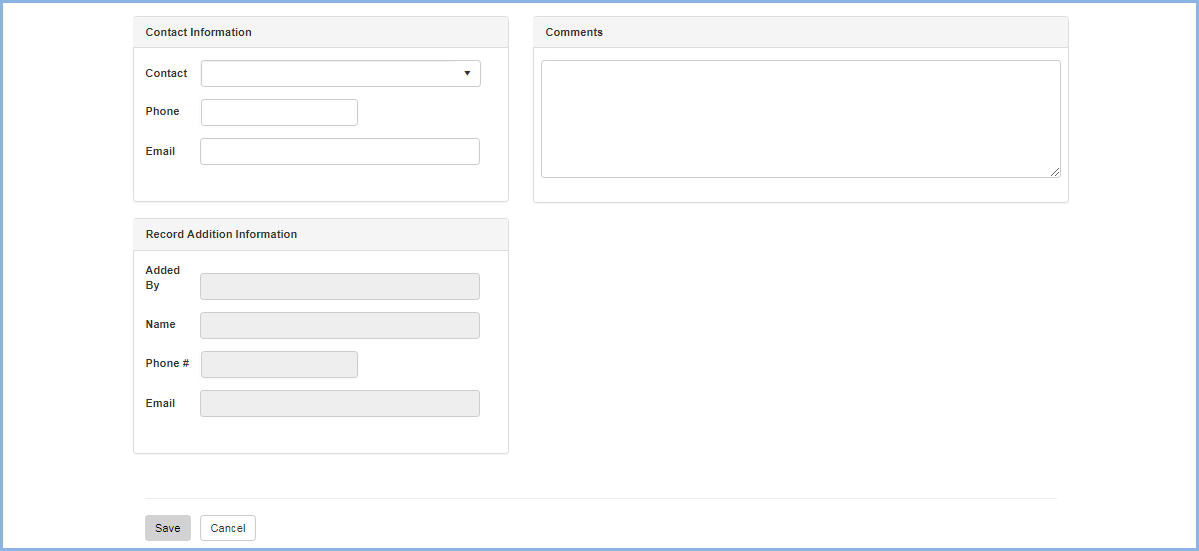
- Click [Save] to save the record, or click [Cancel] to discard the entry.
Remove an Inventory Item
- Click the [Remove] button to remove/dispose of an inventory item.

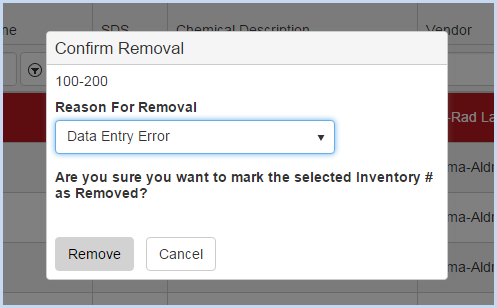
- A Confirm Removal pop-up window will appear.
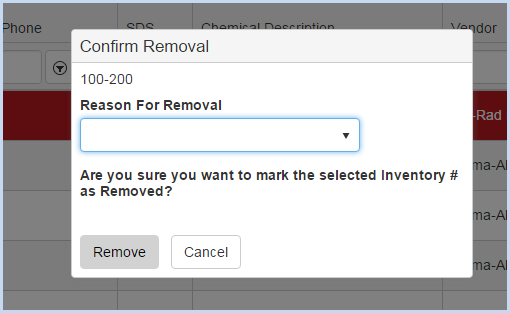
- Choose the Reason for Removal from the dropdown list.
- Click [Remove] to remove the inventory item or [Cancel] to go back to the inventory list without removing the item.
Transfer an Inventory Item
- To transfer an inventory item from one PI or location to another, select the PI you want to transfer from in the PI list.
![]()
- Once you have an individual PI's inventory on screen, click the [Transfer] button.
![]()
- This opens the Chemical Transfer screen.
- Select a Receiving PI from the dropdown list to transfer to a different PI.
- Select a Receiving Lab from the dropdown to transfer to a different lab.
![]()
- Click the [Transfer] button above for each item to be transfered to the new Receiving PI or Lab. This will move the items to the "Chemicals to Transfer" side of the screen.
- Use the [Transfer All] button to transfer/move all the items in the list.
- Use the [Remove] button to remove an item from the Transfer list.
- Use the [Remove All] button more all items from the Transfer list.
![]()
- When ready to transfer, click the [Transfer] button in the lower left corner of the screen to confirm and complete the transfer(s).
- Click the [Cancel] button to cancel the changes and go back to the previous screen.
Chemical Inventory Transfer Request
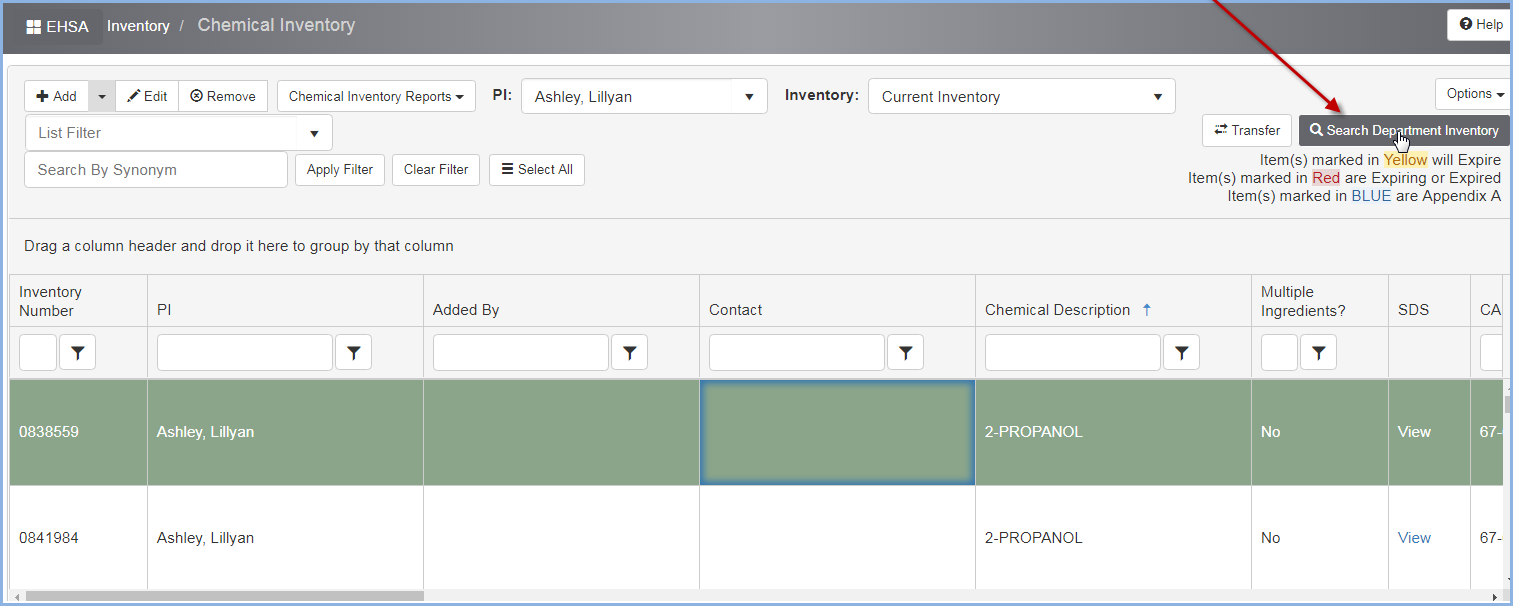
EHSA allows Principal Investigators to view the chemical inventory records of other PI's in their department. Now, a new function allows PI's to request a transfer within their department if they find a needed inventory item in another PI's lab. For example, if PI "Ashley" below is in the Chemistry department, she can search and request a transfer from the inventory of other PIs that are also in the Chemistry department. (The PIs must be in the same Department as selected in the PI Worker record in EHSA.) The Transfer Request function will send a transfer request email to the PI with the inventory item in current inventory. The PI receiving the request will need to log into EHSA and approve or deny the transfer request. Approved requests will be transferred in total and a transaction history record added to the chemical inventory record.
- The Principal Investigator, or Lab Manager, clicks on the [Search Department Inventory] button to view the inventory items for PI's in the same department.
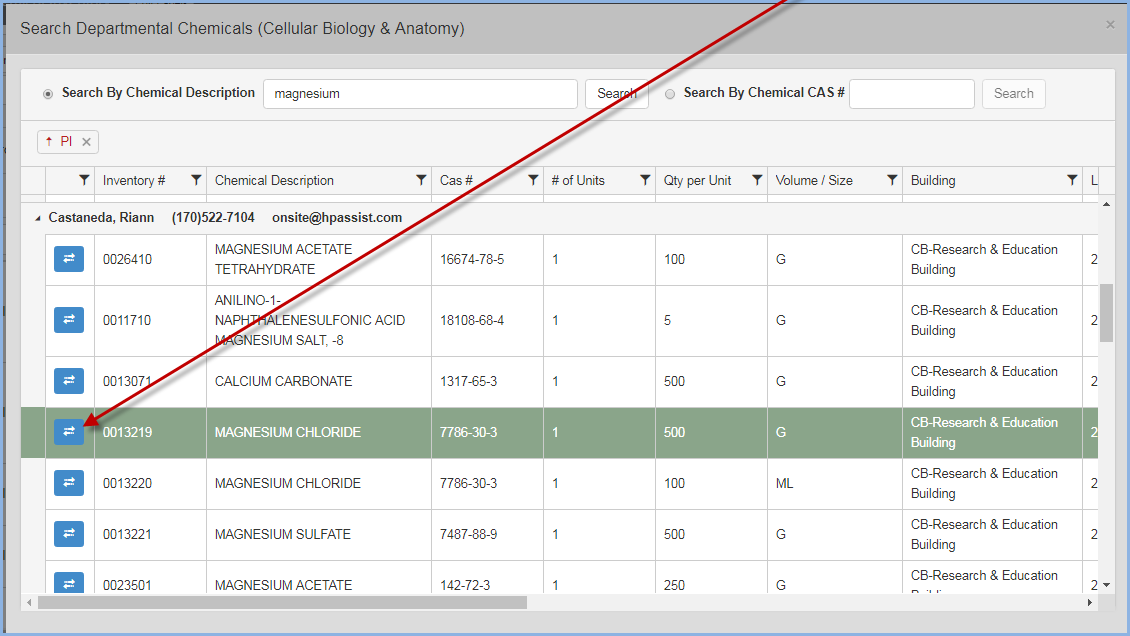
- The user will see her department listed in the header and have the option to search by Chemical Description or Chemical CAS#.
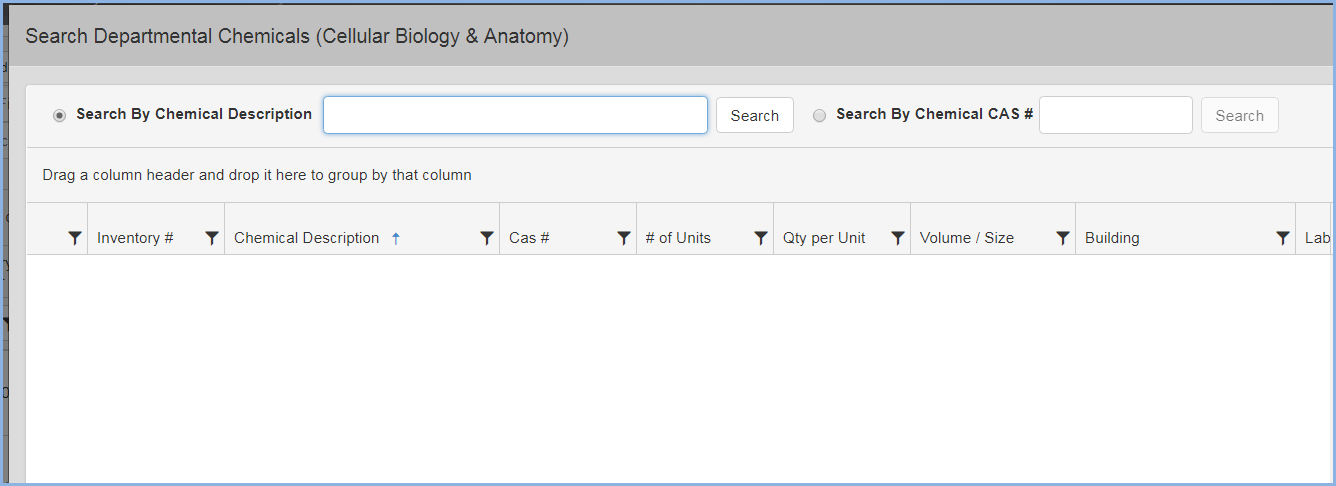
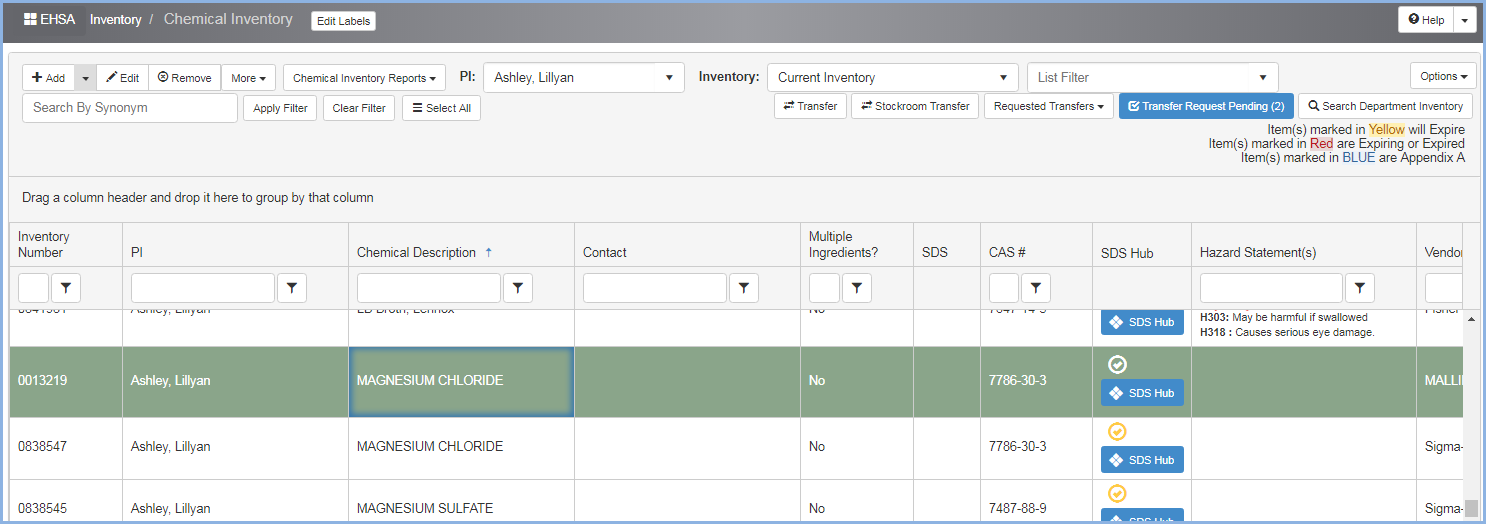
- In this example below, we are searching for Magnesium. The Search results return chemical inventory items containing Magnesium:

- The results list display PI's in the same department as the user, but not necessarily PI's that are on her PI access list.
- We will request the Magnesium Chloride Inventory #0013219 from Castaneda, Riann, by highlighting the line item and clicking the Request Transfer button in the far left column.
- A Request Chemical Transfer window will pop-up. The Email CC and Report To boxes will auto-fill with the requester email address so she will receive a copy of the email and be set as the reply to contact for any questions regarding the transfer.
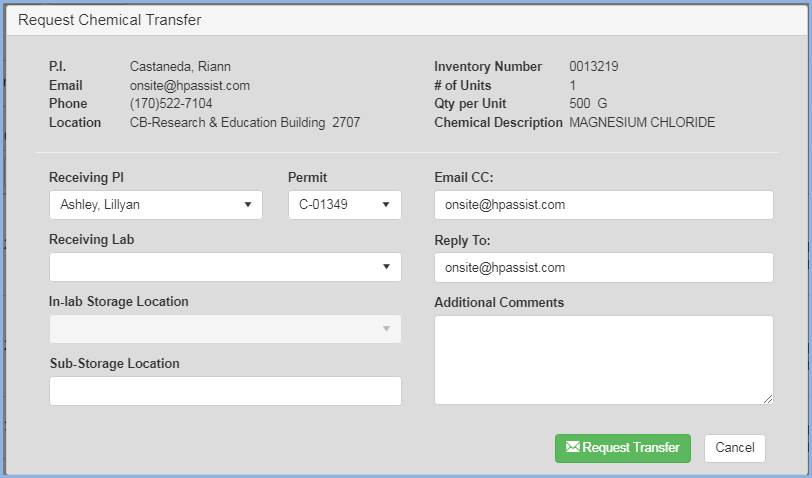
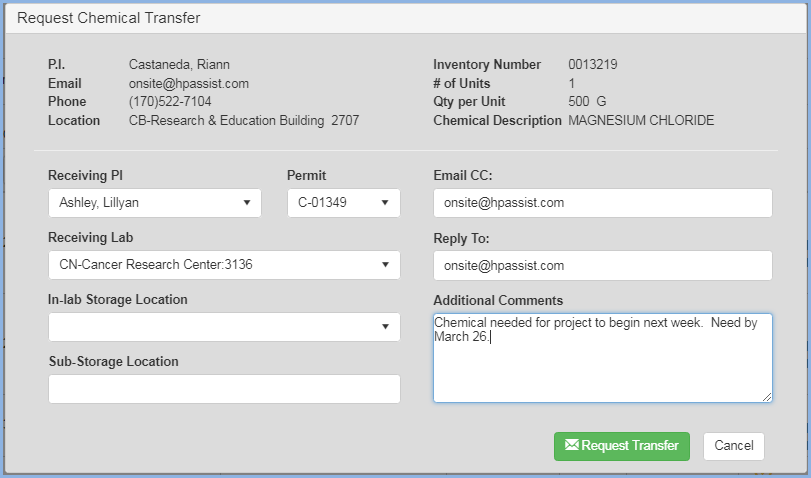
- The user selects the Associated Permit (if receiving PI has more than one Chem permit) and the Receiving Lab Location.
- Enter any important information regarding the transfer in the Additional Comments box.
- Click the [Request Transfer] button when ready to request.
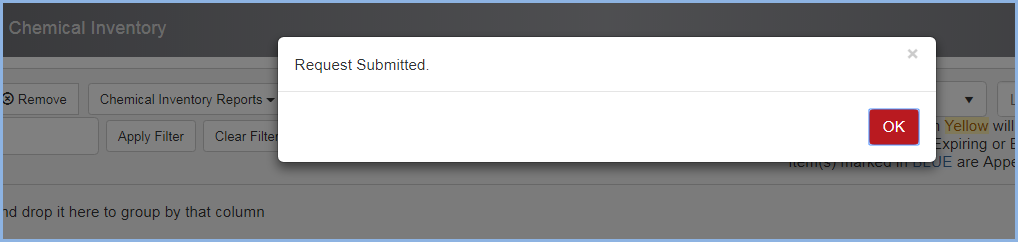
- A Request Submitted confirmation appears. Click [OK] to close the pop-up.
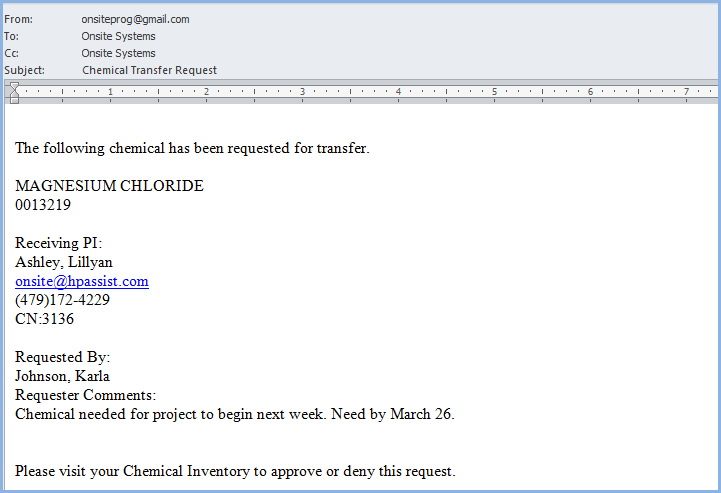
- The current PI will receive a Transfer Request email from the system. An example is shown below.
- After receiving the e-mail notification, the PI will need to login to EHSA and view her Chemical Inventory to view the Transfer Request.
- The [Transfer Request Pending] button will show the number of pending requests.
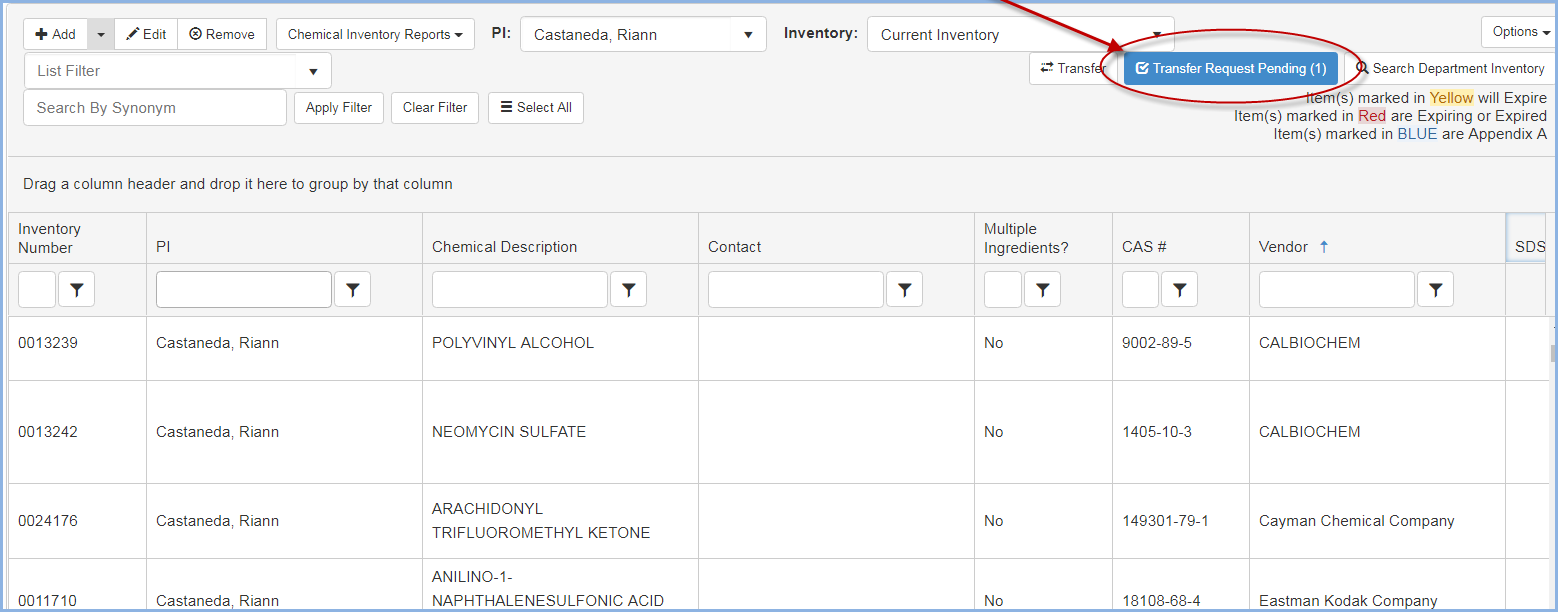
- Click on the [Transfer Request Pending] button to view and select the request to approve or deny.
- The user can toggle between [Open Requests] (shown below) and any [Closed Requests] by clicking the appropriate button.
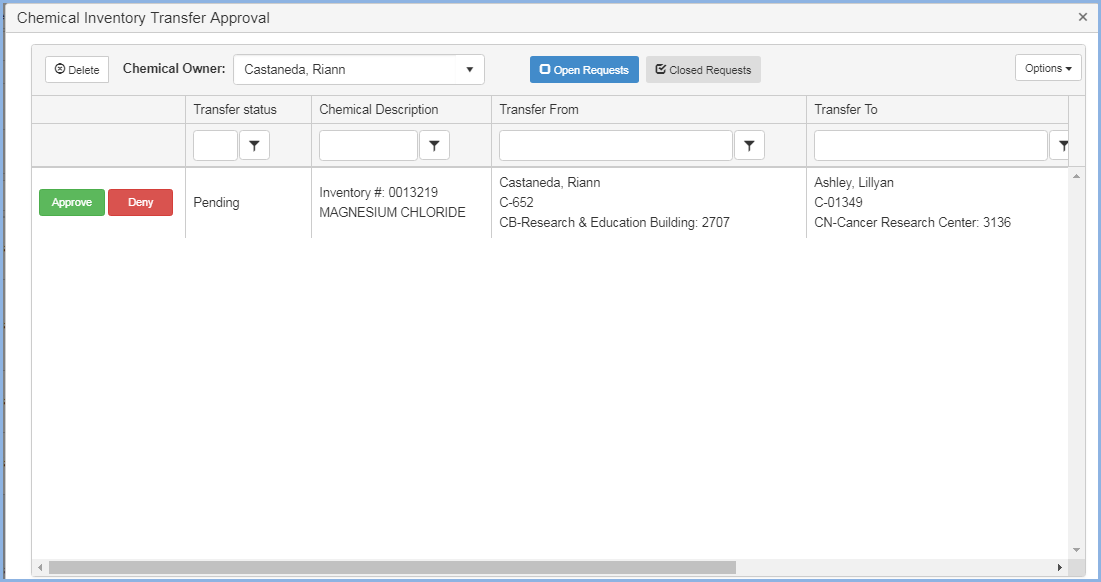
- Click the [Approve] or [Deny] button on the request. When the [Approve] button is clicked, a Confirmation box will appear. Click [Yes] to proceed.

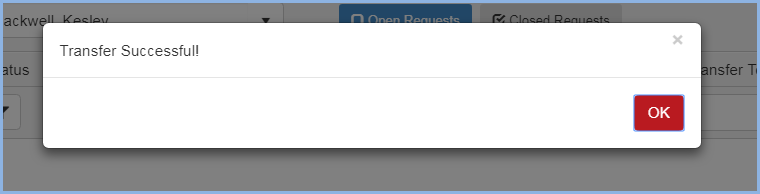
- A Transfer Successful pop-up will appear. Click [OK] to close this confirmation message.
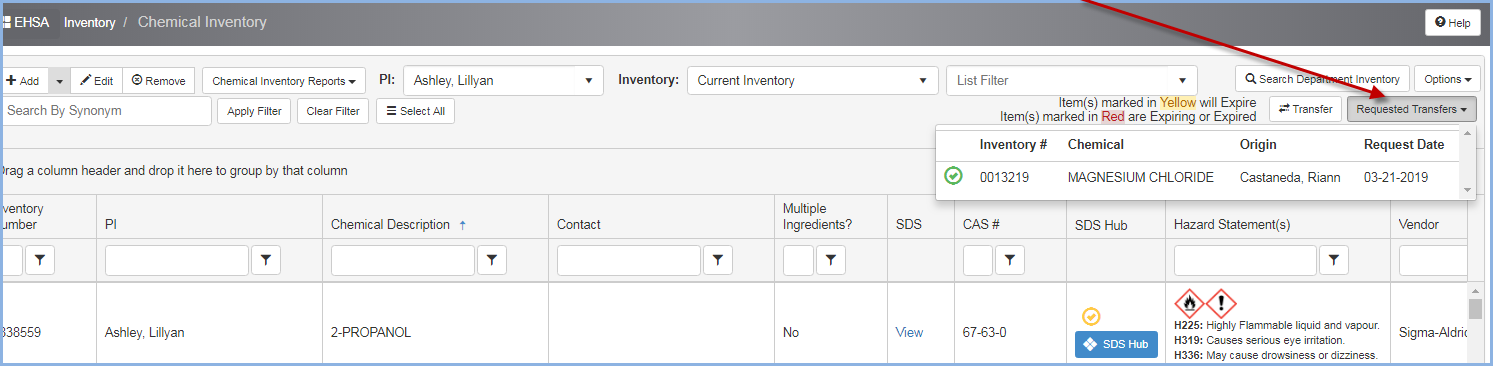
- The PI that the inventory item has been transferred to can check on the status of Requested Transfers by clicking the [Requested Transfers] button.
- The green check shows that the transfer has been approved.
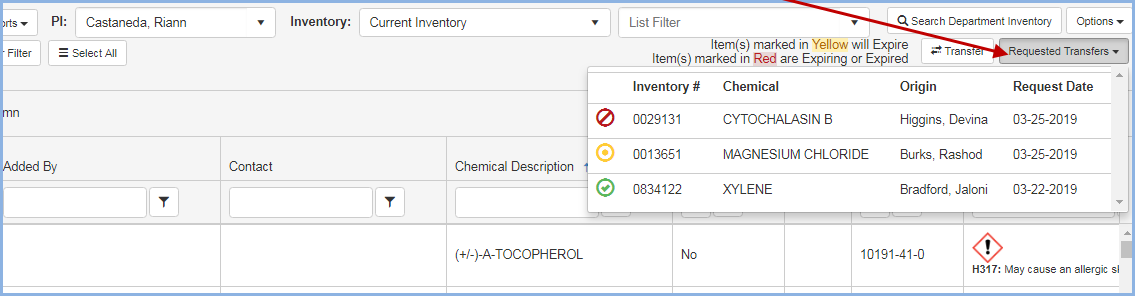
- Here is an example of multiple requests in the Requested Transfers list. Any Red
 items are denied, Yellow
  items are Pending, and Green
 items are Approved.
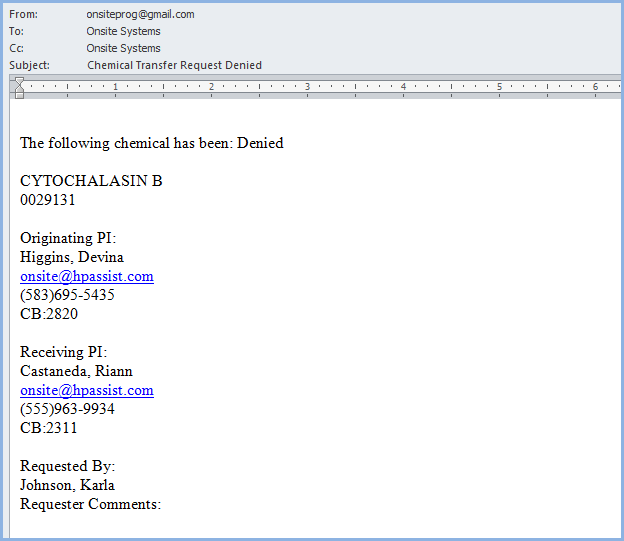
- The Requester will also receive an approval or denial email.
- Here is an example of a Denial email.
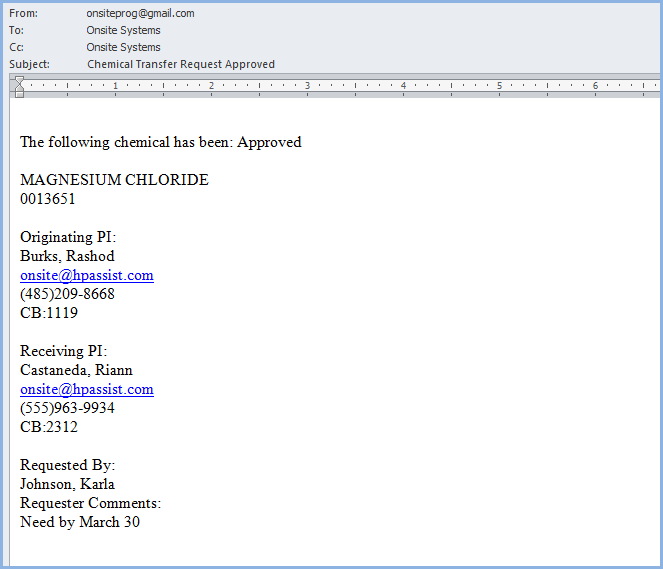
- Here is an example of an Approval email.
- The PI or Lab Manager will need to arrange to pick up and physically move the approved transfer inventory item to the receiving PI's lab.
- The Requesting/Transfered to PI can search for and view the inventory item in her inventory.
- The Transfer History is shown on the Inventory item detail