Quick Add
Chemical Inventory Quick Add
The Quick Add feature allows the user to add a chemical inventory item without a Requisition.
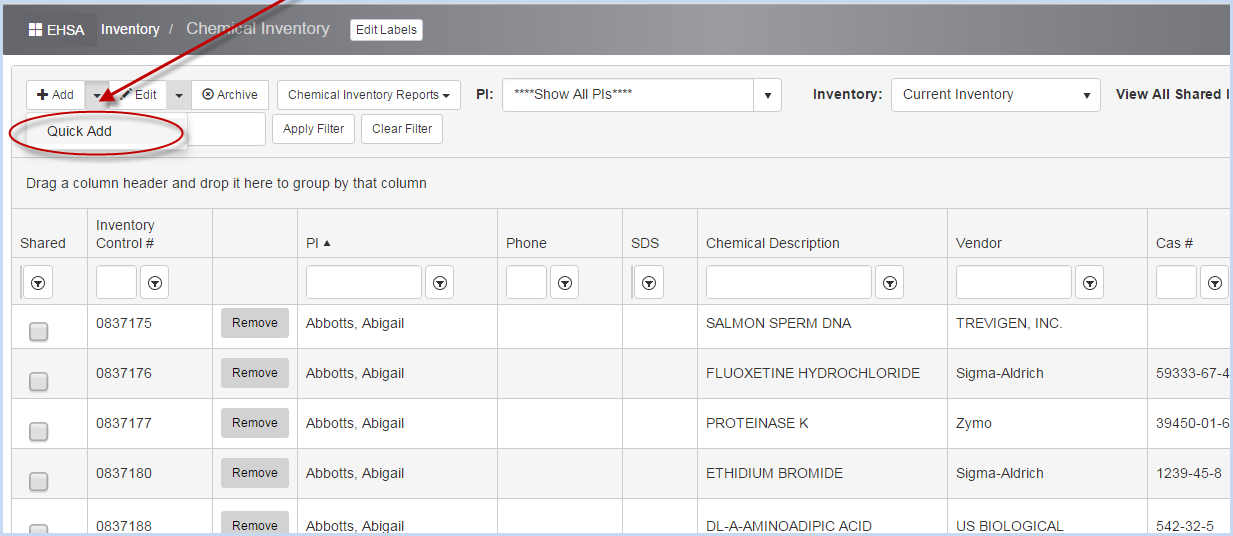
- From the Chemical Inventory screen, click the Arrow beside the [+Add] button and then click [Quick Add].
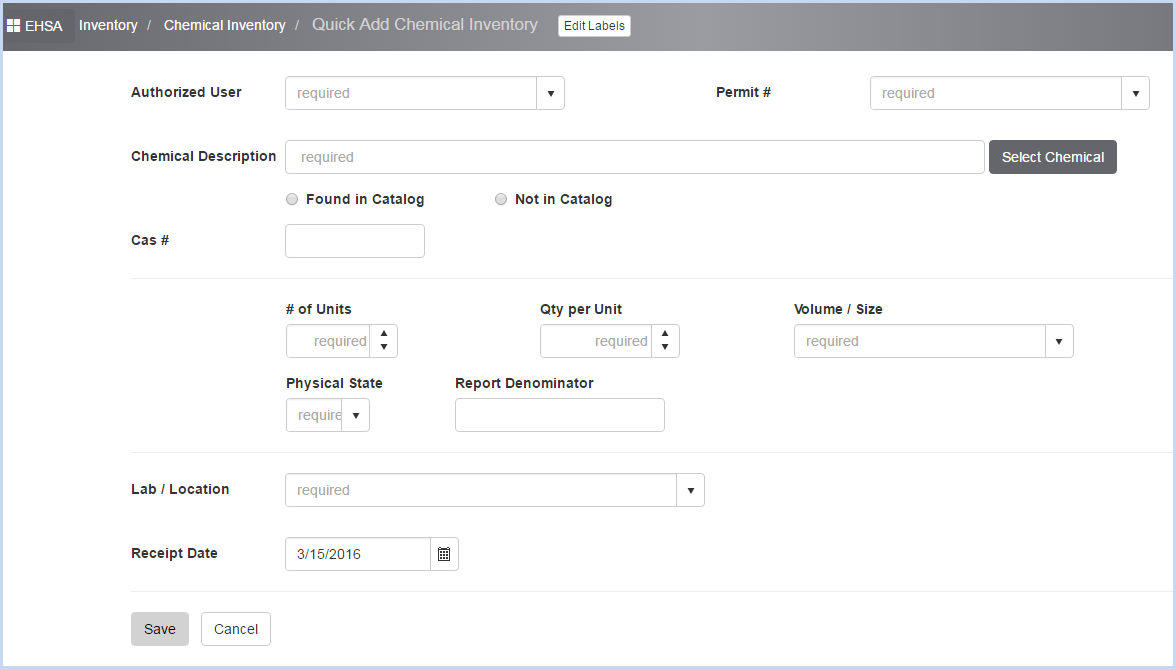
- This opens the Quick Add Chemical Inventory screen.
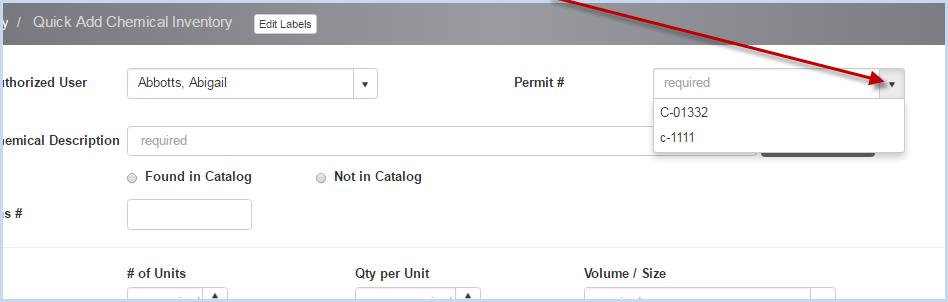
- Select the Authorized User from the dropdown list.
- Then select a Permit # for the Authorized User chosen.
- Required fields are noted or marked with an *.
- On the Chemical Inventory screen if an individual PI's inventory was selected for viewing as shown below and the user clicks [Quick Add],
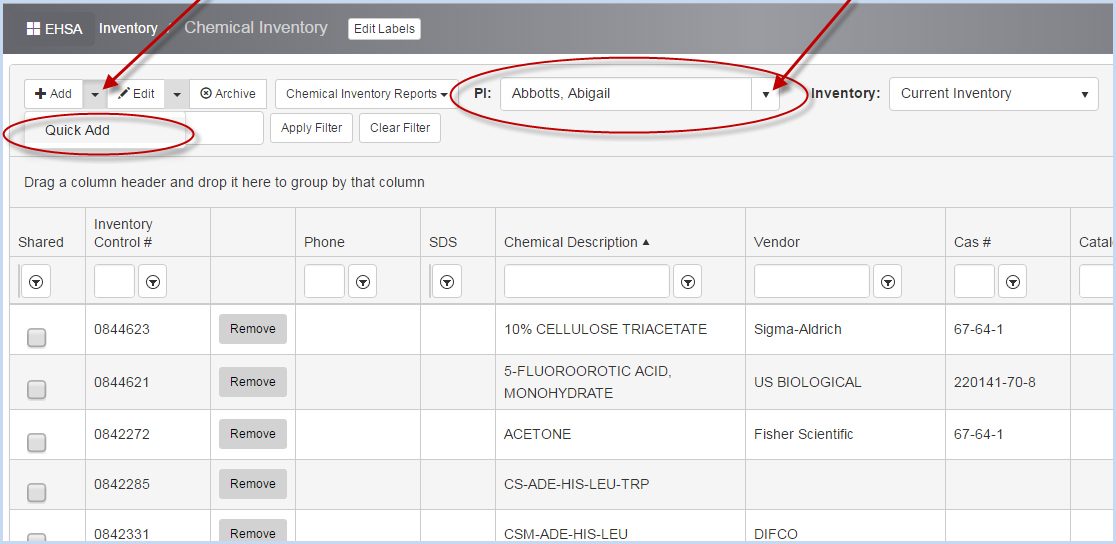
then the Quick Add Chemical Inventory screen will open with the Authorized User filled in as shown below.
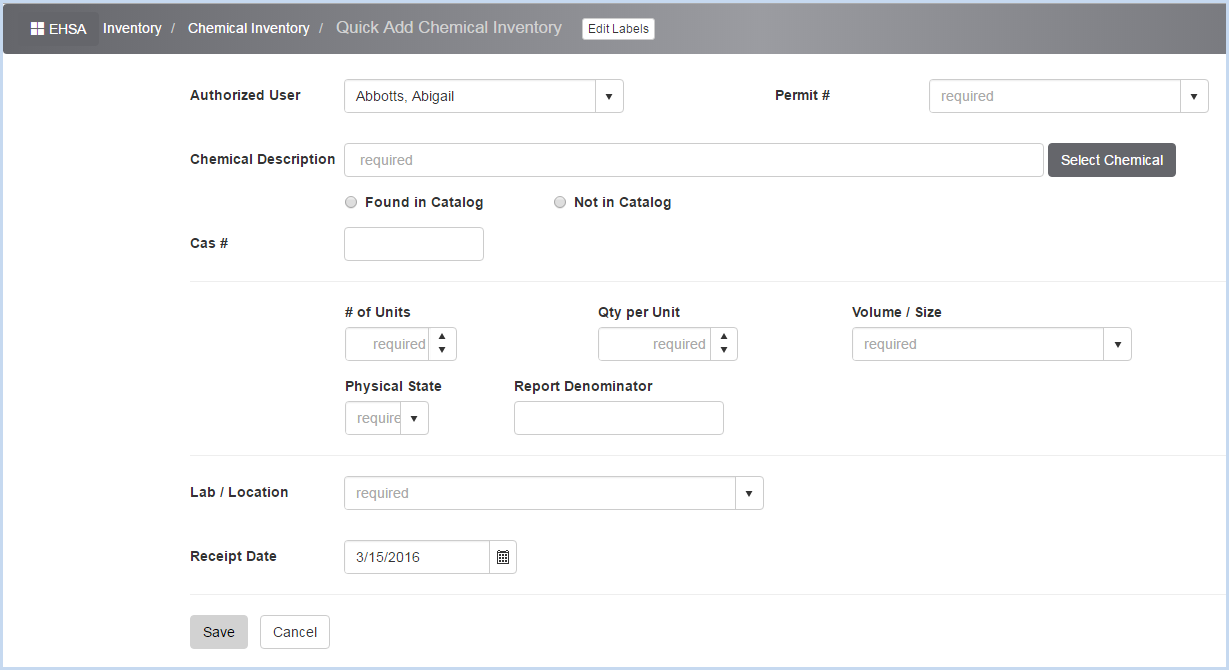
- Select the Permit # to attach the chemical to from the list of the selected PI's permits. This is a required field.
- Continue entering data in the Chemical Inventory fields.
- Click [Select Chemical] to open the [Select Chemical] search box.
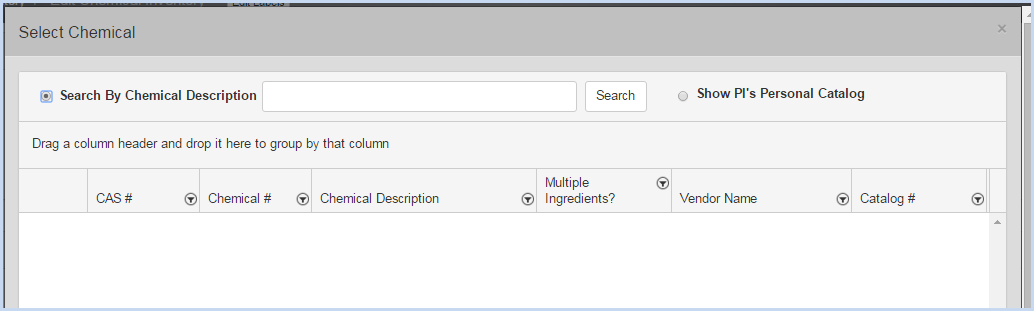
- Select Search by Chemical Description and enter a Description, or Show PI's Personal Catalog.
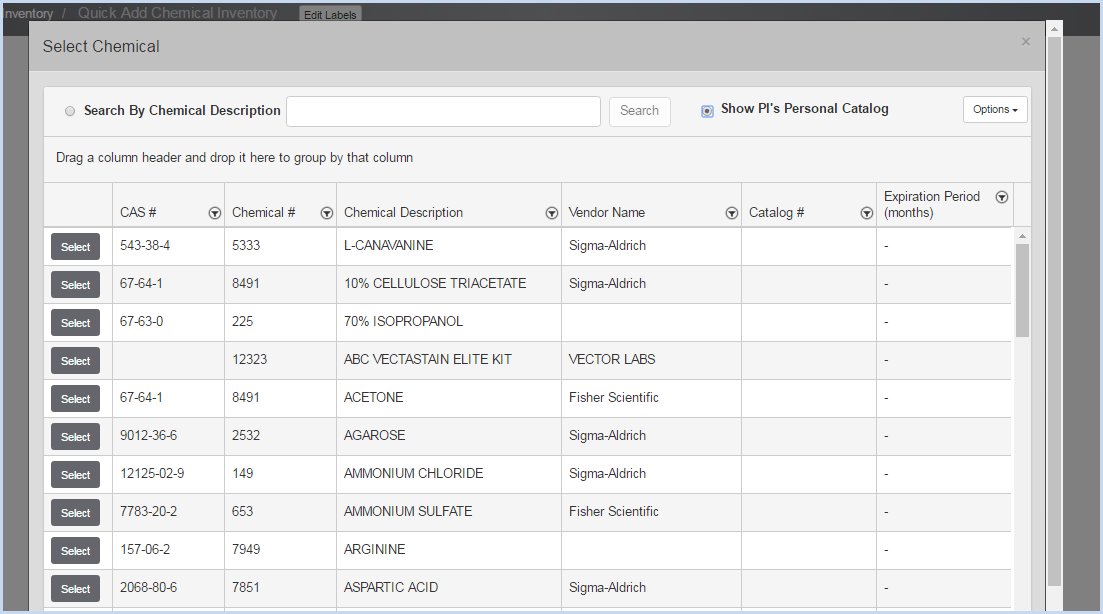
- Click [Select] for the chemical you wish to add. This will populate the chemical information - Chemical Description and CAS# (if available) will fill in.

- Enter the # of Units, Qty per Unit, Volume/Size, and Physical State.
- The Report Denominator will calculate based on the Unit, Volume, and Size entry details.
- Enter the Concentration.
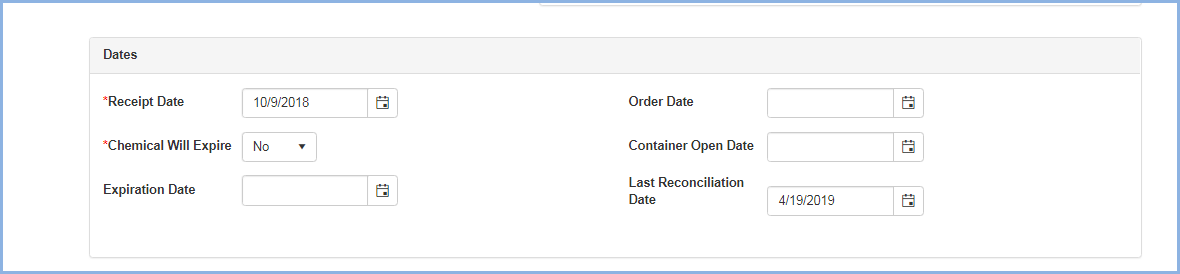
- The Receipt Date will default to the current date. Edit if necessary.
- Select Yes/No if Chemical Will Expire.
- Enter the Expiration Date if the Chemical will expire.
Scroll down to view Vendor, Location and Dates section:
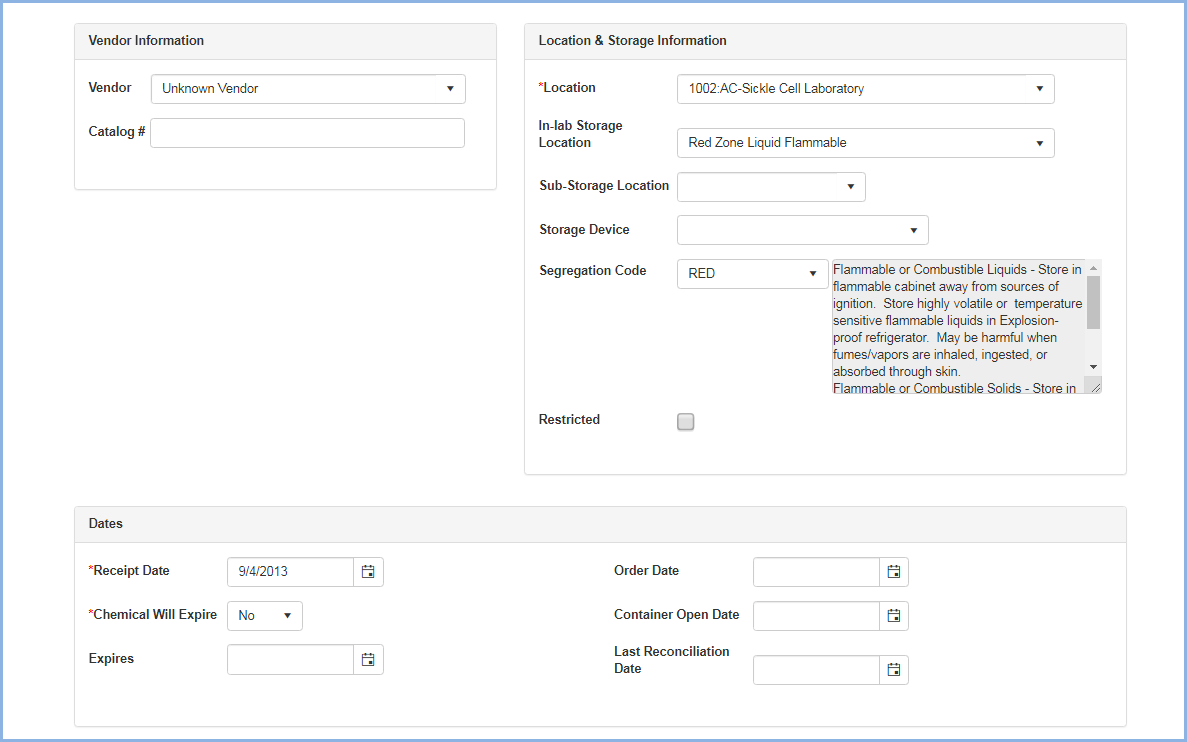
- Select the Vendor and Catalog # (for Vendor) if applicable.
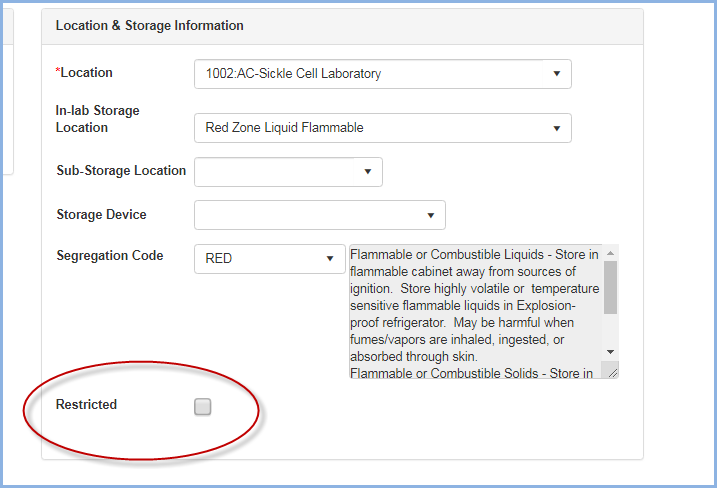
- Select the Lab/Location from the dropdown of labs for the PI on the Permit that was selected.
- Select/enter In-Lab Storage Location as applicable/needed.
- Select/enter Sub-Storage Location as applicable/needed.
- Select/enter Storage Device as applicable/needed.
- Select the Segregation Code as applicable.
- Check if the chemical item is Restricted. If Restricted is checked, this indicates it is a highly hazardous chemical and viewing this inventory item will be limited to users in a security group with authorization to view Restricted items.
- Enter the Order Date as needed.
- Enter the Container Open Date as needed.
- The Last Reconciliation Date will auto-fill the last date the inventory item was verified.
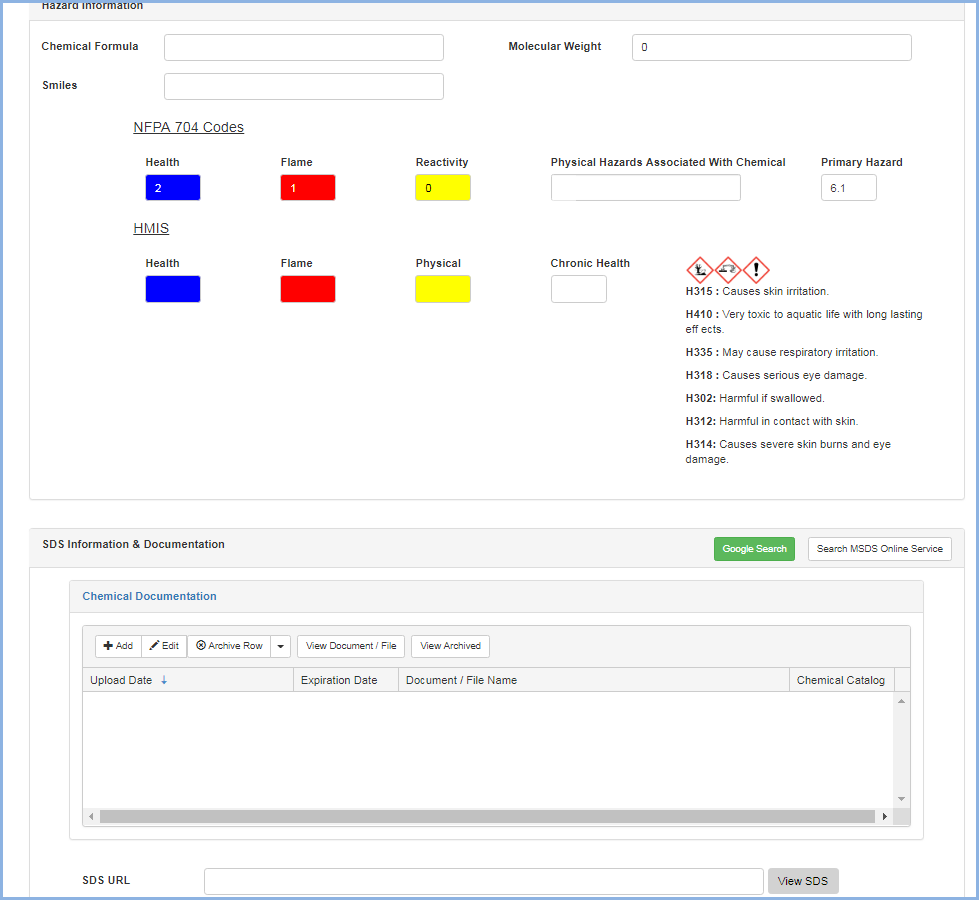
Scroll down to view The Hazard Information and SDS Information & Documents sections:
Scroll down to view the Contact Information, Comments, and Record Addition Information
- Select the Contact from the dropdown - these will be the contacts from the Permit selected for this entry.
- The Contact's Phone and Email will auto-fill.
- Enter any Comments as needed.
- The Record Addition Information will auto-fill wit the information of the user entering the inventory item.
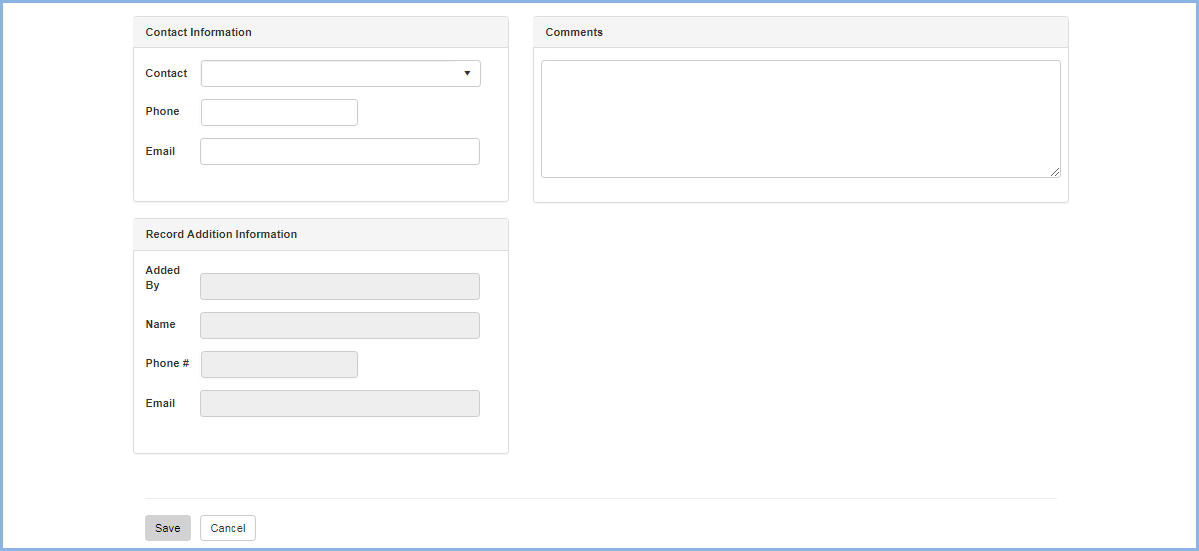
- Click [Save] to save the record, or click [Cancel] to discard the entry.