Waste Pickup Add or Edit
Waste Pickup Add or Edit
Click Waste Pickup Request to add a new Waste Request or view/edit existing requests.
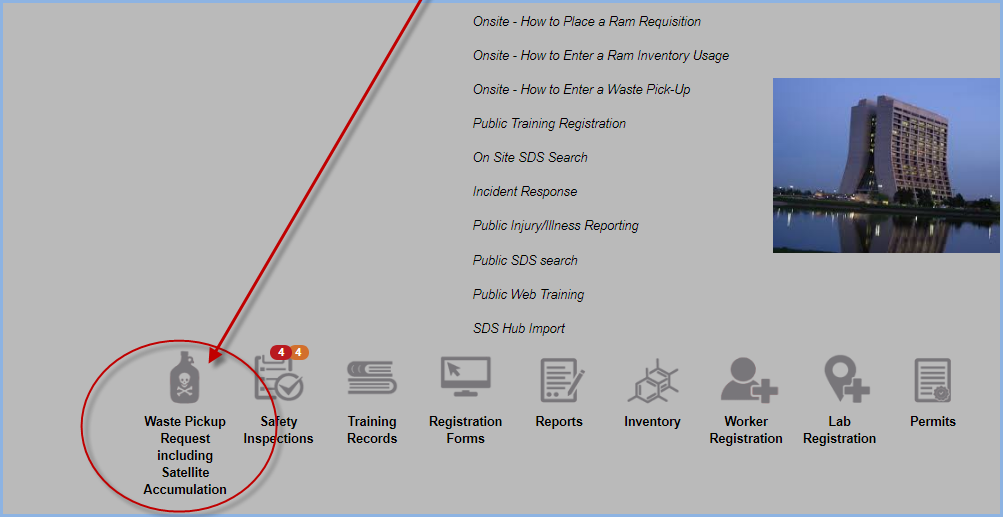
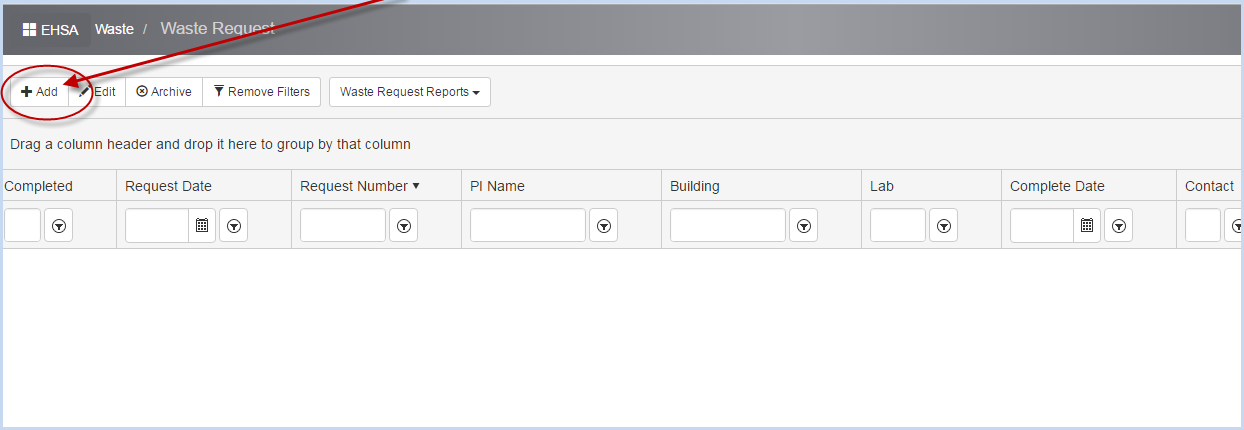
- This opens the Waste Request Screen Click [Add] to add a new waste request.
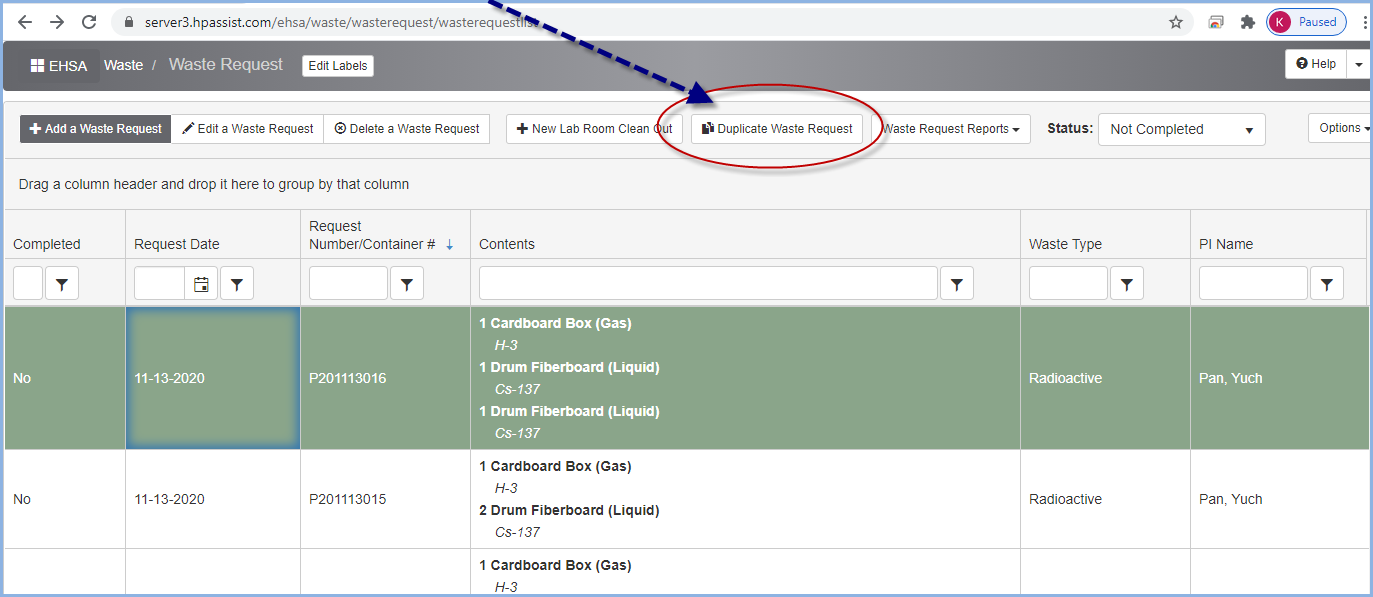
- Users may create a Duplicate waste request by highlighting as request and clicking the [Duplicate Waste Request] button on the Waste Request List screen.
- This action will create a duplicate of an existing request that the user can edit to make needed changes for a new pickup, without needing to enter all the data fields. This is a time-saving procedure for repeat pickups of the same waste items or chemicals.
- Select the Waste Type from the dropdown list.
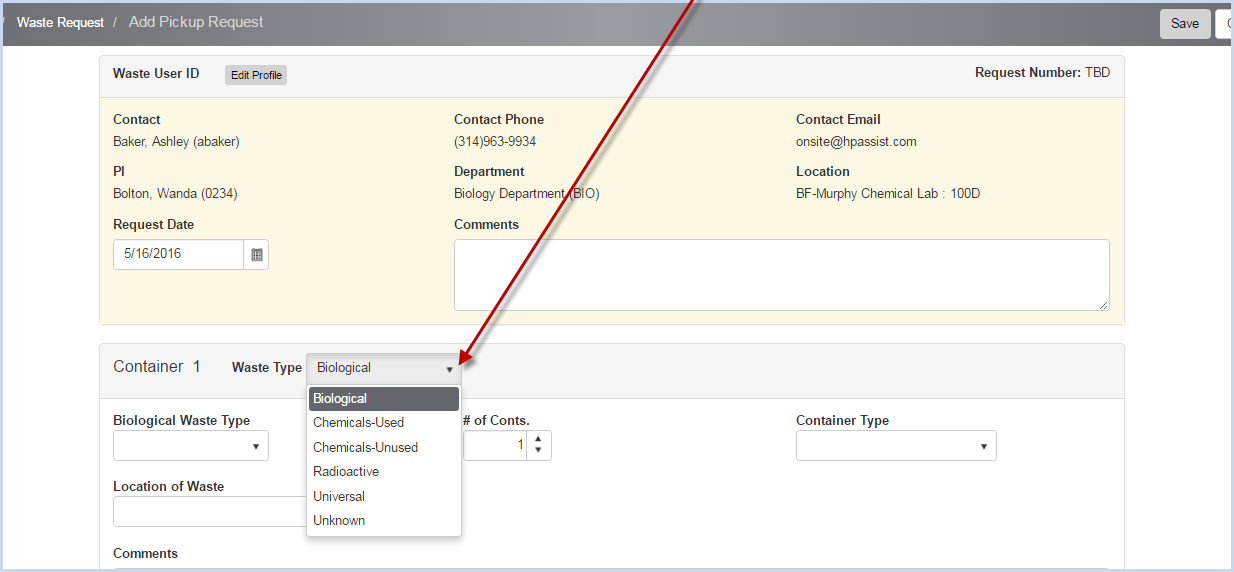
- When a Waste Type is selected, the data entry options will change to reflect the Waste Type.
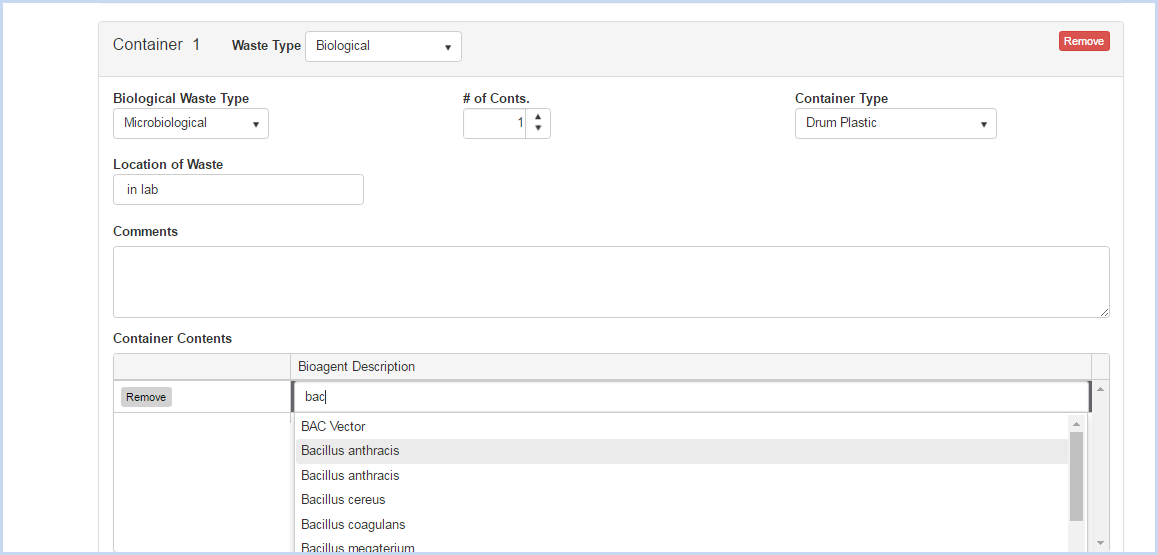
Biological Waste Type
- Biological is selected from the Waste Type list above.
- Select the specific type of Biological Waste from the dropdown list.

- Enter the # of Conts.
- Select the Container Type from the dropdown selections available.
- Begin typing the Bioagent Description as shown below, then select from the list.
- Enter any Comments as needed.
- Click [Add Container] to add an additional container to the request, or [Save] to save the Waste Request.
- Click [Cancel] to discard all edits/entries.
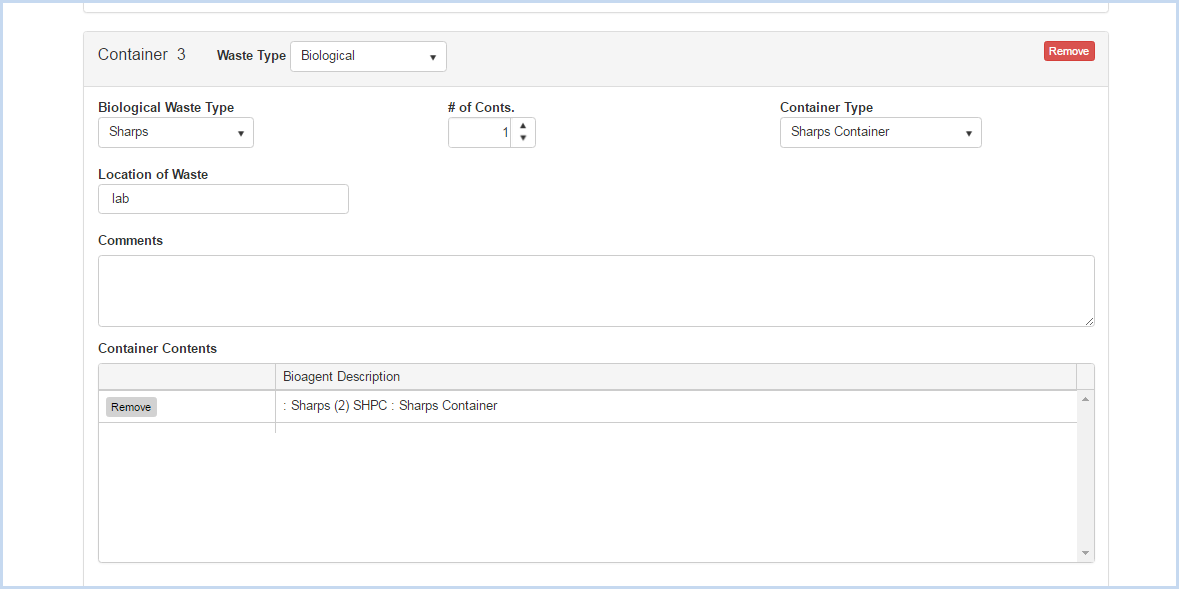
- Example of Sharps Waste - Select the Biological Waste Type "Sharps" and Sharps Container.
- The Bioagent Description will fill in as the selected Container Type.
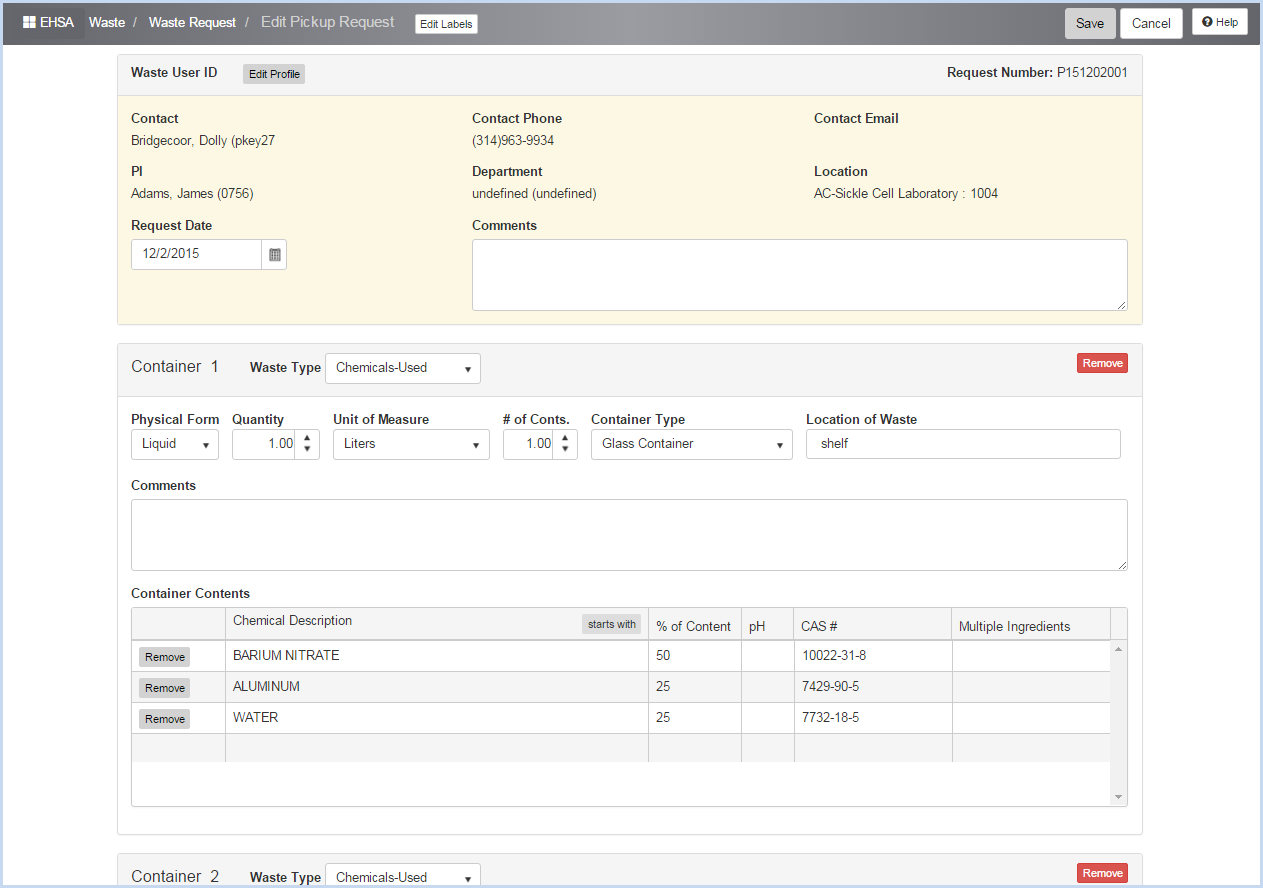
Chemicals Used or Unused Waste Type
- Select the Chemicals-Used or Chemicals-Unused Waste Type from the dropdown list.
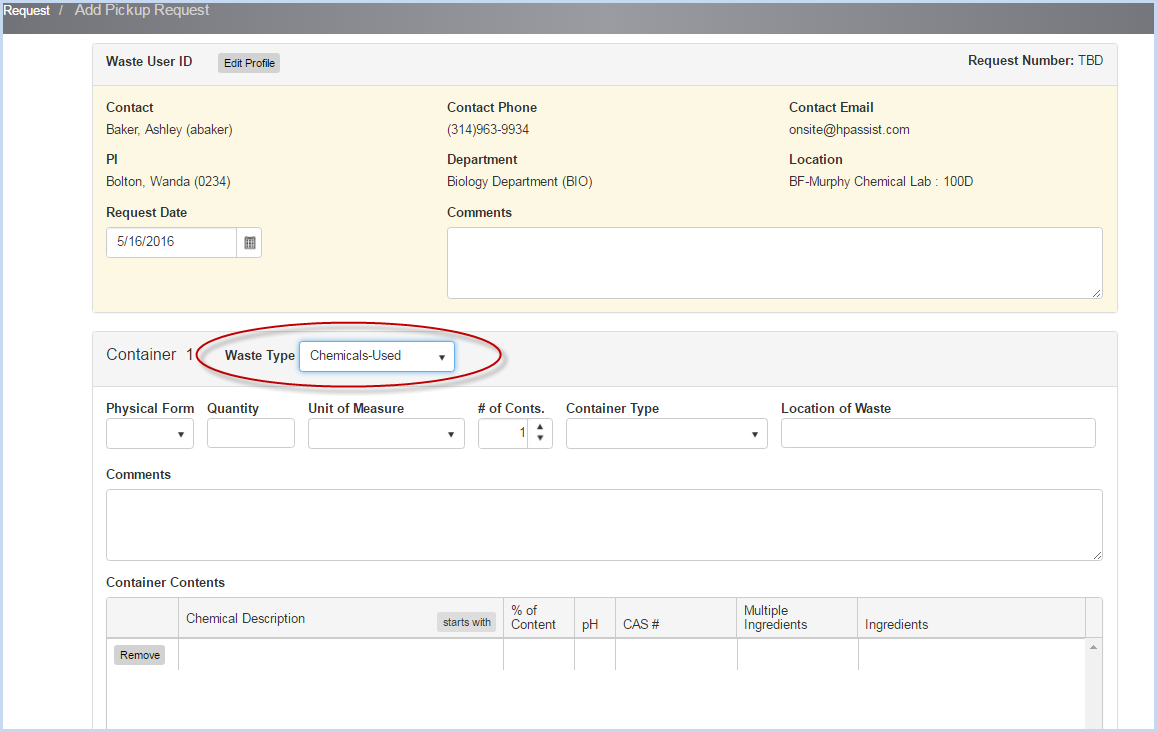
- Select the Physical Form from the dropdown.
- Enter the Quantity.
- Select the Unit of Measure from the dropdown.
- Enter the # of Contents.
- Select the Container Type from the dropdown.
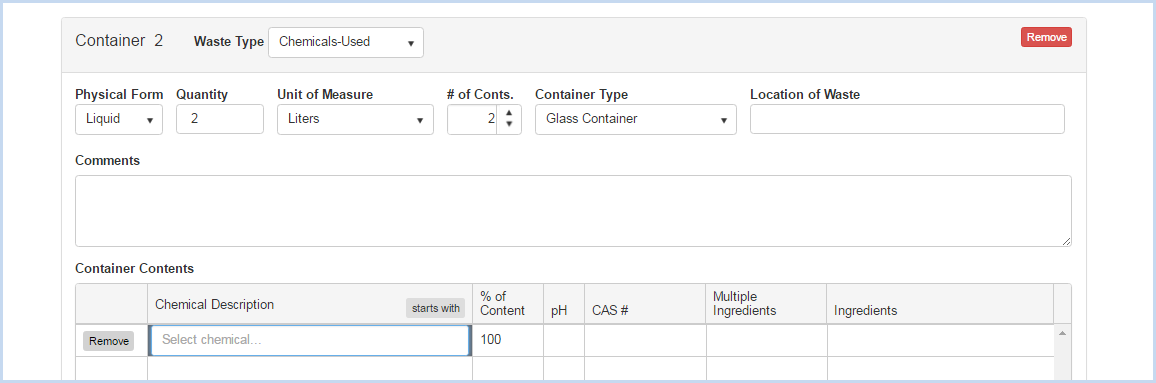
- Container Contents/Chemical Description: The [starts with] button will toggle to [contains] when clicked.

- Begin entering a description to search for the Chemical.
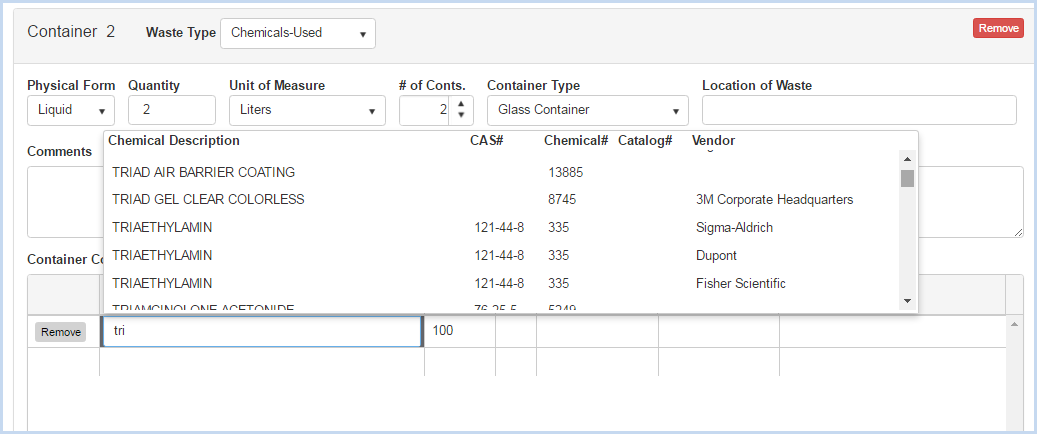
- Scroll through the list to find the chemical to add to the waste request and click to add. This list is from the Chemical Catalog and includes CAS#, Chemical #, Catalog #, and Vendor as applicable.
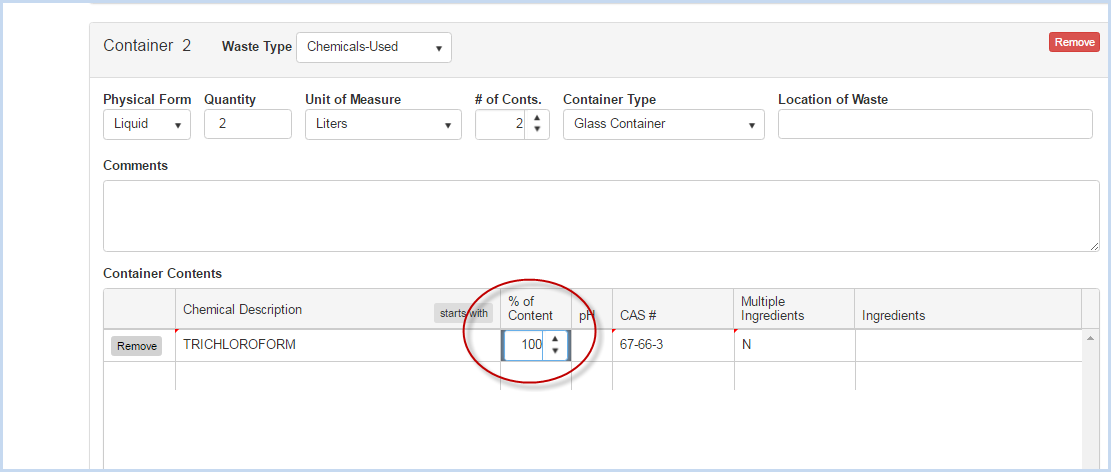
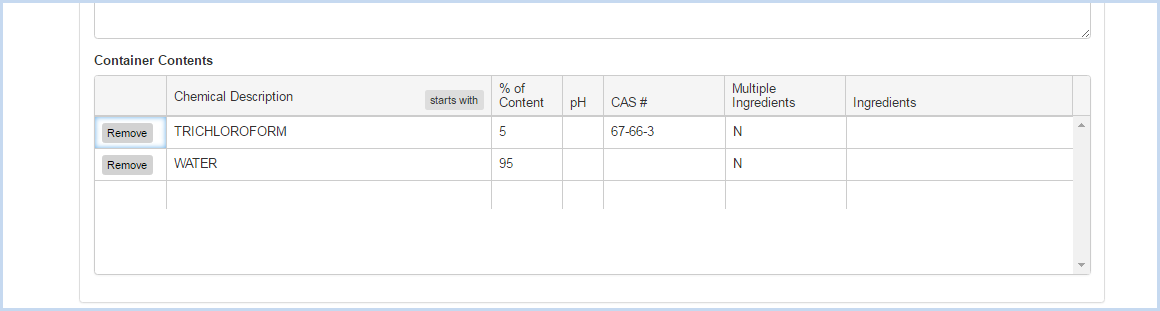
- Adjust the % of Content as needed, add any additional content items to total 100% as shown below.
- Click [Save] if the pick up request is complete, or click [Add] to add an additional item/container for pickup.
Radioactive Waste Type
- Select the Radioactive Waste Type from the dropdown list.
- Select the Physical Form from the dropdown.
- Enter the # of Conts.
- Select the Container Type from the dropdown list.
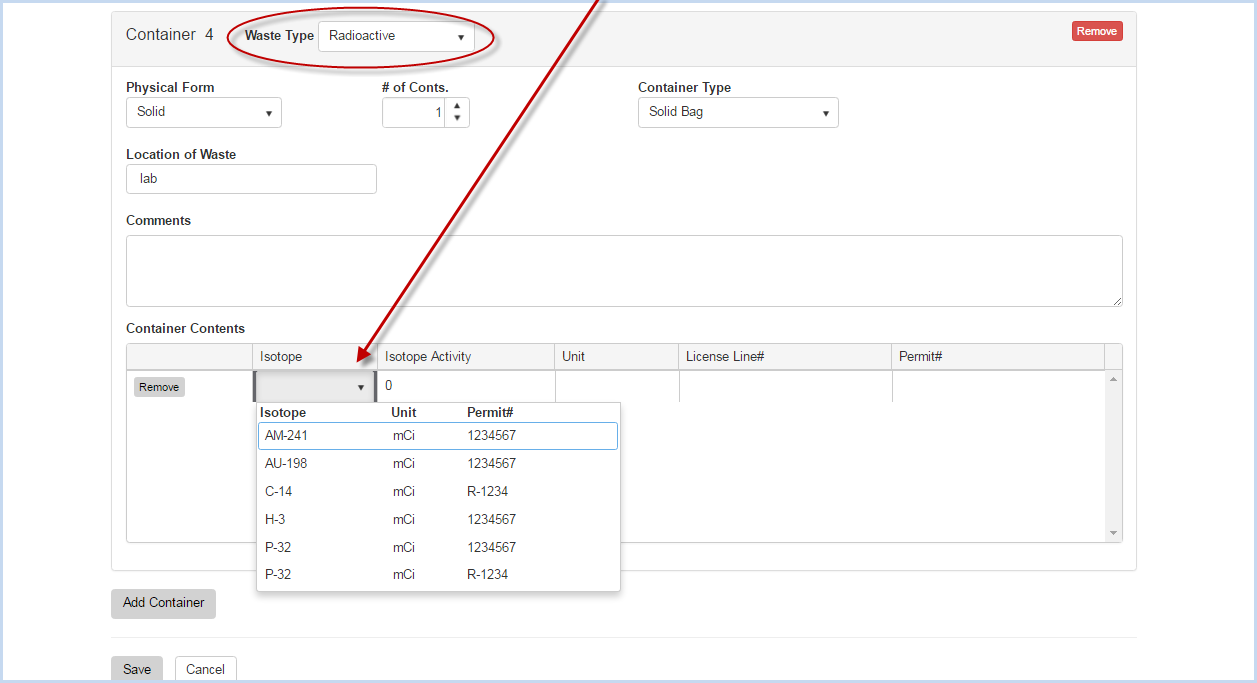
- Select the Isotope from the dropdown list.
- Enter the Isotope Activity.
- The Unit, License Line# and Permit # will auto-fill.

- Click [Save] to save the Waste Request, or [Add Container] to add an additional Container to the request.
Universal Waste Type
- Select the Universal Waste Type from the dropdown list.
- Enter the Location of Waste and any Comments as needed.
- Enter the Description of the universal waste item(s). in Container Contents.
- Enter any additional description row(s) for any other item(s) by clicking in the blank row for description and entering information.
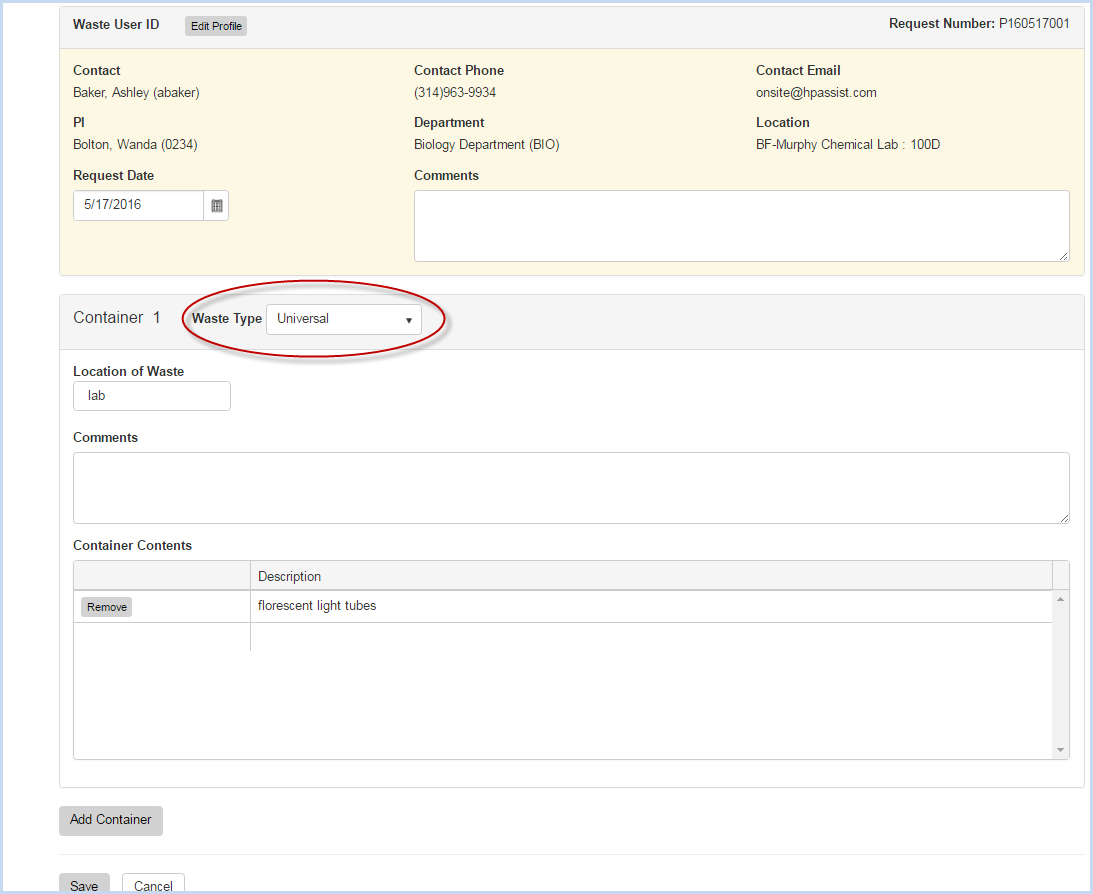
- Click [Save] to save the Waste Request, or [Add Container] to add an additional Container to the request.
Unknown Waste Type
- Select the Unknown Waste Type from the dropdown list.
- Enter the Location of Waste and any Comments
- Enter the Description waste item(s) in Container Contents.
- Enter any additional description row(s) for any other item(s) by clicking in the blank row for description and entering information.

- Click [Save] to save the Waste Request, or [Add Container] to add an additional container to the request.
- Click the [Remove] button to remove a container from a waste request.
- When removing a container, a Confirmation window will appear.

- Click [Yes] to remove the container, or [No] to cancel the removal.
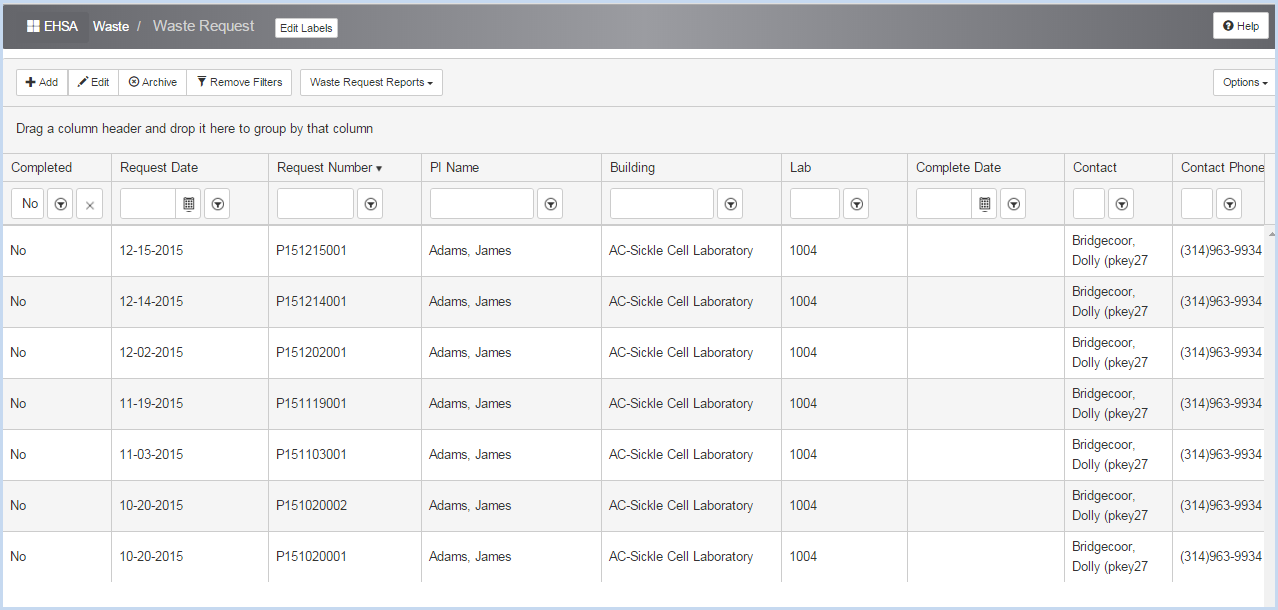
Editing an existing Waste Request
- Open the Waste Request screen. Use filters and column sorting to view and find Waste Pickup Requests for editing.
- Highlight a Waste Request and click [Edit] to modify.
- Make any edits or additions needed.
- When complete, click [Save] to save changes, or [Cancel] to discard any edits.
- Click the [Remove] button to remove a container from a waste request.
- When removing a container, a Confirmation window will appear.
- Click [Yes] to remove the container, or [No] to cancel the removal.