Ram Receipt
Ram Receipt
- Select the Procure icon from the Main Menu bar.
- Select Ram Receipt Entry from under [Procure].
- The Ram Procurement screen will open. Use group and filtering options to sort the list as needed.
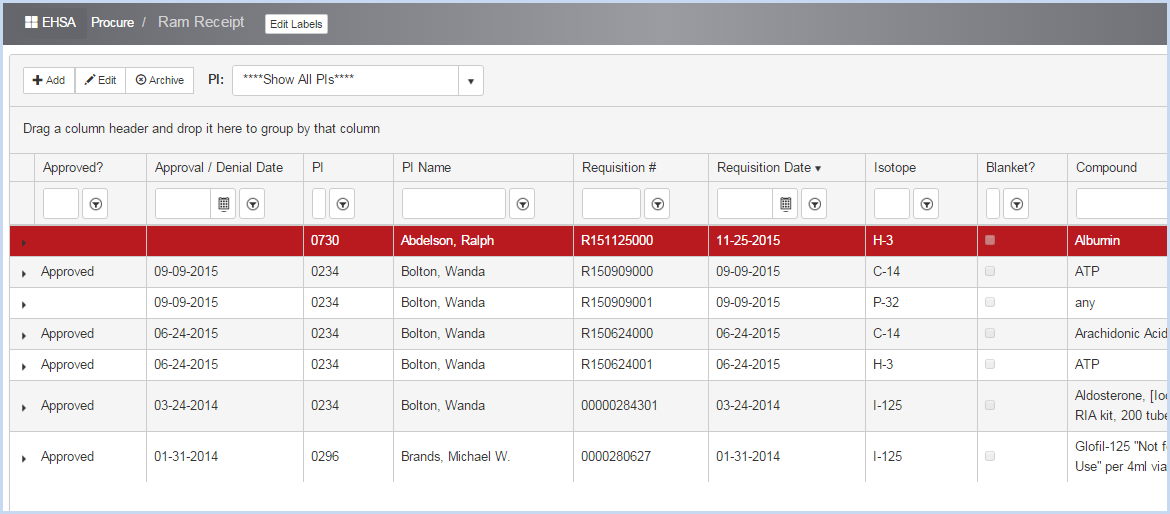
- Click the arrow beside an Approved requisition item to open the requisition and enter a Receipt Date and details.
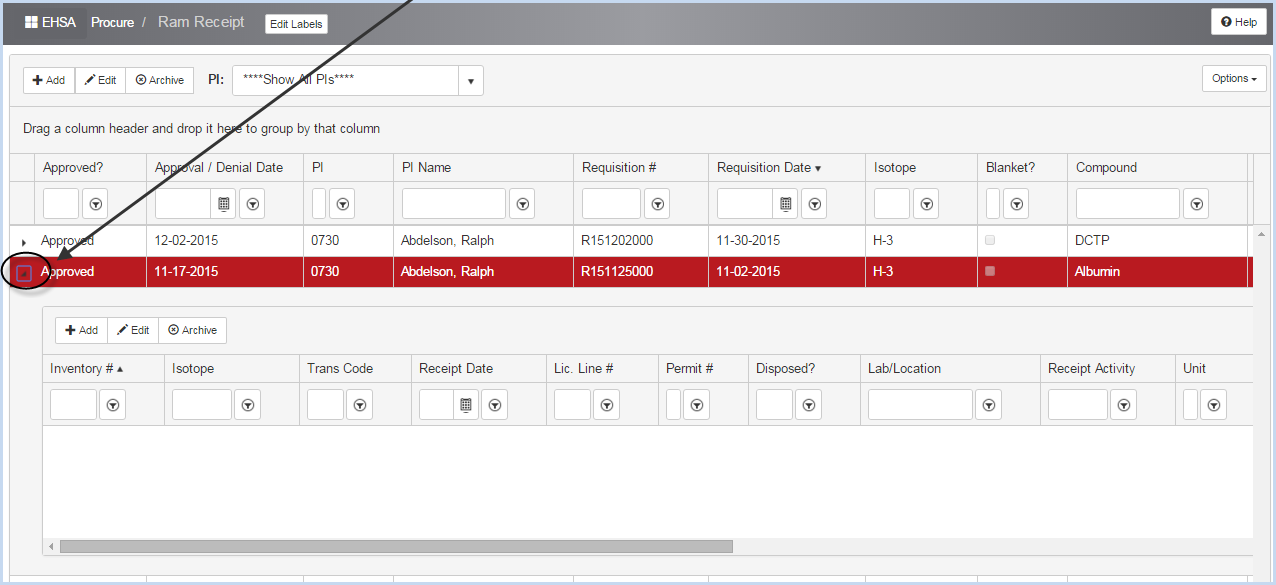
- Click [Add] a new receipt of the isotope. This opens the Add Ram Receipt screen.
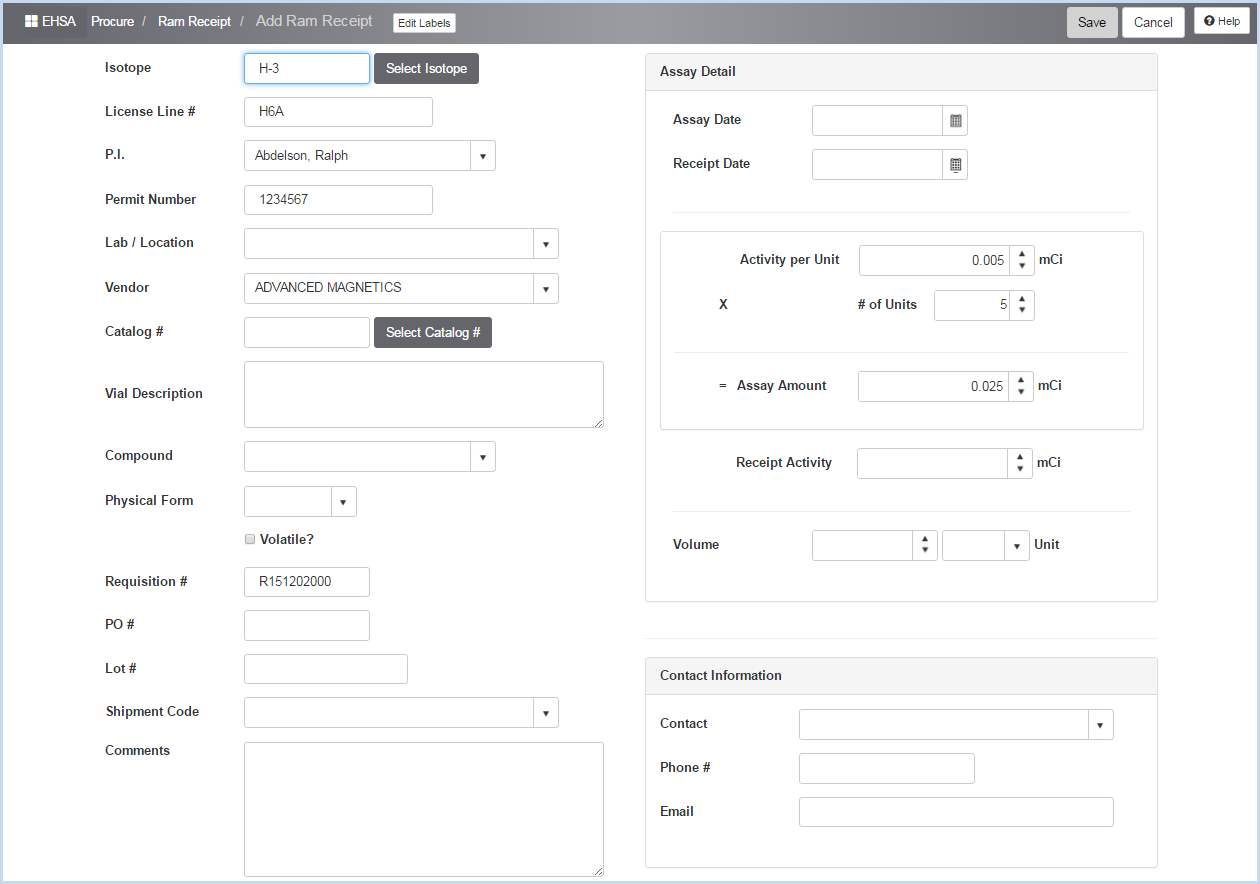
- Select the Lab/Location from the dropdown list of labs on the PI's permit.
- Select the Vendor if not already entered in the original requisition, or change if needed.
- Click the [Select Catalog #] button to choose from the list of the vendor's catalog numbers for the isotope.
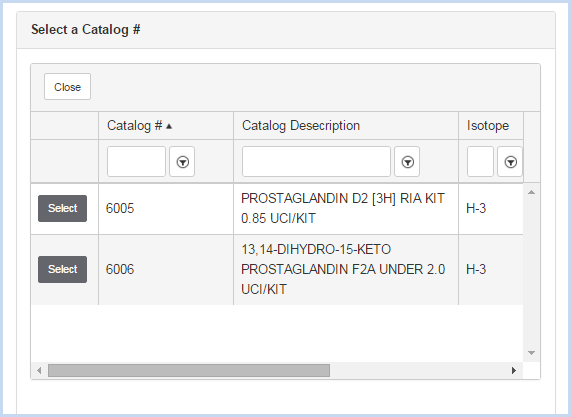
- Select an item if applicable, or click [Close] to close the selection box. This field is not required.
- Enter a Vial Description if needed or applicable.
- Select the Compound from the dropdown list
- Select the Physical Form from the dropdown list.
- Enter the PO # and Lot # as applicable.
- Select the Shipment Code from the dropdown list.
- Enter any Comments that may apply for the shipment.
Assay Detail section
- Enter the Assay Date and Receipt Date int the Assay Detail section in the upper right portion of the screen.
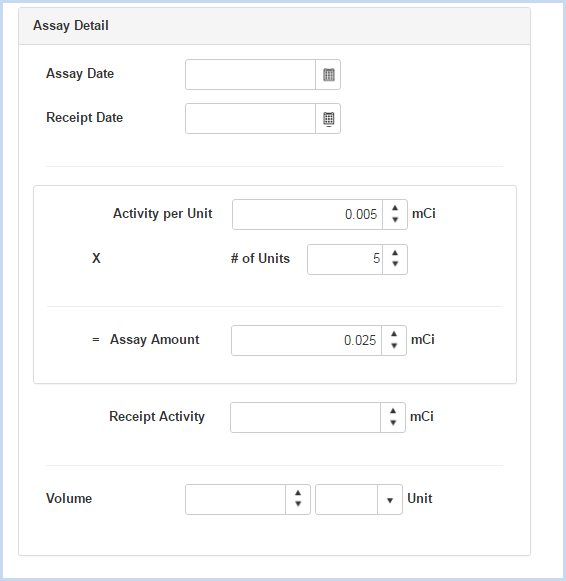
- Enter Assay Date, Receipt Date, Receipt Activity, Volume and Unit.
- Enter Contact Information as needed.
- Click [Save] to save entry, or [Cancel] to discard the entry/edit.
- Click the [Package Inspection] button to open the Ram Package Check-in screen shown below.
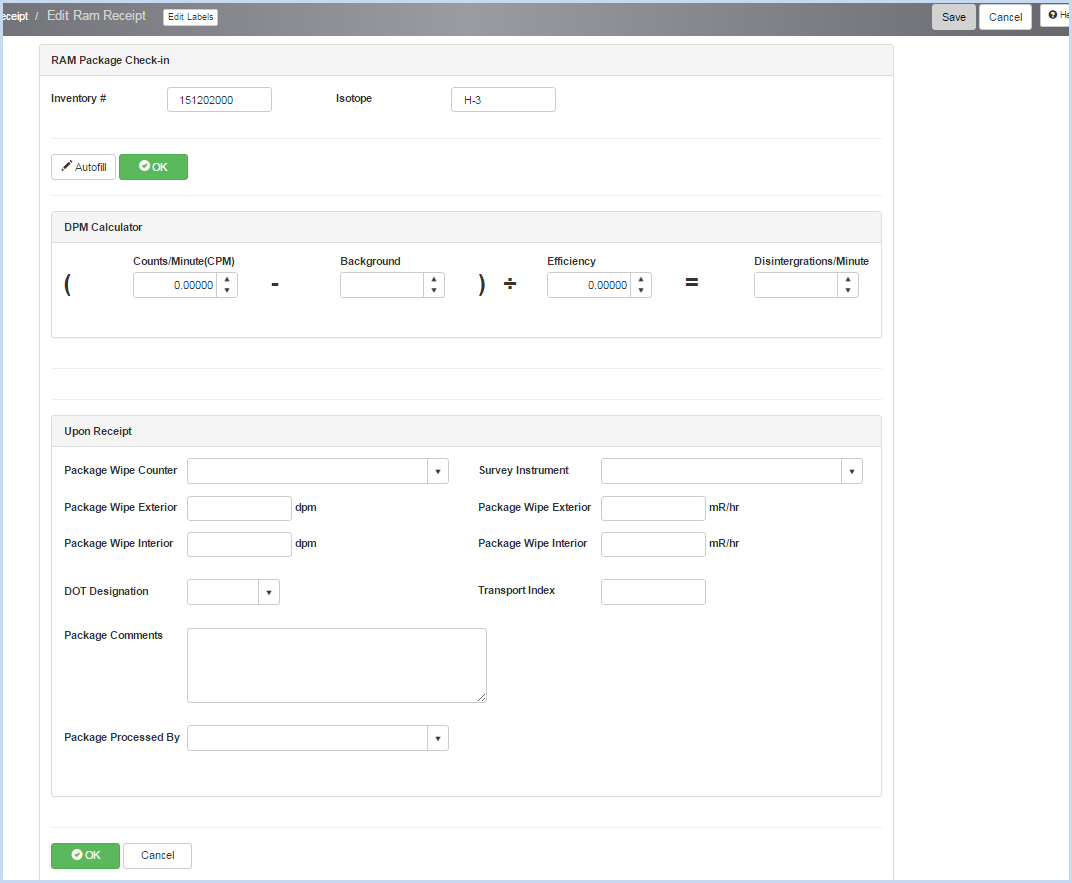
- Enter the DPM Calculator information.
Upon Receipt section
- Select the Package Wipe Counter and Survey Instrument from the the dropdown lists. The survey instruments available are marked "Use for Package Check-In" on the instrument record.
- Enter the Package Wipe Exterior and Package Wipe Interior information as applicable.
- Select the DOT Designation from the dropdown list.
- Enter the Transport Index if applicable.
- Enter any Package Comments.
- Select the Package Processed By from the dropdown list. The list is populated from the Inspectors.
- When entries are complete, click the [OK] button. The [Cancel] button will discard all entries/edits.
- Click the [Save] button to save all entries/edits. Click to [Cancel] button to discard entry/edit,