X-Ray Histories
X-Ray Histories
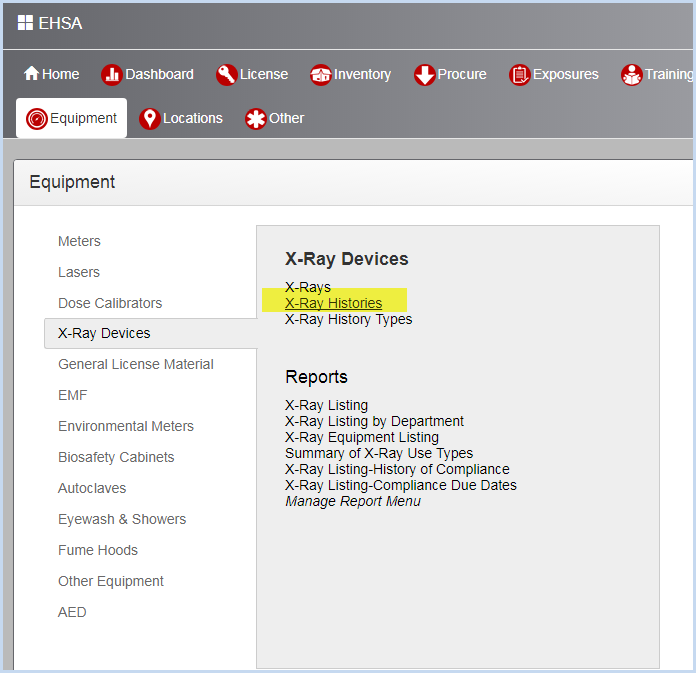
Select Equipment from the Main Menu bar. Select X-Rays Histories from the X-Ray Devices menu.
- This opens the X-Ray Histories listing screen. Use filters and column sorting to view and find X-Ray Histories for viewing or editing.
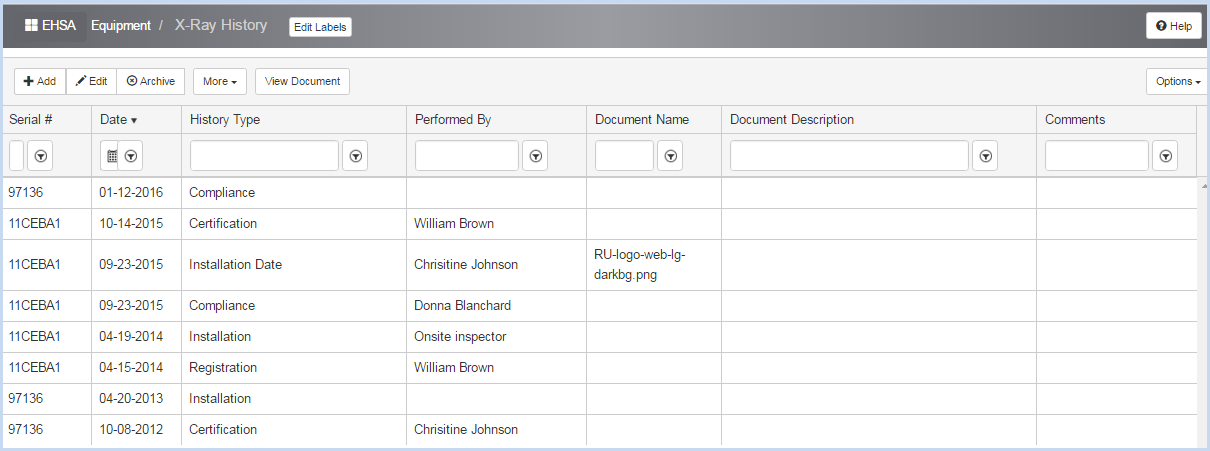
- Highlight an X-Ray history and click [Edit] to open an existing history record. Click [Add] to add a new history record.
- When adding a new history, the Serial # will default to the Serial # of the record that was highlighted when the user clicked on [Add].
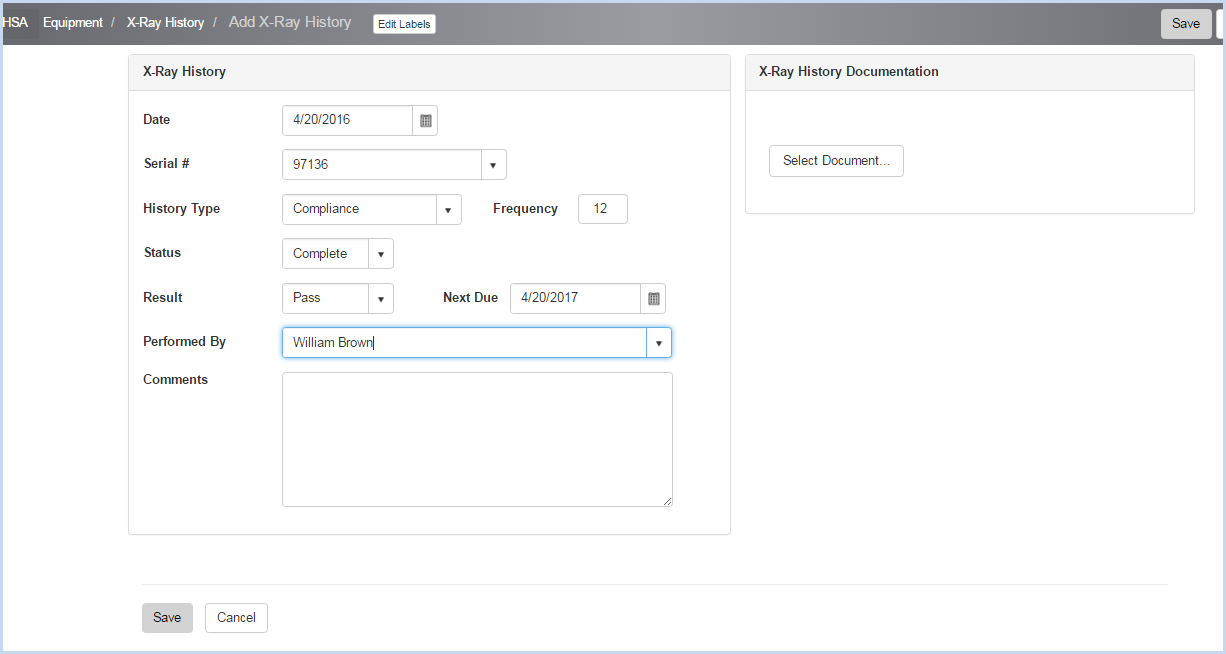
- Enter the Date for the procedure or select using the Calendar date picker option.
- Use dropdowns to select History Type and Status.
- For history types that have an associated Frequency, the field will display next to the history type. This is a display only field. The procedure's Next Due Date will populate using the frequency.
- Select Result and Performed By from the dropdown lists.
- Enter any Comments as needed.
- Click [Save] to save all entries, or click [Cancel] to discard entries/edits.
- X-Ray History Documentation - click [Select Document] button to navigate to the field to be attached.

- After selecting a document, enter the Document Description as needed.
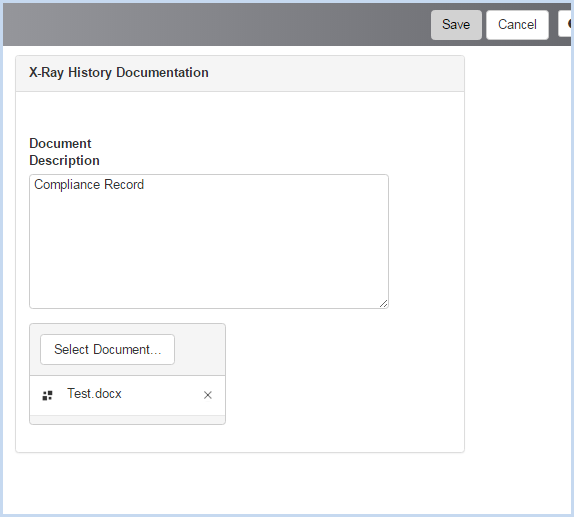
- Click [Save] to save all entries, or click [Cancel] to discard entries/edits.