X-Ray Add or Edit
X-Ray Add or Edit
Click [Add] to add a new X-Ray, or highlight a row and click [Edit] to edit an x-ray record.
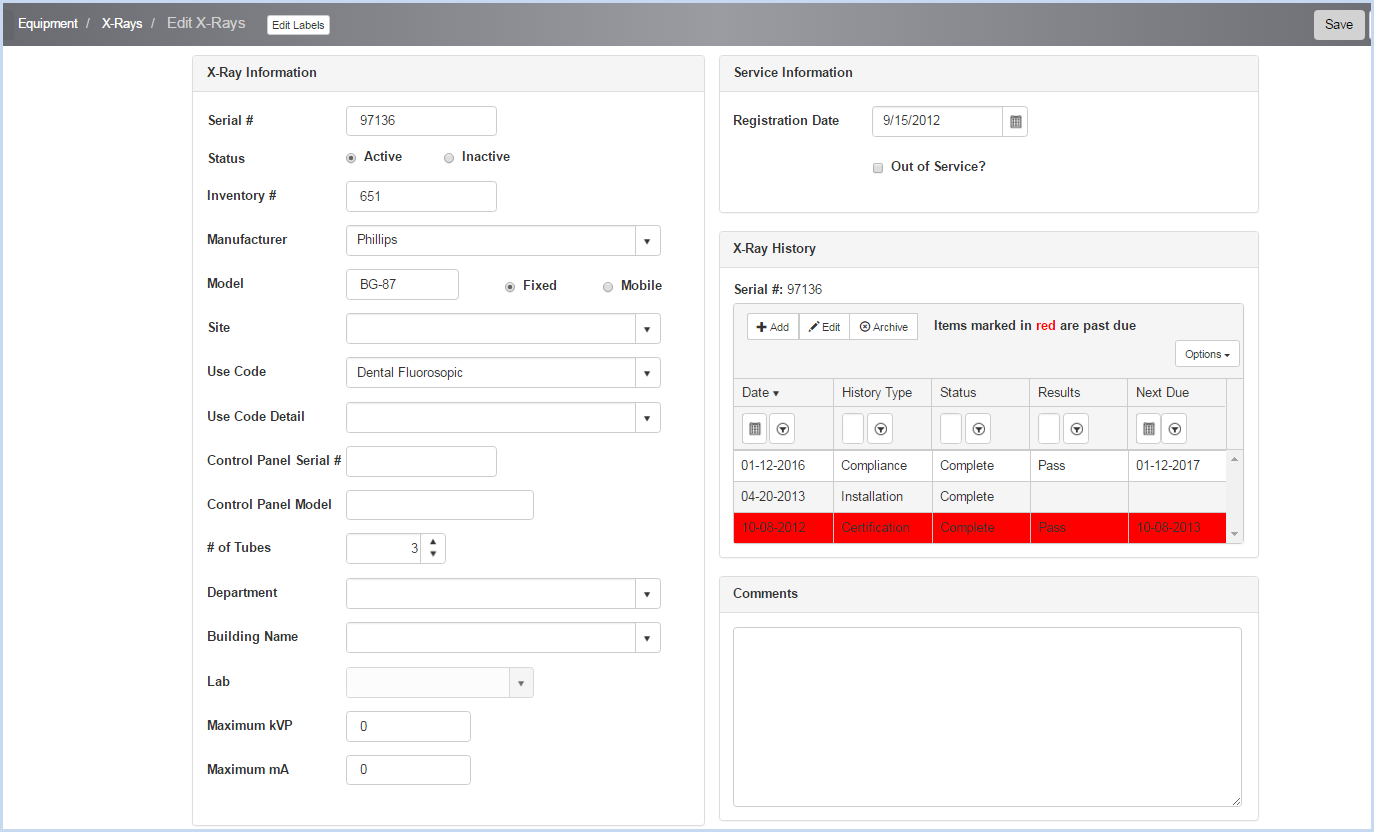
- Enter the Serial #. This field is required and is a unique identifier.
- Select Active or Inactive Status radio button.
- Enter the Inventory #.
- Select the Manufacturer from the dropdown list.
- Enter the Model.
- Select the Fixed or Mobile radio button.
- Select Site, Use Code, and Use Code Detail from the dropdown lists.
- Enter the Control Panel Serial #.
- Enter the Control Panel Model.
- Select/enter the # of Tubes.
- Select the Department, Building, and Lab from the dropdown lists.
- Enter the Maximum kVP and Maximum mA.
Service Information Section
- Enter or use the date picker to select the Registration Date.
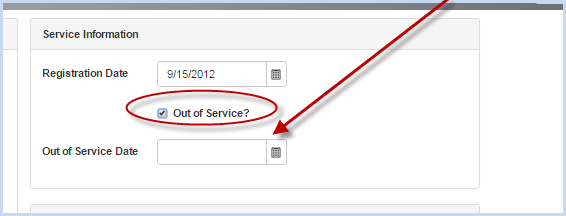
- Click "Out of Service" if out of service - this will open the Out of Service Date field for entry.
- X-Ray Histories can accessed to add or edit from the X-Ray History preview window, or from the X-Ray menu under Equipment.
- Enter any comments as needed in the Comments memo field.
- Scroll down to view the Custodians and X-Ray Photos and Files sections.
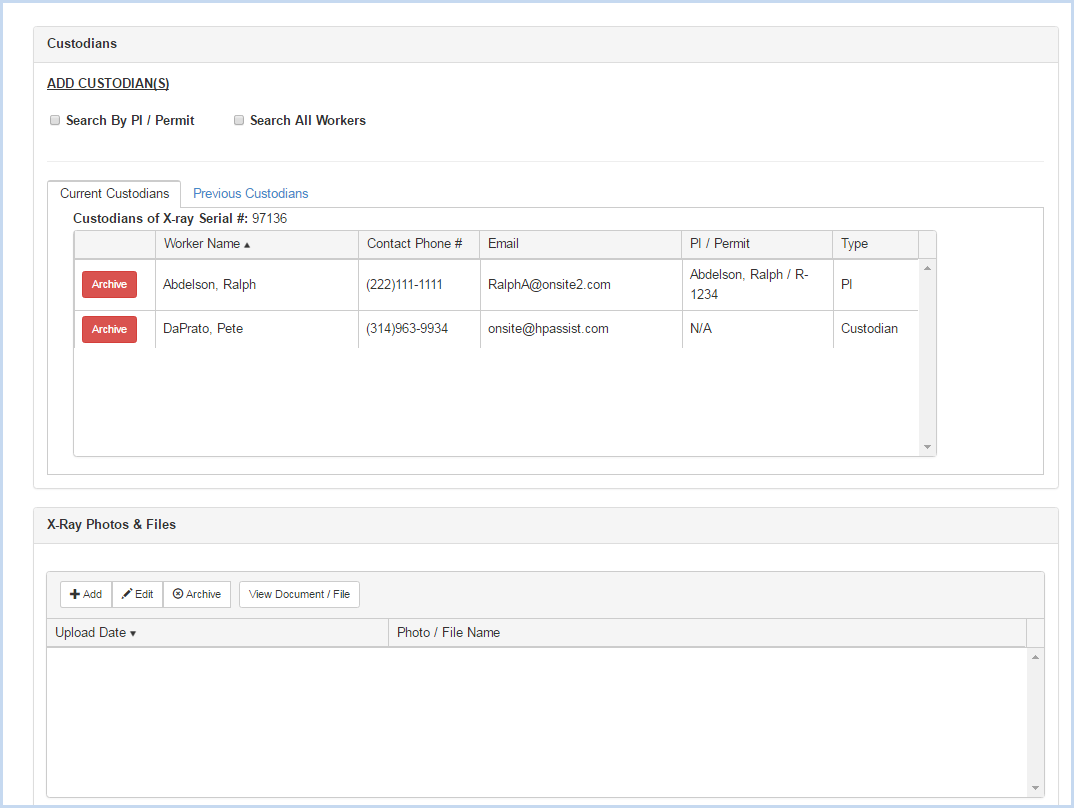
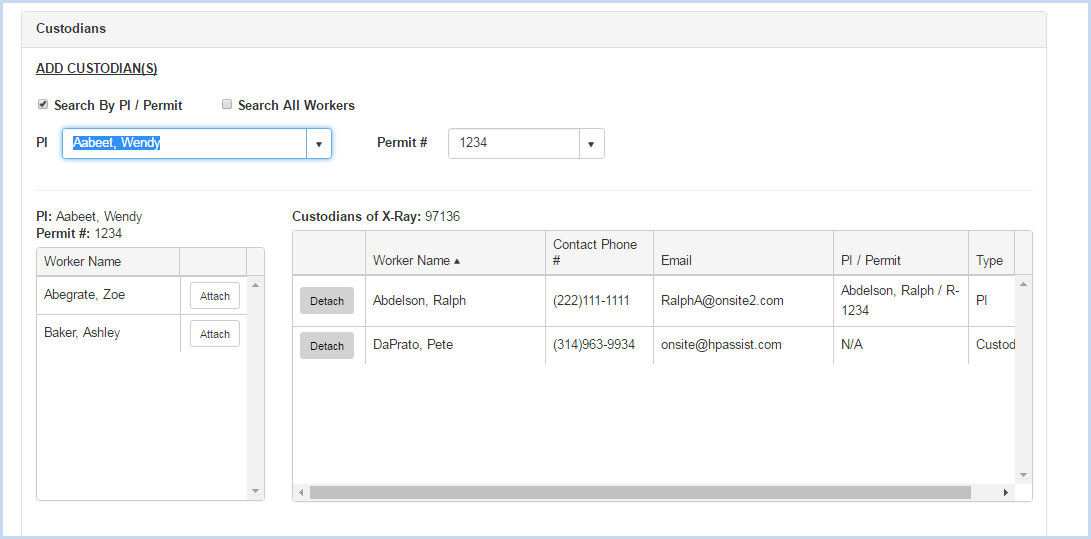
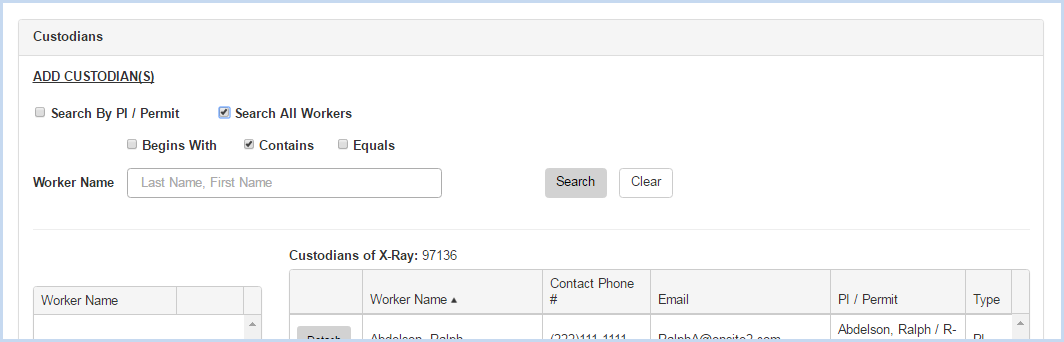
Adding Custodians
- Click the radio button for Search by PI/Permit or Search All Workers to search for and add a custodian.
- Search by PI/Permit is shown below. Select the PI from the dropdown list.
- After the PI is selected, choose one of the Permits attached the PI from the Permit # dropdown.
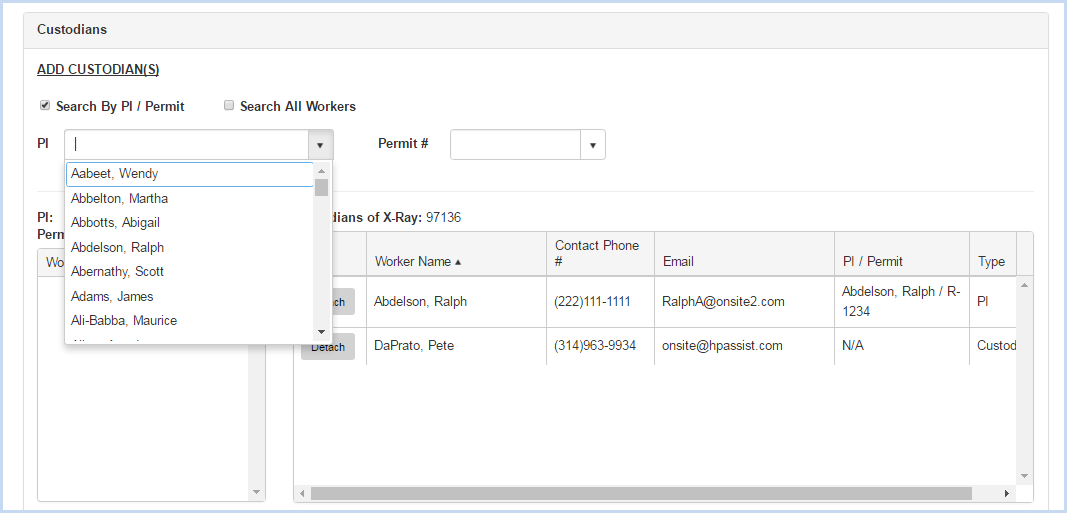
- After PI and Permit are selected, the list of Workers attached to the permit will be available for attaching.
- Click on the [Attach] button to attach each custodian as needed.
- When the "Search All Workers" option is chosen, enter filter criteria (Begins With, etc.) and click the [Search] button.
- Click [Save] to save the entries, or [Cancel] to discard any entry/edit and return to the previous screen.