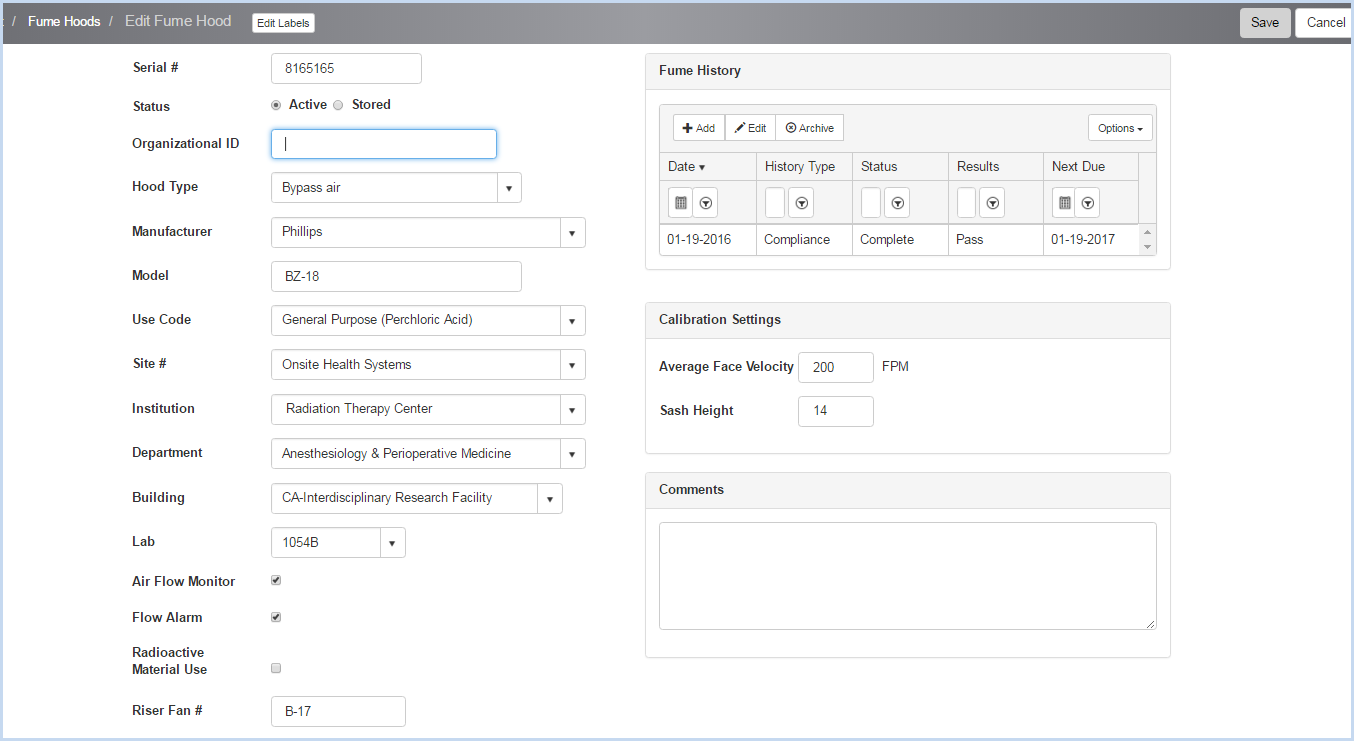
Click [Add] to add a new Fume Hood, or [Edit] to modify an existing Fume Hood. This opens the Fume Hood entry/edit screen. The upper portion of the screen is shown.
Enter the Serial #. This field is required and is a unique identifier.
Status - Select Active or Stored status radio button.
Enter the Organizational ID as needed.
Select the Hood Type and Manufacturer from the dropdown lists.
Enter the Model.
Select the Use Code from the dropdown.
Select the Site #, Institution, Department, Building, and Lab from the dropdown lists.
Check boxes for Air Flow Monitor, Flow Alarm and Radioactive Material Use as applicable.
Enter the Riser Fan #.
Fume Hood History entry/edit can be accessed by clicking [Add] to add a history, or highlighting a record and clicking [Edit].
Calibration Settings - Enter the Average Face Velocity (FPM) and Sash Height.
Enter any Comments for the Fume Hood.
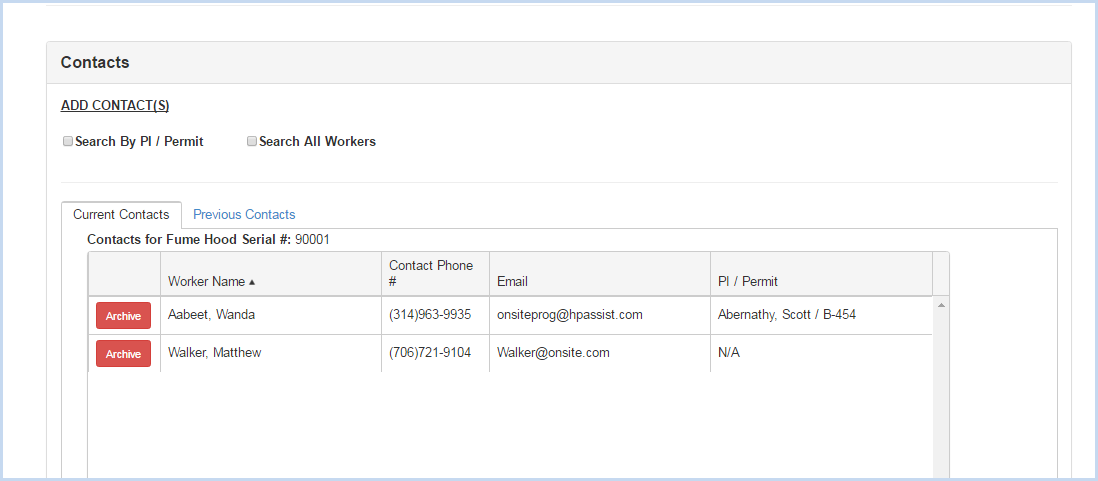
Contacts - Scroll down to view the Fume Hood Contacts.
Adding Contacts
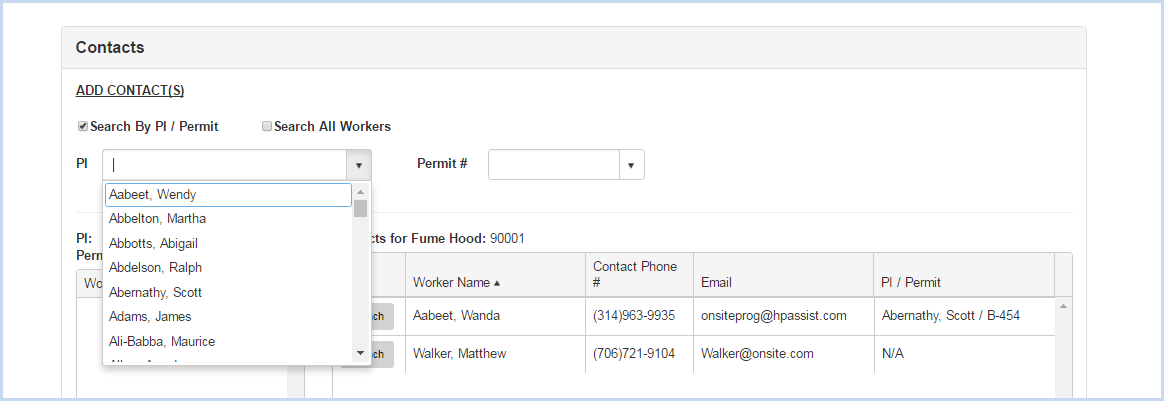
Click the radio button for "Search by PI/Permit" or "Search All Workers" to search for and add a custodian.
Search by PI/Permit is shown below. Select the PI from the dropdown list.
After the PI is selected, choose one of the Permits attached to the PI from the Permit # dropdown.
After PI and Permit are selected, the list of Workers attached to the permit will be available for attaching.
Click on the [Attach] button to attach each contact as needed.
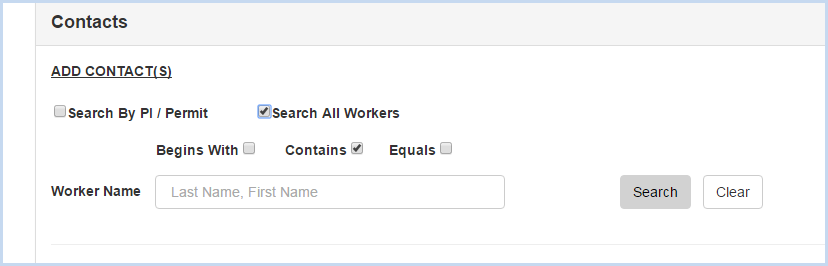
When the "Search All Workers" option is chosen, enter filter criteria (Begins WIth, etc.) and click the [Search] button.
Click [Save] to save the entries, or [Cancel] to discard any entry/edit and return to the previous screen.