Building Edit
Building Edit
Select Locations from the Main Menu bar. Select Buildings & Labs from the Locations menu.
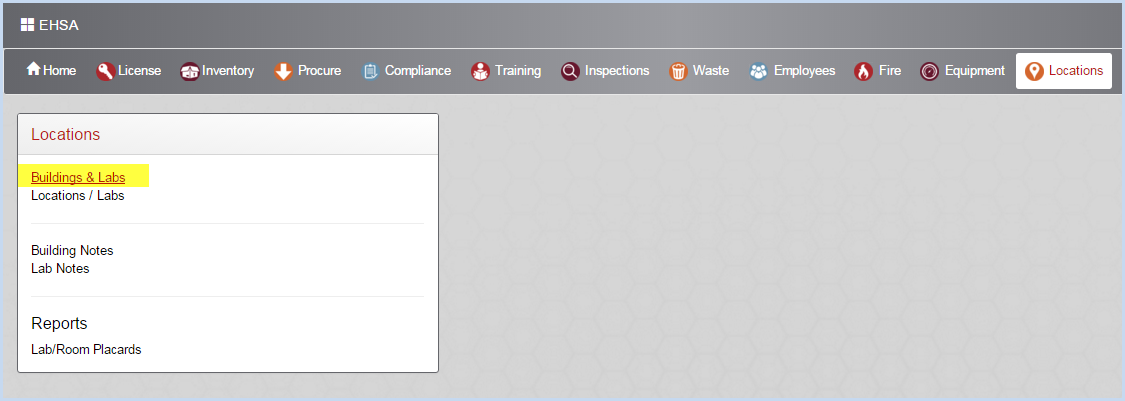
- This opens the Building List screen. Use filters and column sorting to view and find Buildings for viewing data and editing

- Click [Add] or [Edit] to add or modify Building information fields in the screen below.
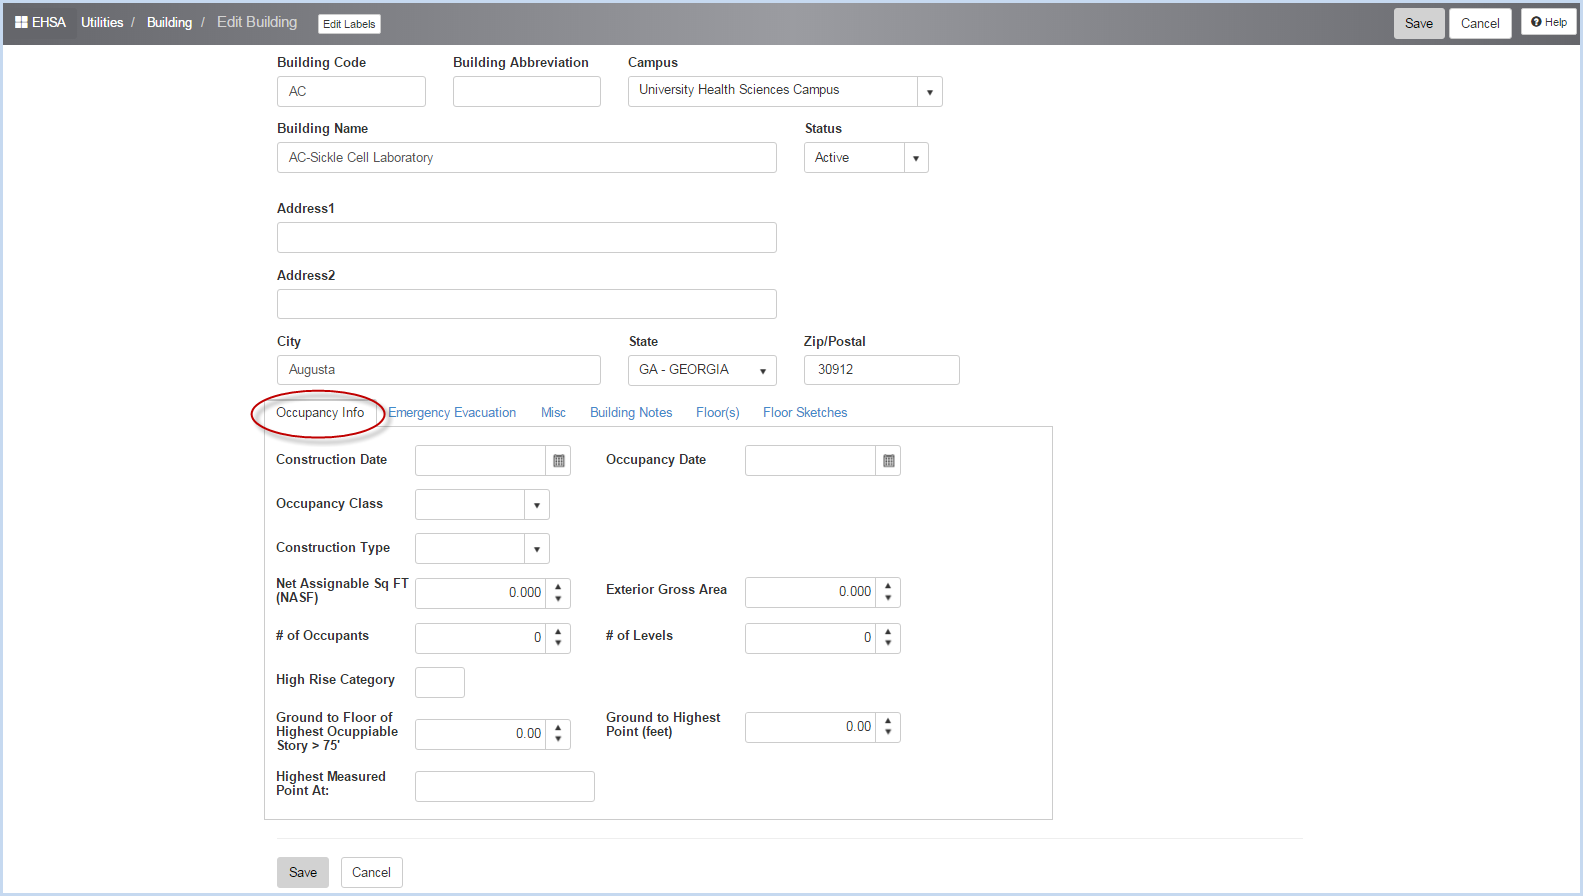
- Enter the Building Code, Building Abbreviation (if needed) and Building Name.
- Select the Campus from the dropdown list.
- Enter the Address information.
- Tabs for Occupancy Info, Emergency Evacuation, Misc (Miscellaneous), Building Notes, Floor(s), and Floor Sketches are found below the basic addresss information.
- Select each tab to view or modify data as needed.
- The view is set to default to the first tab, Occupancy Info. The font for the selected tab will be black, as circled in the screen above.
- Enter the Occupancy Info as needed in the fields below.

- Select the Emergency Evacuation tab.
- Enter the Primary Assembly Area and Alternate Assembly Area information as needed.

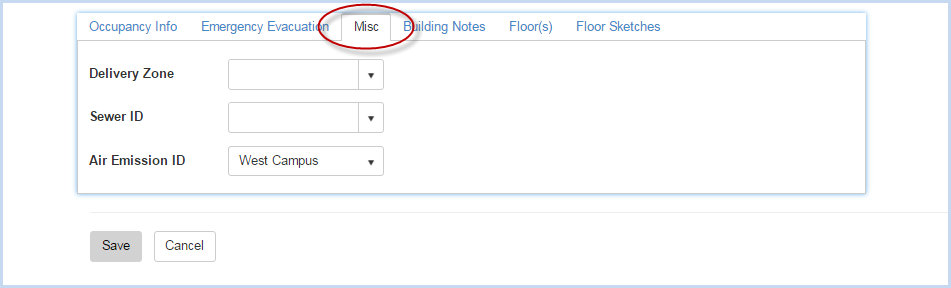
- Select the Misc tab.
- Select the Delivery Zone, Sewer ID and Air Emission ID from the dropdown lists.
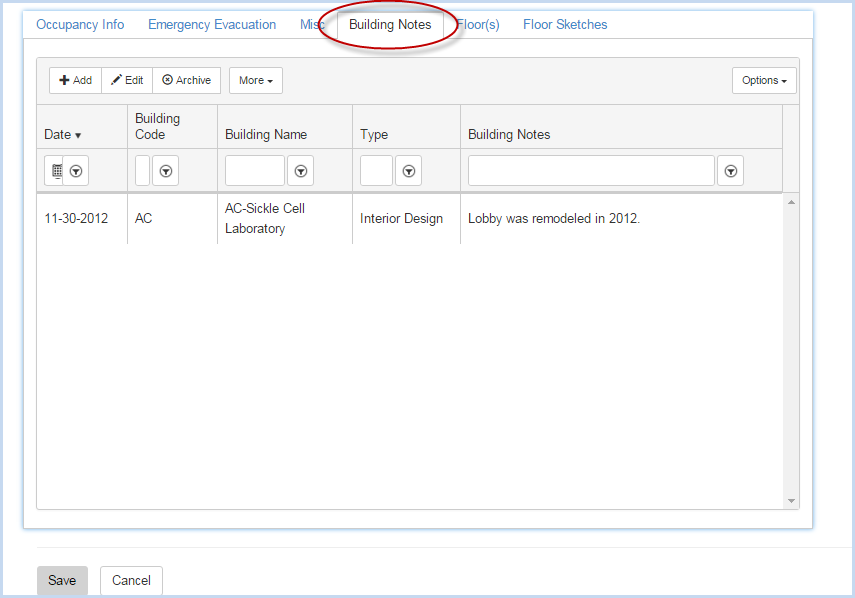
- Select the Building Notes tab.
- Click [Add] to add a building note, or highlight and [Edit] to modify an existing note.
- The Building Notes Edit screen is shown below.
- Enter the Date or use Date Picker Calender to select.
- The Building will default to the current building, however, you can use the dropdown to select a different building for the note.
- Select the Note Type from the dropdown.
- Enter/edit the Building Notes as applicable.
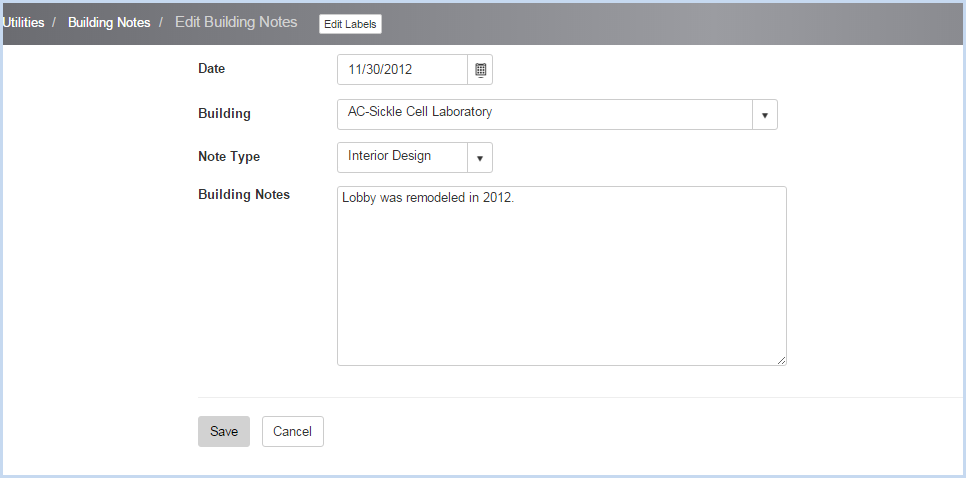
- Click [Save] to save the note, or [Cancel] to discard the entry/edit.
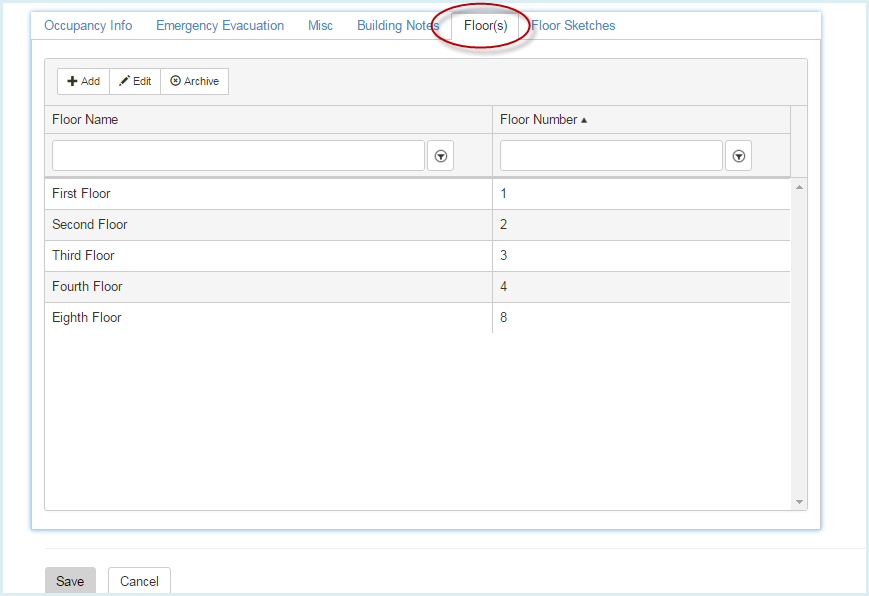
- Select the Floors tab.
- Click [Add] to add a floor, or highlight a record and click [Edit] to modify floor information
- This opens an Editing Floor window above the floors listing as shown below.
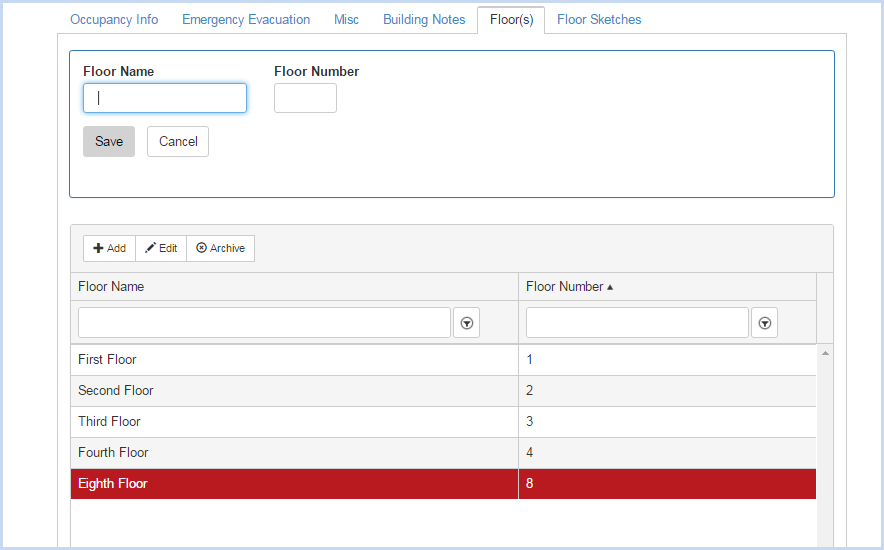
- Enter the Floor Name and Floor Number as needed, then click [Save] to save the entry. Click [Cancel] to discard the edit and close the Floor entry window.
- Highlight and double click on a floor row to edit that floor.
- Highlight a row and click the [Archive] button to delete a floor.
- This opens a Confirmation pop-up window.
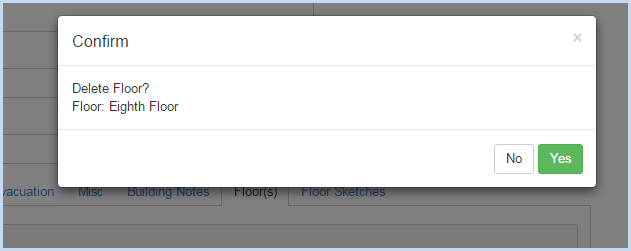
- Click [Yes] to delete the floor, or [No] to cancel the deletion.
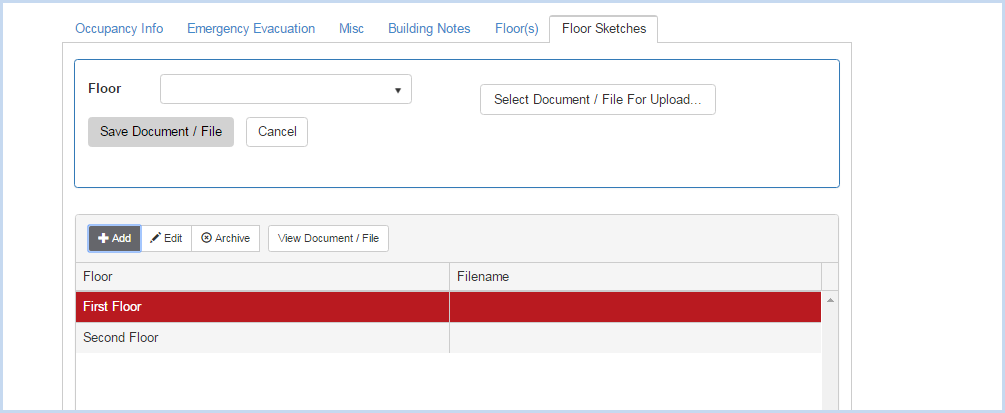
- Select the Floor Sketches tab.
- Click [Add] to add a floor sketch.

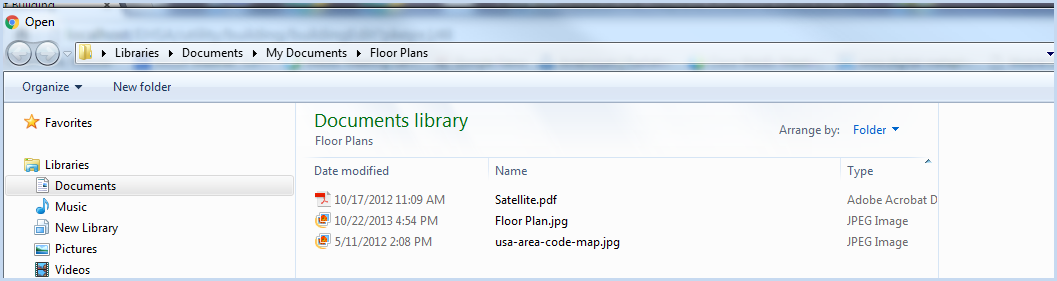
- This will open the Floor Sketches Document selection/upload box. Click the [Select Document/File for Upload] button.
- Navigate to the file location and double-click on the file to add.
- The file is shown in the upload box. Select the Floor for the attachment from the dropdown list.
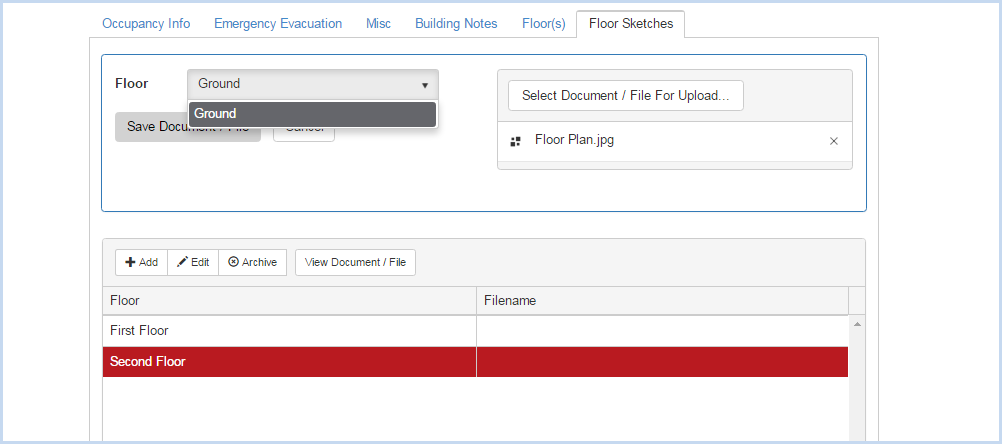
- Click [Save] to save the attachment, or [Cancel] to close without attaching the document.
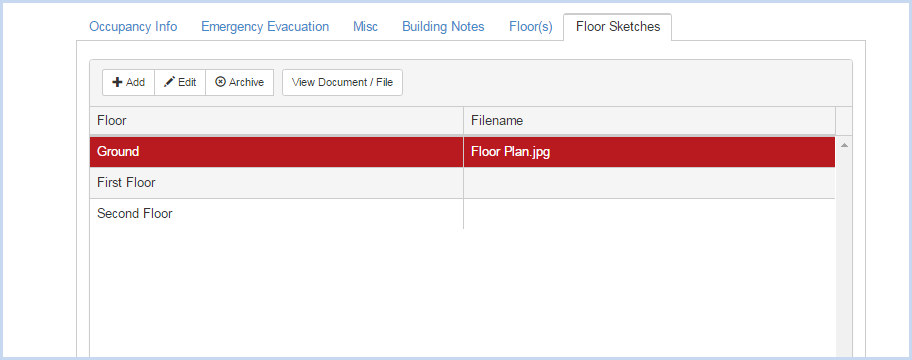
- The attached file is listed. Click [View Document/File] to view the attachment.
- Highlight an file row and click [Archive] to delete an attachment.
- A confirmation pop-up box will appear.

- Click [Yes] to confirm and delete the document, or [No] to cancel the deletion.