Quick Isotope Entry
Inventory - Ram Inventory - Quick Isotope Entry
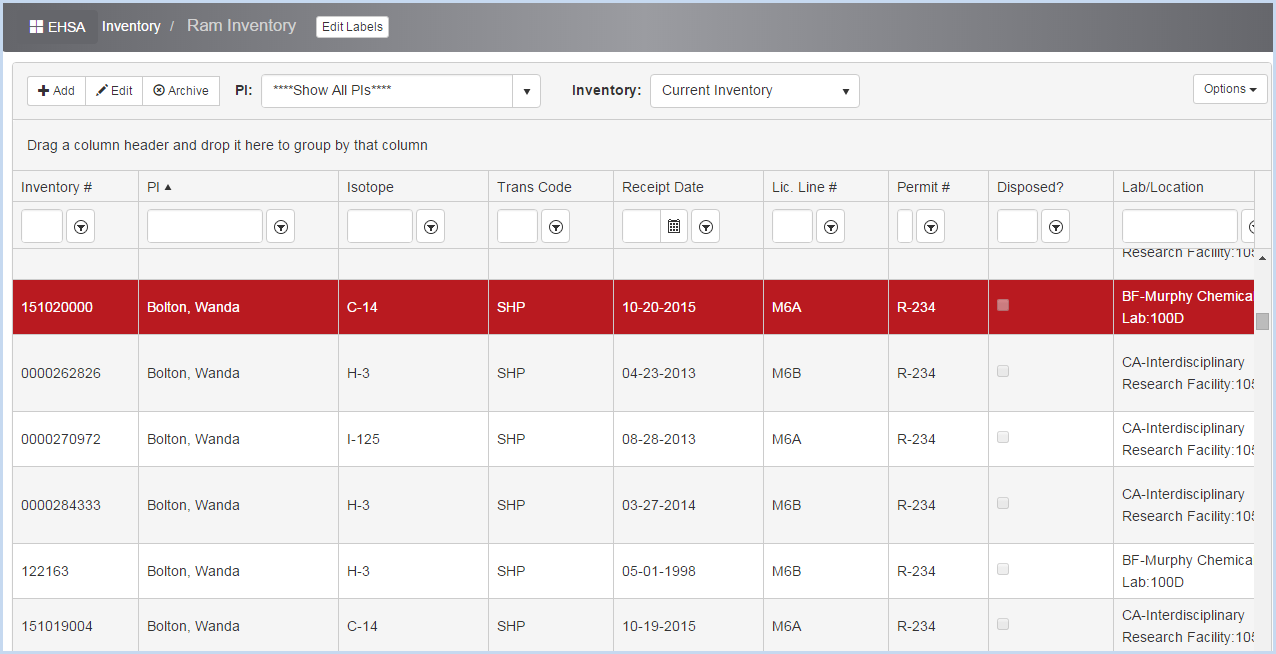
Users can view, add, edit or delete Ram Inventory from a PI in this screen. Inventory Transfers from one PI to another can also be made on this screen.
- Select the Inventory icon from the Main Menu bar.
- Select Quick Isotope Entry from under [RAM Inventory].

- The Ram Inventory screen shows a list of all Ram Inventory items. Use sorts (click on header row column), grouping, and filters to sort or view the list by any column (PI, Isotope, etc.). The default view is "Show All PIs". Select an individual PI from the dropdown list to view a single PI's inventory. The Inventory dropdown allows the user to view "Current Inventory" or "Disposed Inventory". The default view is Current Inventory.
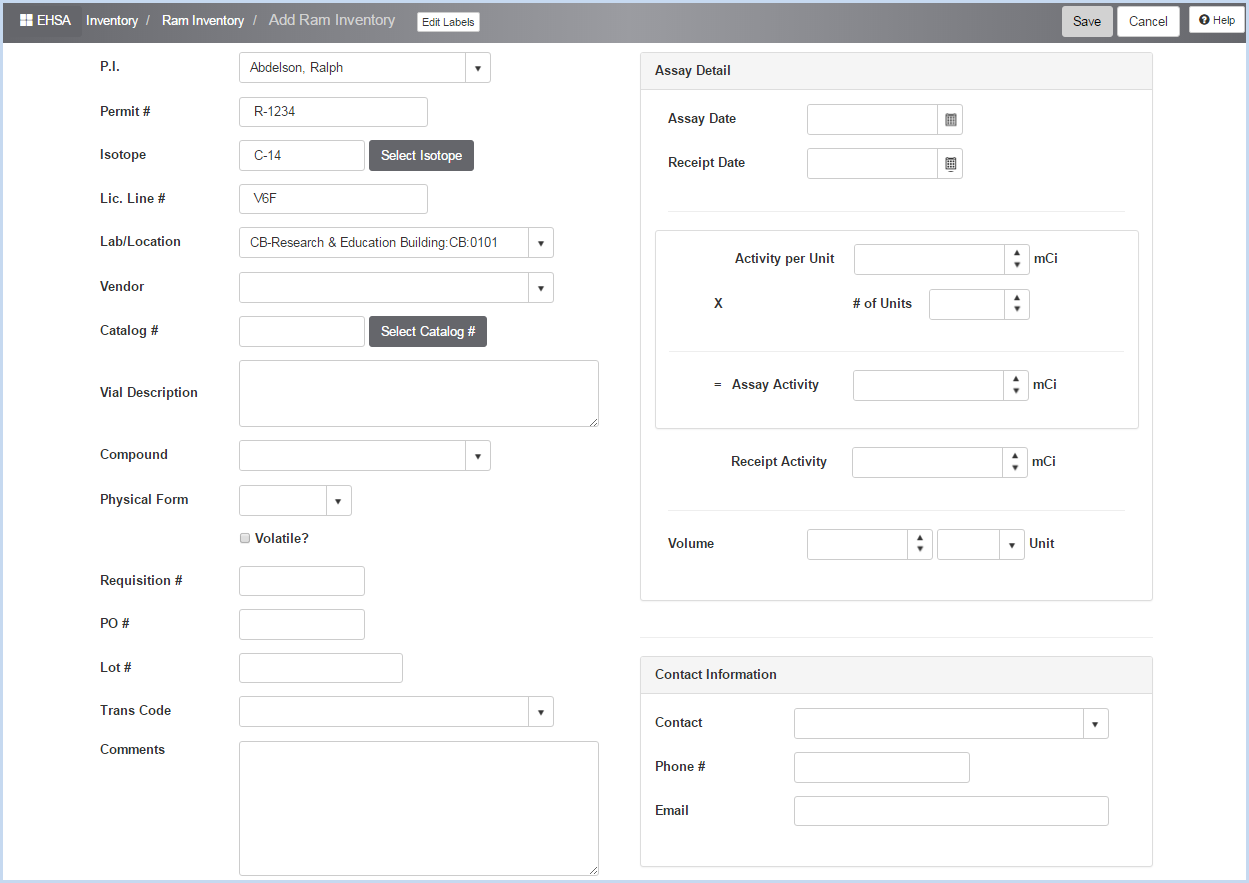
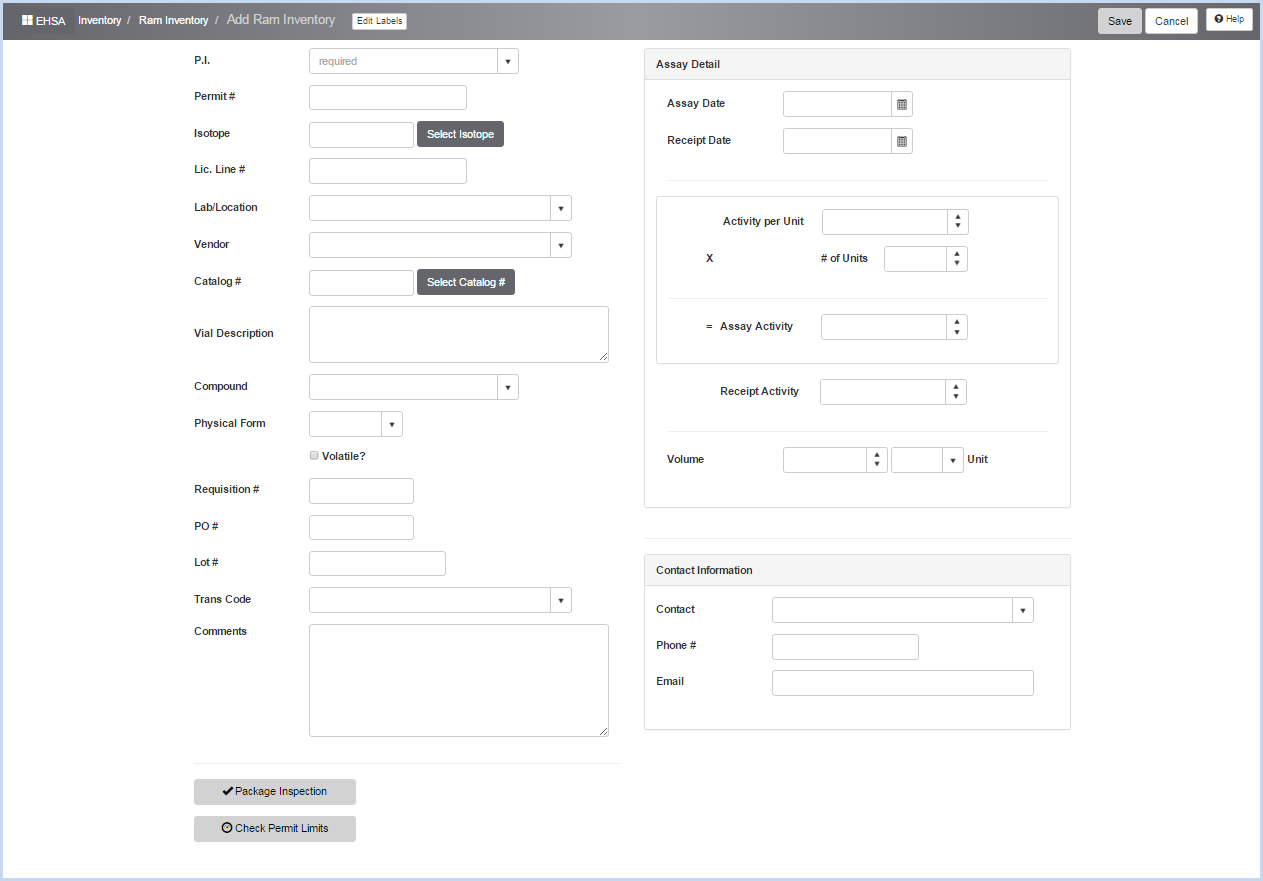
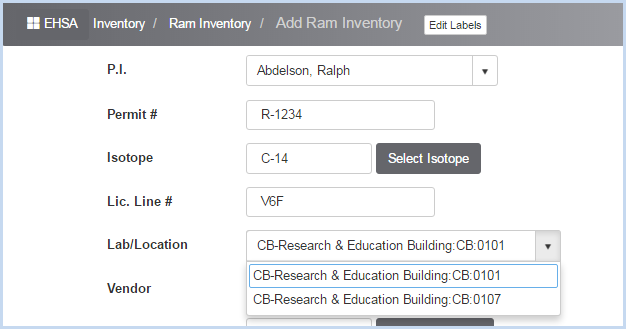
- Click [Add] to add a Ram Inventory item, or [Edit] to modify an item. This opens the Ram Inventory Edit screen shown below.
- Select the PI from the dropdown list to begin.
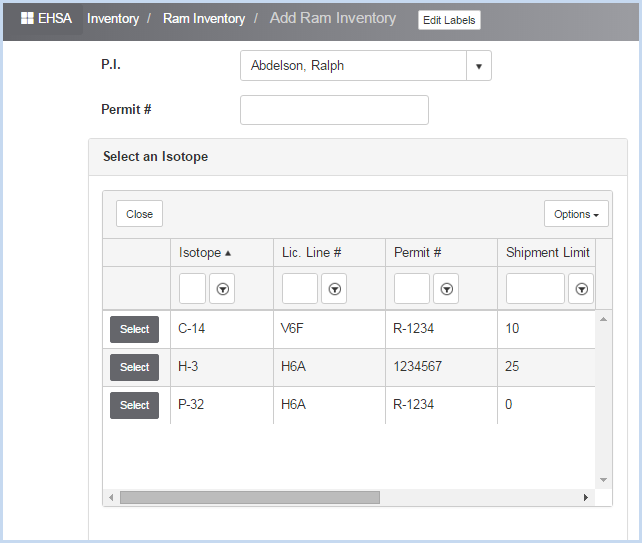
- Next, click the [Select Isotope] button to bring up the list of licensed isotopes for the selected PI. If the Isotope is not listed, go the the PI Ram Permit and add the Isotope.
- Click the [Select] button beside the Isotope you want to add.
- Next, select the Lab/Location from the labs listed on the PI's permit.
- Continue entering the Ram Inventory Fields as applicable.