PI & Permit Information
PI Information
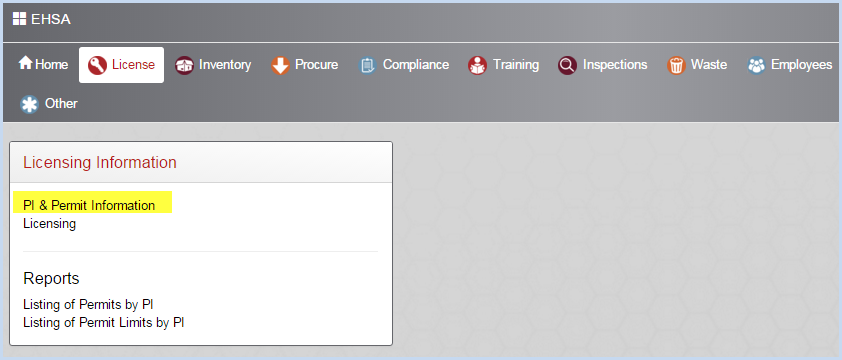
Select License from the Main Menu bar.
Select PI & Permit Information from the Licensing Information menu.
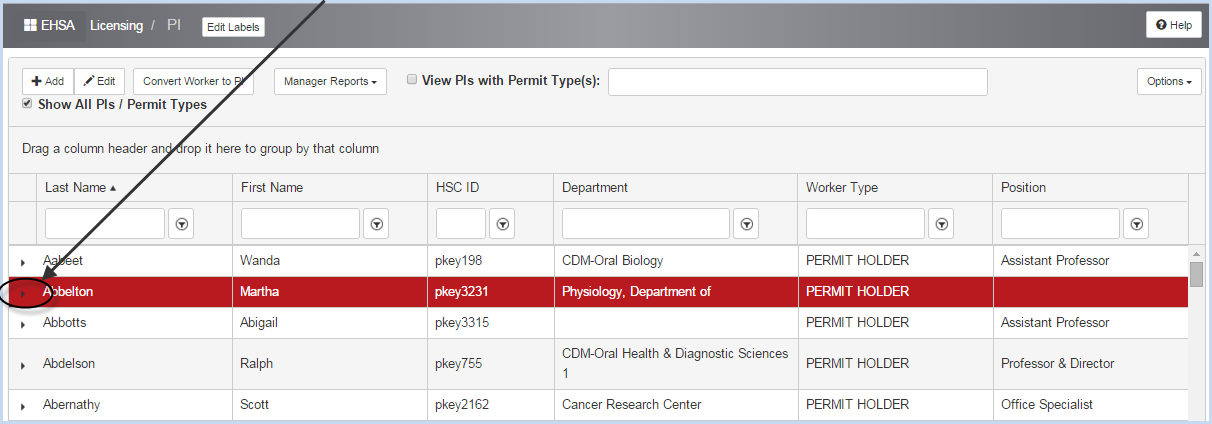
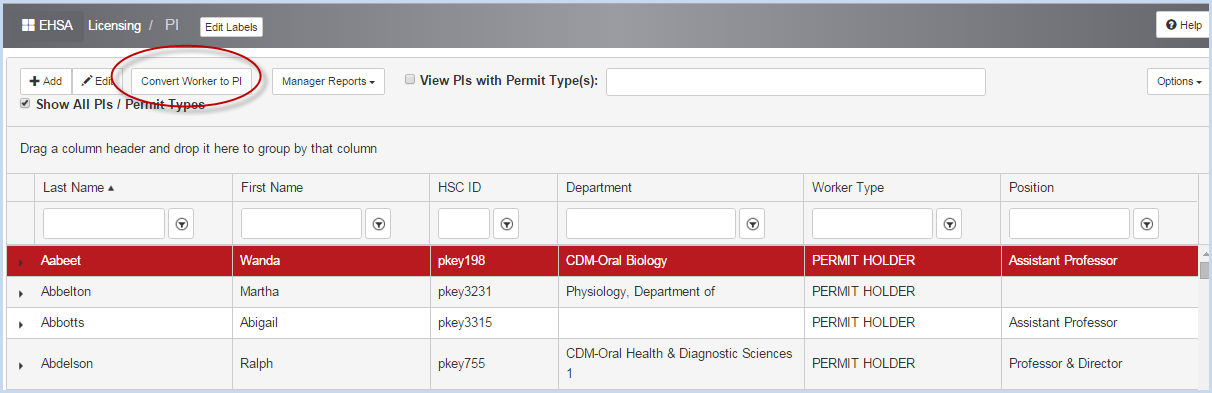
- This opens the PI List screen shown below.
- Click the arrow beside a highlight PI to open the PI's permit view window.
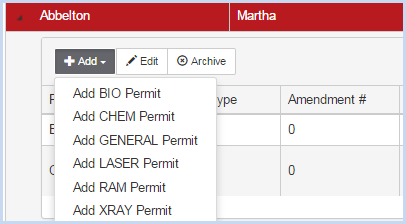
- Click [Add] to add a permit. To edit a permit, highlight the permit and click [Edit]. Click [Archive] to archive the permit.
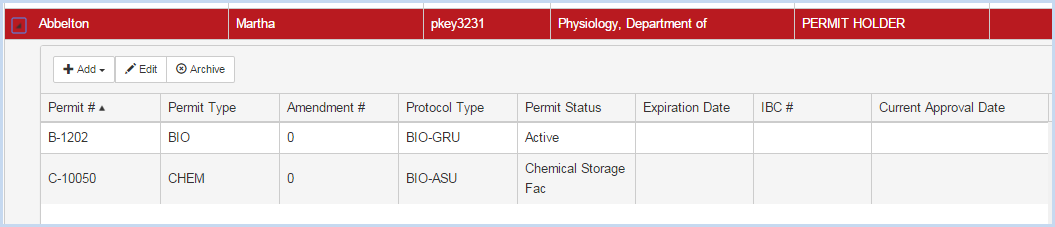
- Clicking [Add] will open the permit selection list. Select the permit type and add the permit information.
Creating a new PI
- Click the [Convert Worker to PI] button.
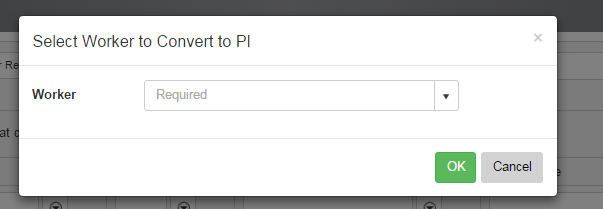
- A pop-up box will open. The user can select a Worker from those in the Worker List. Use the dropdown to find the worker to convert, then click [OK] to continue.
- Use the [Search Option] for Permit Types or drag column headers to the area above the header row to filter and sort the listing.
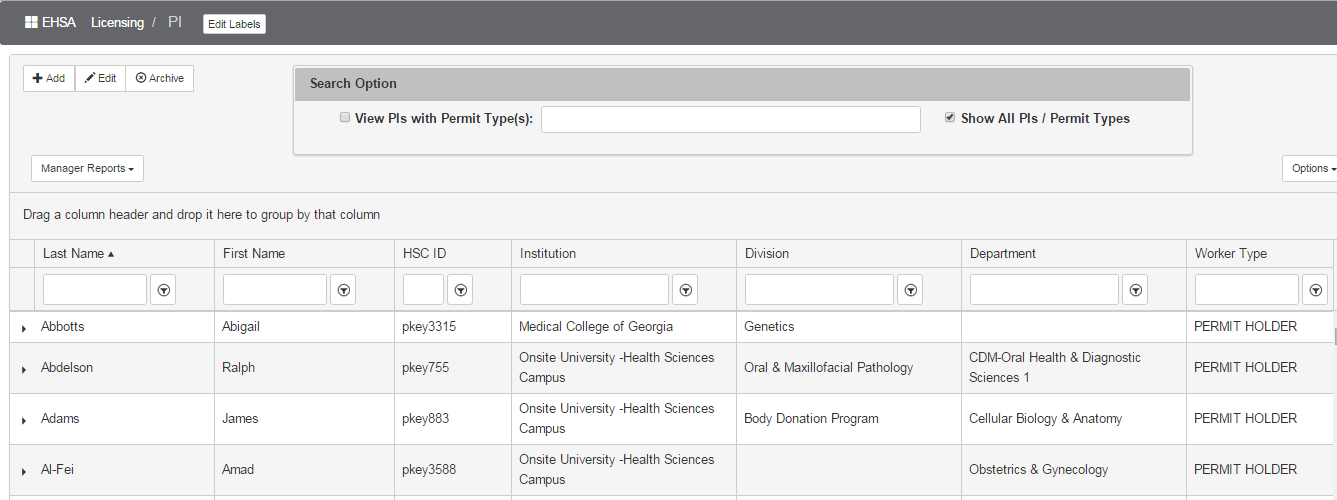
- Search Option – Permit: “Show All PIs/Permit Types is the default setting.
- Click on/Check “View PIs with Permit Type(s): to open the dropdown option for Permit Type(s).
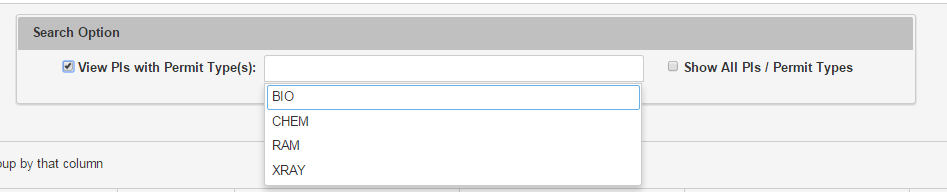
- Add one or more Permit Types to filter by, for example, CHEM and BIO and the listing will just show the type(s) selected

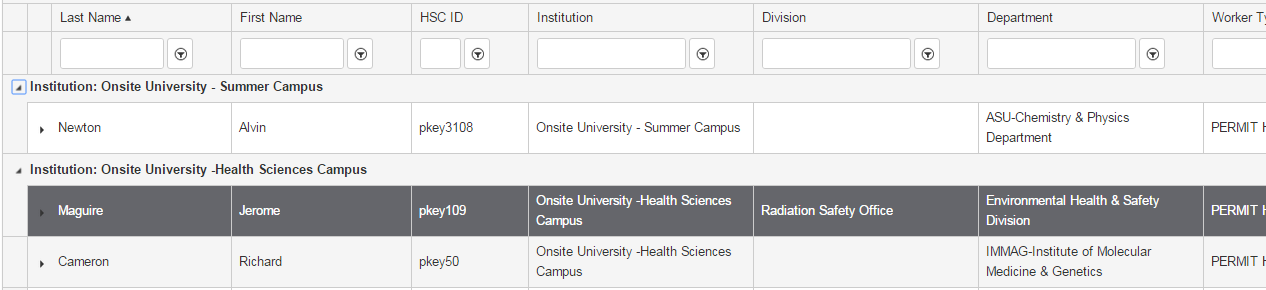
- Filter example: Drag the Column Header “Institution” to the area above the header row and the results:

- Click on the arrow beside the Institution name to open or close the list.
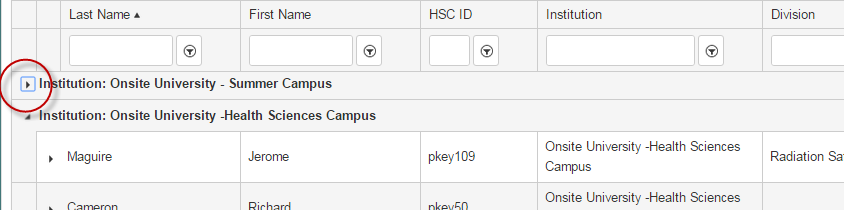
- List view for “Onsite University – Summer Campus” is open below.
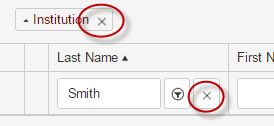
- Use a filter to search further. For example, search for contains “Smith” last name.
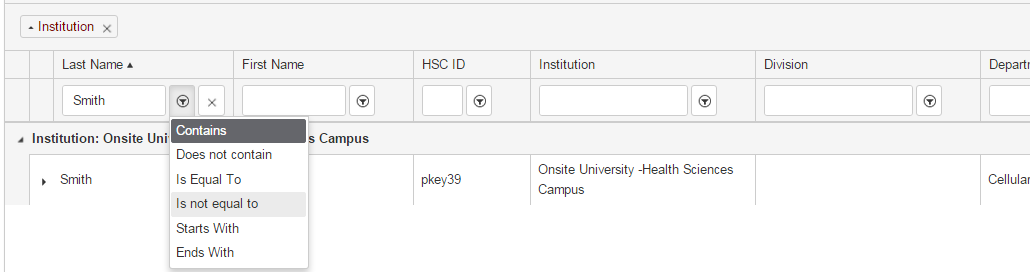
- Filter options are show in the dropdown above.
- Click the “X” to remove filter(s) and return to the previous view.
- Click on a column header to reveal an arrow. Click to switch the arrow up or down to sort A-Z or Z-A.

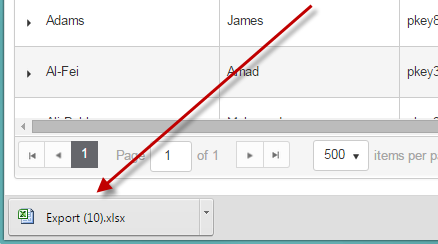
- Open the Options dropdown menu to “Export to PDF” (current screen view) or “Export to Excel”
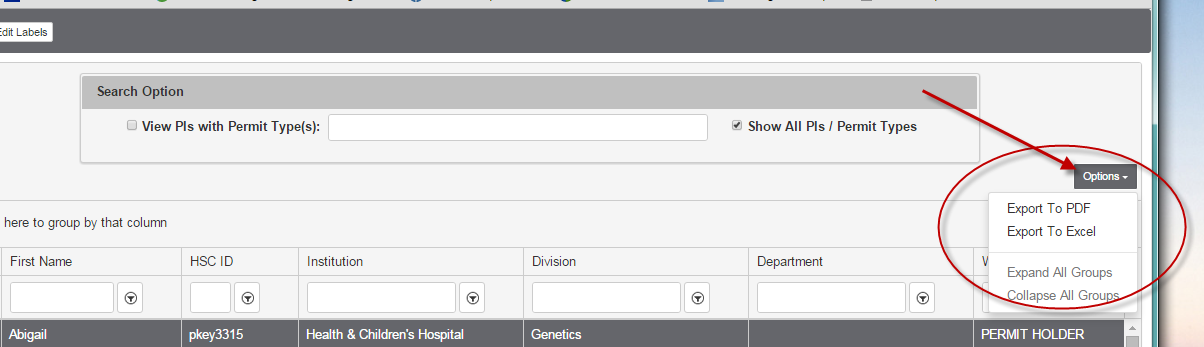
- The file will load and be available to open. Users can save the file to their computers as needed.